
GICT knowledge base
How to Resize Images with imgproxy
Published
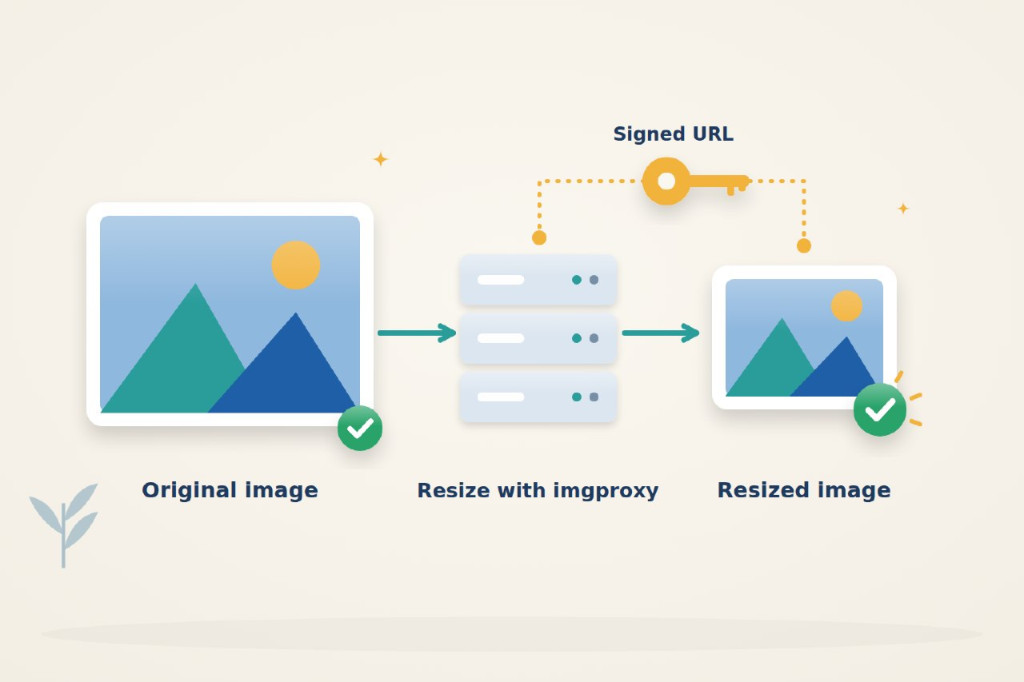
imgproxy creates thumbnails when an image URL is requested, leaving the original file unchanged. A signed URL fixes the source and resize options, so visitors cannot change the dimensions or request a different image without a new signature.
Use a fresh Ubuntu 24.04 server with sudo access. An InterServer VPS is suitable for a small image service; leave room for the source library and concurrent processing. Have a domain such as images.example.com pointing to the server and a trusted TLS certificate with its renewal already arranged. Run the following commands on the server.
Private-port prerequisite: use Docker Engine 28 or newer for the loopback-published ports in this guide. Older releases have a documented localhost-port exposure limitation. Confirm from another machine that the public IP cannot reach those private service ports; a proxy login does not protect a direct bypass route.
1. Prepare the image directory
Install Docker, Compose, Nginx and the tools used below:
$ sudo apt-get update
$ sudo apt-get install -y docker.io docker-compose-v2 nginx openssl python3-pil curl
$ sudo systemctl enable --now docker nginx
$ sudo install -d -m 0750 -o "$USER" -g "$USER" /opt/imgproxy
$ install -d -m 0755 /opt/imgproxy/images
$ cd /opt/imgproxy
Copy a JPEG you own to ~/photo.jpg on the server, then place it in the dedicated source directory:
$ install -m 0644 ~/photo.jpg /opt/imgproxy/images/photo.jpgOnly put images intended for delivery in this directory. Do not mount your website root, home directory or confidential files. The container will receive read-only access to this folder.
2. Enable URL signatures
Set a restrictive file-creation mask and generate two independent random values:
$ umask 077
$ openssl rand -hex 32
$ openssl rand -hex 32
Create /opt/imgproxy/.env, replacing each placeholder with one generated value. Keep the values unquoted and on separate lines:
IMGPROXY_KEY=REPLACE_WITH_FIRST_HEX_VALUE
IMGPROXY_SALT=REPLACE_WITH_SECOND_HEX_VALUE
Keep this file private:
$ chmod 600 /opt/imgproxy/.envAnyone with these values can generate valid image URLs. Do not put them in browser JavaScript, a public repository or a support ticket.
Create /opt/imgproxy/compose.yaml:
services:
  imgproxy:
    image: ghcr.io/imgproxy/imgproxy:v4.0.17
    restart: unless-stopped
    ports:
      - "127.0.0.1:8080:8080"
    env_file:
      - .env
    environment:
      IMGPROXY_LOCAL_FILESYSTEM_ROOT: /images
      IMGPROXY_ALLOWED_SOURCES: "local://"
      IMGPROXY_MAX_SRC_RESOLUTION: "20"
      IMGPROXY_MAX_SRC_FILE_SIZE: "10485760"
    volumes:
      - ./images:/images:ro
The source prefix permits only local images, not arbitrary remote downloads. The source limits cap input files at 10 MiB and 20 megapixels. The host port listens only on loopback; Nginx will provide public HTTPS access. This example pins a known release rather than changing versions silently.
Start the service:
$ sudo docker compose -f /opt/imgproxy/compose.yaml up -d
$ sudo docker compose -f /opt/imgproxy/compose.yaml ps
The container should be running. Avoid sharing expanded Compose output or container inspection dumps: those can expose signing values.
Separate source access from URL access
Restricting imgproxy to the intended source directory limits what it can read. A valid signature authorizes a particular transformation, but anyone holding a working public URL can retrieve that result. Keep signing secrets server-side and add viewer authentication separately when images are private.
3. Add the HTTPS endpoint
Replace the example hostname below with your domain. Point the certificate directives at your existing full-chain certificate and private key; the paths shown are placeholders for those files. Nginx needs permission to read them.
Create /etc/nginx/sites-available/imgproxy:
server {
    listen 80;
    server_name images.example.com;
    return 301 https://images.example.com$request_uri;
}

server {
    listen 443 ssl;
    server_name images.example.com;
    ssl_certificate /etc/ssl/imgproxy/fullchain.pem;
    ssl_certificate_key /etc/ssl/imgproxy/privkey.pem;

    location / {
        proxy_pass http://127.0.0.1:8080;
        proxy_set_header Host $host;
        proxy_set_header X-Forwarded-Proto $scheme;
    }
}
Enable the site without replacing other server blocks:
$ sudo ln -s /etc/nginx/sites-available/imgproxy /etc/nginx/sites-enabled/imgproxy
$ sudo nginx -t
$ sudo systemctl reload nginx
Allow inbound HTTP and HTTPS in your existing host and provider firewall policy while preserving SSH access. Do not open port 8080. An unsigned request to this domain can return an error; that is not a useful resize test.
4. Generate a thumbnail URL
Create /opt/imgproxy/sign-url.py:
import base64
import hashlib
import hmac
from pathlib import Path

root = Path(__file__).resolve().parent
settings = dict(
    line.split("=", 1)
    for line in (root / ".env").read_text().splitlines()
    if line and not line.startswith("#")
)
source = "local:///photo.jpg"
options = "rs:fit:400:300:0"
encoded = base64.urlsafe_b64encode(source.encode()).decode().rstrip("=")
path = f"/{options}/{encoded}.jpg"
key = bytes.fromhex(settings["IMGPROXY_KEY"])
salt = bytes.fromhex(settings["IMGPROXY_SALT"])
digest = hmac.new(key, salt + path.encode(), hashlib.sha256).digest()
signature = base64.urlsafe_b64encode(digest).decode().rstrip("=")
print(f"https://images.example.com/{signature}{path}")
Change the printed hostname to match Nginx. The source path is relative to the mounted image directory, not the host filesystem. rs:fit:400:300:0 fits the image inside a 400-by-300-pixel box, preserves its aspect ratio and disables enlargement. A 1200-by-900 source therefore becomes 400-by-300; other proportions produce different dimensions within that box.
Generate the URL and download the result:
$ python3 /opt/imgproxy/sign-url.py
$ IMAGE_URL=$(python3 /opt/imgproxy/sign-url.py)
$ curl --fail --show-error "$IMAGE_URL" -o /tmp/thumbnail.jpg
$ python3 -c 'from PIL import Image; im = Image.open("/tmp/thumbnail.jpg"); print(im.format, im.size)'
Open the generated URL in a browser to inspect the image. You can also use it as an image source in your application. Signing belongs on the trusted server, not in the visitor’s browser. A valid URL is shareable: signatures prevent changes, but do not authenticate viewers or automatically expire links.
For another thumbnail size, change options in the script and generate a fresh URL. Use rs:fill:200:200:0 for a square crop rather than a proportional fit. Change source to select another file inside the image directory.
Choose fit or fill deliberately
Use fit when the whole image matters, such as a product photograph that must not lose its edges. The requested dimensions describe a bounding box, so a nonmatching aspect ratio will not produce both dimensions exactly. Use fill when the layout needs a fixed shape and cropping is acceptable, such as the square thumbnail in this example. Inspect the result for important details near the edges.
The final zero in the example options disables enlargement. That keeps a small source from being stretched simply to reach the requested box. Judge the result using the source dimensions as well as the requested dimensions; a smaller-than-requested output can be intentional rather than a processing failure.
Generate a new signature after changing either the source or options. Editing a URL in a template after it has been signed changes the protected path, so rejection is the expected result even when the edit looks harmless.
5. Check rejected requests
Edit 400 to 401 in a generated URL without signing it again. The request should be rejected instead of returning an image. A missing source file should also fail, while the original valid URL should continue working.
If requests fail unexpectedly, inspect the service logs:
$ sudo docker compose -f /opt/imgproxy/compose.yaml logs --tail=30 imgproxyAn invalid signature usually means the path changed after signing or the signer and container use different key/salt values. After changing .env, recreate the container, then regenerate URLs:
$ sudo docker compose -f /opt/imgproxy/compose.yaml up -d --force-recreateOld signatures will stop working if their key is removed. For source errors, check the filename, read permissions and configured input limits; keep signature checks enabled while troubleshooting.
Reference: imgproxy URL signatures. Check the documentation for your installed version before applying changes.
Related guides
How to Protect a Web App with Authelia
Protect an app with Authelia and Nginx. Keep the backend private, configure password authentication and test permitted and denied user access.
webhostingWhat Is Colocation Hosting? When It Makes Sense Over Cloud
Your server. Their datacenter. When colocation costs less than cloud and when cloud is the smarter call.
webhostingUnderstanding Network and Node-Level Security at InterServer
When you are managing a website or a server, it is frustrating to run into a connection issue.
webhostingHow long does an expired VPS or webhosting account stay available for re-activation
If you have ever wondered what happens if you miss a payment or how long your data stays safe after your due date, this guide covers the lifecycle of an InterServer VPS...