
GICT knowledge base
How to Collect Nginx Logs with Vector
Published
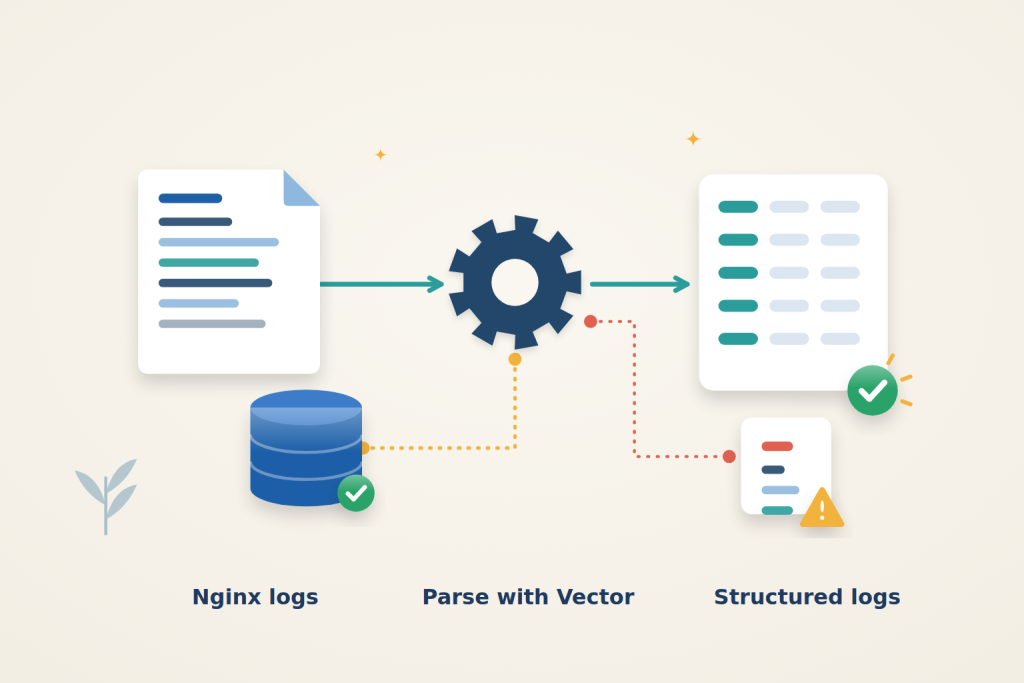
Vector turns Nginx access-log lines into JSON records you can search or pass to another logging system. This setup keeps the original message, adds parsed fields and flags lines that do not match the expected format.
Use Ubuntu 24.04 with sudo access and Nginx writing access logs on the host. An InterServer VPS is suitable for this collector alongside a small website; reserve disk space for both the original and processed logs. Vector will run in Docker without opening a network port.
1. Confirm the Nginx log format
Install the required packages if they are not already present:
$ sudo apt-get update
$ sudo apt-get install -y nginx docker.io docker-compose-v2 curl jq
$ sudo systemctl enable --now nginx docker
The parser below expects Nginx’s combined format. In the existing server block for your site, ensure the access-log directive is:
access_log /var/log/nginx/access.log combined;For Ubuntu’s default site, the file is /etc/nginx/sites-available/default. Replace its existing access-log directive if necessary; do not replace the rest of the site configuration or add duplicate logging to the same file. Keep error logs separate.
$ sudo nginx -t
$ sudo systemctl reload nginx
$ curl -sS -o /dev/null http://127.0.0.1/
$ sudo tail -n 1 /var/log/nginx/access.log
Confirm a new request appears. If your site uses another log path, use that directory and filename consistently in the mounts and Vector source below. For a named virtual host, send requests with that site’s hostname.
Follow one request through the pipeline
Nginx writes an access-log line, Vector reads it, the parser produces structured fields and the sink writes the event. Verify a fresh identifiable request at every stage. A running container does not prove successful parsing or output, and checkpointing is not an exactly-once delivery guarantee.
2. Create the Vector pipeline
Prepare a private configuration directory and output folder:
$ sudo install -d -m 0750 -o "$USER" -g "$USER" /opt/vector
$ sudo install -d -m 0700 /opt/vector/output
$ cd /opt/vector
Create /opt/vector/vector.yaml:
data_dir: /var/lib/vector

api:
  enabled: false

sources:
  nginx_access:
    type: file
    include:
      - /var/log/nginx/access.log
      - /var/log/nginx/access.log.1
    read_from: beginning

transforms:
  parse_access:
    type: remap
    inputs:
      - nginx_access
    source: |
      parsed, err = parse_nginx_log(.message, "combined")
      if err == null {
        . = merge(., parsed)
        .parse_error = false
      } else {
        .parse_error = true
        .parse_error_message = err
      }

sinks:
  json_file:
    type: file
    inputs:
      - parse_access
    path: /var/log/vector/nginx-%Y-%m-%d.jsonl
    encoding:
      codec: json
The file source watches the active log and its first rotated copy. read_from: beginning reads existing content for files without a saved checkpoint. Once a checkpoint exists, Vector resumes from that position instead of treating every restart as a new import.
Successful parsing adds fields such as status, request and timestamp, while keeping message. A failed parse retains the original line with parse_error: true and an error description. This helps you notice a format mismatch without silently losing that record.
The sink writes one JSON object per line. Date-based filenames use event timestamps, so imported older requests may appear in files bearing older dates. Daily files do not impose retention: monitor disk space and set a retention policy for completed files according to your requirements. Logs may contain visitor addresses and sensitive query strings; do not serve the output directory through Nginx.
3. Start the collector
Check the log-reading group:
$ getent group admOn Ubuntu its numeric group ID is normally 4. If yours differs, use that number under group_add. Create /opt/vector/compose.yaml:
services:
  vector:
    image: timberio/vector:0.58.0-debian
    user: "0:0"
    group_add:
      - "4"
    restart: unless-stopped
    read_only: true
    cap_drop:
      - ALL
    security_opt:
      - no-new-privileges:true
    command: ["--config", "/etc/vector/vector.yaml"]
    volumes:
      - ./vector.yaml:/etc/vector/vector.yaml:ro
      - /var/log/nginx:/var/log/nginx:ro
      - vector_data:/var/lib/vector
      - ./output:/var/log/vector

volumes:
  vector_data:
The supplemental adm group permits reading Nginx logs. The container uses root for its private output and checkpoint files, but the source directory is mounted read-only and Linux capabilities are dropped. The writable locations are the checkpoint volume and private output directory. There is no Docker socket mount, published port or enabled Vector API.
Download the pinned image and validate the configuration before starting:
$ sudo docker compose -f /opt/vector/compose.yaml pull
$ sudo docker compose -f /opt/vector/compose.yaml run --rm vector validate /etc/vector/vector.yaml
$ sudo docker compose -f /opt/vector/compose.yaml up -d
$ sudo docker compose -f /opt/vector/compose.yaml logs --tail=30 vector
Validation should succeed, and startup logs should show the file source and sink without permission or parser-compilation errors. Inspect configuration errors before proceeding; a running container alone does not prove that records are being collected.
4. Verify structured output
Generate a normal request and a request for a nonexistent path:
$ curl -sS -o /dev/null -w '%{http_code}\n' 'http://127.0.0.1/?vector-check=ok'
$ curl -sS -o /dev/null -w '%{http_code}\n' 'http://127.0.0.1/__vector_missing?vector-check=missing'
On a default site these return 200 and 404. Allow a few seconds for collection, then locate the JSON files:
$ sudo ls -lh /opt/vector/output
$ sudo sh -c 'cat /opt/vector/output/nginx-*.jsonl' | jq 'select(.message | contains("vector-check=")) | {status, request, parse_error}'
Look for both requests with numeric status codes and parse_error: false. For large collections, query only the relevant dated file instead of reading every file.
Recreate the container and send another request:
$ sudo docker compose -f /opt/vector/compose.yaml up -d --force-recreate
$ curl -sS -o /dev/null 'http://127.0.0.1/?vector-check=after-recreate'
The new event should appear without replaying already checkpointed records. Keep the vector_data volume: removing it, including through docker compose down -v, removes saved positions and can cause old files to be imported again. This is not an exactly-once delivery guarantee during crashes.
Check the right output date and restart state
The input’s event time matters when locating a JSON file. Importing an old access log can create an older dated output file even though the collector is running today. If the current-date file is empty, inspect the output directory before assuming collection has stopped.
The output and checkpoints serve different purposes. Output files hold the collected events; checkpoints tell the source how far it has read. Keeping one does not replace the other. Removing checkpoints while retaining old source files can make the collector read those files again, while retaining checkpoints does not recover output files someone deleted.
For the recreation check, find the newly sent request as well as confirming that the container starts. An old JSON file can remain on disk even when the collector is no longer reading anything. The distinct query marker in the new request makes fresh collection distinguishable from previously stored output.
5. Handle rotation and collection errors
Mount the whole Nginx log directory, not one file. Nginx’s normal rename-and-reopen rotation changes the active file’s inode; the directory mount lets Vector discover the replacement. Keep the uncompressed .1 file available long enough for collection. Older compressed archives are outside this source configuration, so a long outage spanning multiple rotations can leave gaps.
If output stops, inspect Vector’s logs and confirm that new lines are reaching the source. Check directory mounts and permissions rather than making logs world-writable. If records show parse_error: true, compare the actual Nginx format with the configured combined parser. After correcting the YAML, rerun validation and recreate the container while preserving the checkpoint volume.
Reference: Vector file source behavior. Check the documentation for your installed version before applying changes.
Related guides
Plan a Safe Redis-to-Valkey Migration
Plan a Redis-to-Valkey migration: check version compatibility, rehearse recovery, stop writers for cutover and protect against lost writes during rollback.
Web HostingHow to Self-Host Online Booking with EasyAppointments
Self-host EasyAppointments, protect initial setup and configure booking. Verify scheduling, customer notifications, rescheduling and cancellation.
Web HostingHow to Benchmark a VPS with fio and sysbench
Benchmark a VPS with fio and sysbench. Choose repeatable workloads and interpret storage latency, CPU scaling, memory caches and steal time carefully.
Web HostingHow to Set Up Meilisearch with Docker
Run Meilisearch with Docker, index sample documents and create restricted search keys. Verify asynchronous tasks, persistence and access boundaries.