
GICT knowledge base
Customize Exim System Filter File
Published
There is also a mechanism for checking messages once they have been received, but before they are delivered. This is called the system filter. The Exim system filter file scans messages that your server has received, but that it has not yet delivered. cPanel allows you to easily create custom Exim filters by simply dropping the rules in /usr/local/cpanel/etc/exim/sysfilter/options/ .
Creating Custom Filter Rule File
1) Create a file in the /usr/local/cpanel/etc/exim/sysfilter/options/ directory.
2) Enter your custom filter rules within this file.
For example, to block mail from [email protected], add the following rule:
if (“$h_from:” contains “[email protected]”)
then fail
endif
3) Go to WHM >> Home >> Service Configuration >> Exim Configuration Manager). In the “Basic Editor” section, select the “Filters” tab.
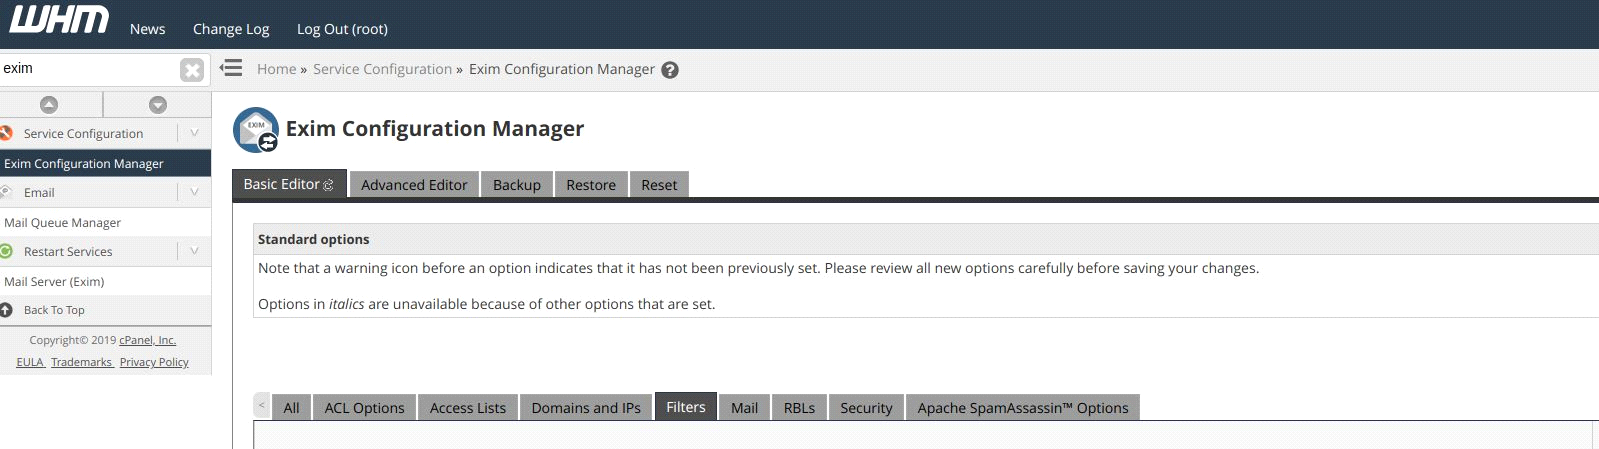
4) Here you can disable any undesired filter rules.
5) Click the “Save” button.
The Exim configuration enables all of the custom filter rules within the /usr/local/cpanel/etc/exim/sysfilter/options/ directory.
Create Custom Exim System Filter File.
Perform the following steps to create a custom system filter file.
1)Log in to the server as the root user.
2) Run the following command to take a backup of the /etc/cpanel_exim_system_filter file:
cp -p /etc/cpanel_exim_system_filter /etc/cpanel_system_filter_new1
We strongly recommend that you copy this file before you edit it, if anything wrong happens we can easily restore the Exim configuration with those backups.
3) Make sure that the new file has the following ownership and file permissions:
-rw-r–r– 1 root root
4) Use a text editor to edit the /etc/cpanel_system_filter_new1 file.
5) Go to WHM >> Home >> Service Configuration >> Exim Configuration Manager
6) In the “Basic Editor” section of the interface, select the “textbox” option for the System Filter File setting.
Note: Regardless of which option you select, the Exim configuration will include all of the files within the /usr/local/cpanel/etc/exim/sysfilter/options/ directory.
7) Enter the new file’s absolute path in the text box (for example, /etc/cpanel_system_filter_new1).
8) Click “Save” button.
If you need any further help, please do reach our support department.
Related guides
How to Test Application Emails with Mailpit
Capture staging emails with Mailpit over a private connection. Inspect message formats and attachments without confusing capture with real delivery.
EmailHow to Test SMTP Login and TLS with swaks
Diagnose SMTP connectivity, TLS and authentication with swaks. Protect credentials and distinguish server acceptance from recipient delivery.
EmailResolving: This message was classified as rSPAM and may not be delivered
Resolve InterServer rSPAM rejections using the SMTP code and MailBaby rule details. Check authentication, security and false positives through support.
EmailHow to Check SPF, DKIM and DMARC Using Message Evidence
Diagnose email authentication using real message identities and selectors, DNS answers and alignment instead of guessed records or delivery assumptions.