
GICT knowledge base
The Ultimate WordPress Administration Guide 2024
Published
The WordPress admin dashboard is the central hub of the Content Management System (CMS). Here, you can manage everything about your site, from adjusting important settings to publishing content and adding plugins and themes. If you’re not familiar with the admin area, it can be tough to run a website.
Using the dashboard is easier than you might think. All the features in the WordPress admin are user-friendly. Once you get the hang of these tools and settings, you’ll be able to make the most of WordPress.
In this article, we’ll guide you through the WordPress dashboard and its different parts. You’ll learn how to access the admin area, set up your website, publish content, and more.
What is the WordPress Admin Dashboard?
The WordPress admin is the control panel for the CMS. Every WordPress setup has a dedicated admin area that allows the user to manage their WordPress site. You can think of the dashboard as the “back end” of your site, where you manage everything related to it.
Here’s a quick overview of what a typical WordPress admin dashboard looks like:
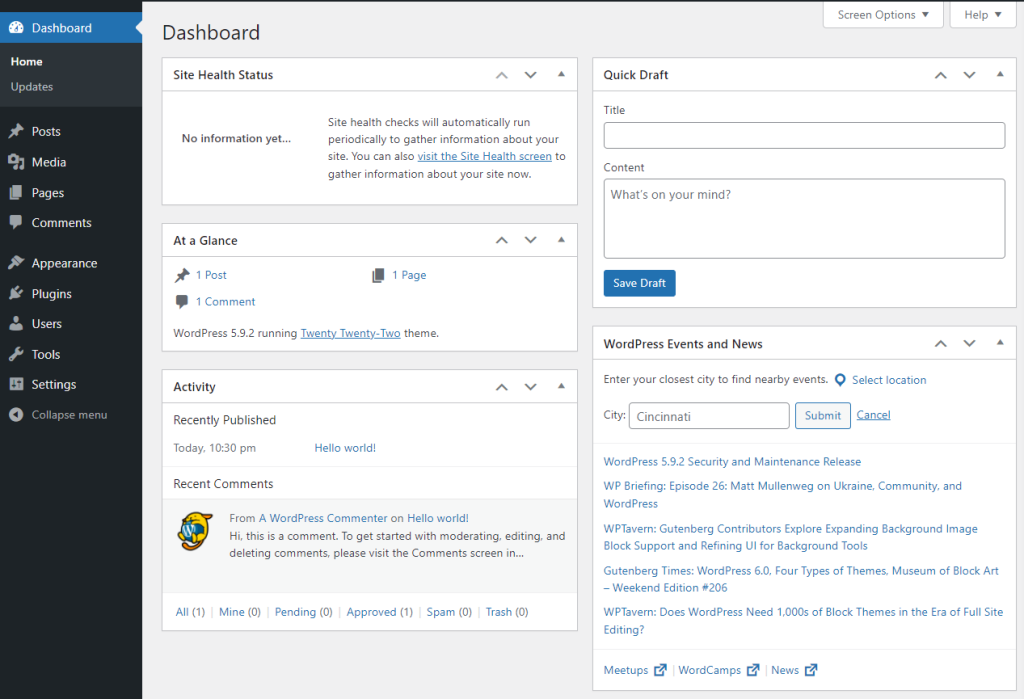
At a glance, you’ll see two menus. The left menu includes most of the tools you’ll use regularly for configuring and publishing. At the top, there’s a navigation menu that lets you switch between the front end of your site and the dashboard. It also allows you to perform many more quick actions based on the plugins you are using on your WordPress site.
We’ll go over each option later in the article. For now, let’s look at how to log into the WordPress admin area.
How do you access your WordPress admin dashboard?
When you install WordPress, it automatically creates an admin area for your website. You can access the dashboard by going to yoursite.com/wp-admin.
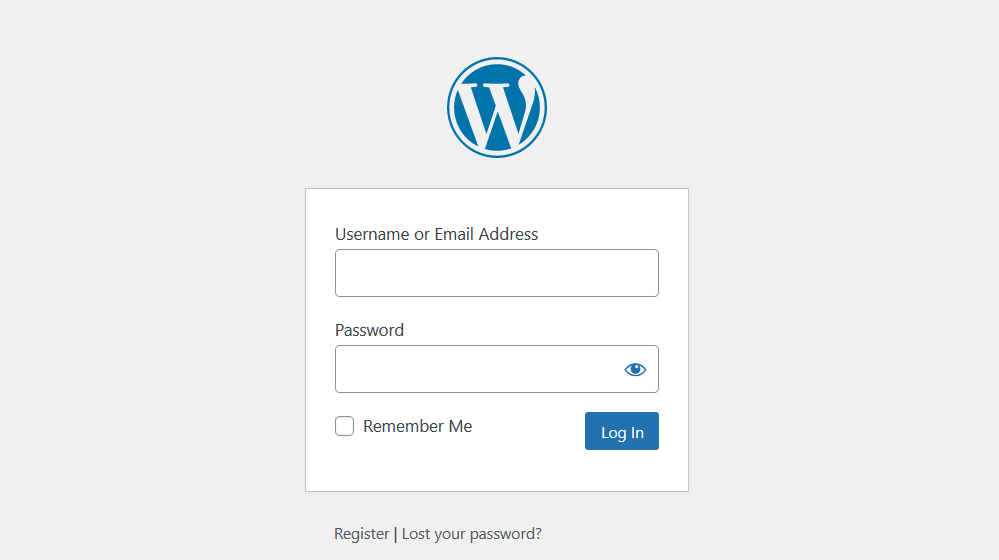
If you set up WordPress yourself, you’ll create an admin user during that process, complete with a username and password. These are the same details you’ll use to log in and access the WordPress admin panel.
If your web hosting provider set up WordPress for you, you might get to choose your admin username and password during the signup process.
Remember, you might not be the only one who can access the dashboard. As the admin, you can allow user registrations and give others access to some of the same tools and settings on your site.
If you forget your password, you can reset it using the login screen, as long as you have access to the email linked to your account.
Understanding the WordPress Admin Interface and Menu
By default, the WordPress admin has a lot of links and tools. While you might not use all of them every day, it’s important to know where to find what you need.
Once you log into WordPress, you’ll land on the Dashboard section.
The dashboard will display you the general summary of your website. It will also include custom widgets based on the plugins and themes you use. You’ll also see updates about site health, comment activity, and WordPress news. There’s even a Quick Draft option that lets you create and save content right there.
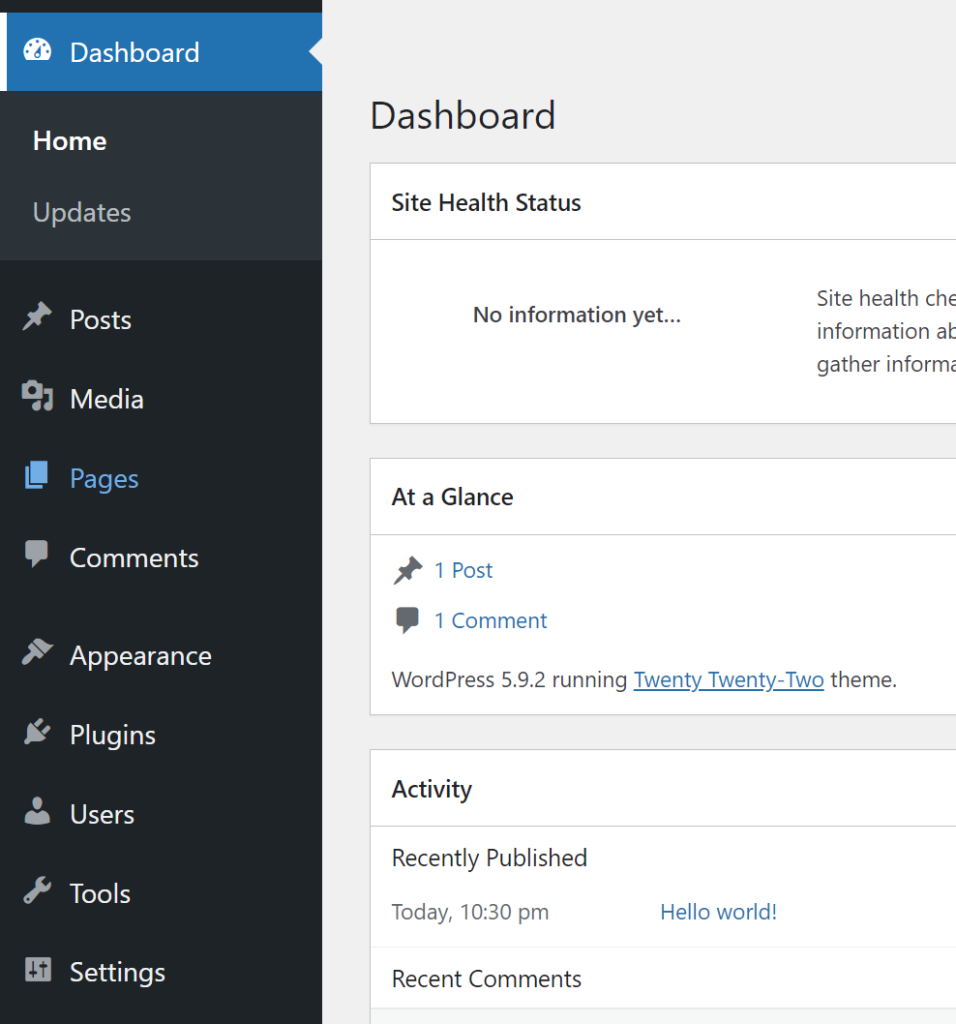
For most users, the Dashboard is just a quick stop. You’ll likely spend more time using the menu on the left side of the screen. This menu has options for publishing content, reviewing posts and pages, checking comments, managing plugins, and themes, and more.
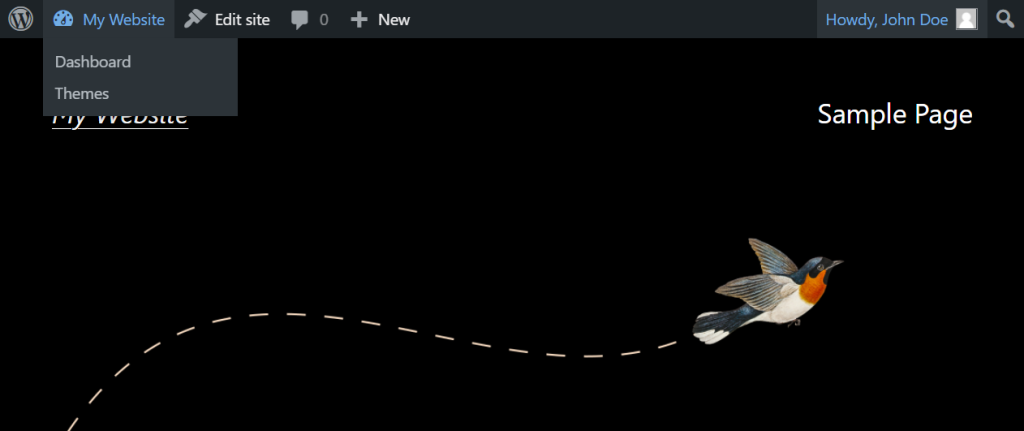
At the top of the screen, there’s a main navigation menu. This menu helps you quickly access the comments section or the WordPress editor.
Its main function is to let you switch between your site’s front end and the WordPress admin. If you hover over your site’s name, you’ll see the Visit Site option.
Clicking on Visit Site will take you to the user-facing homepage of your website. When you’re logged in, the main menu stays at the top so you can move back and forth between administration dashboard and user-facing website.
Hovering over your site’s name will show options to go back to the dashboard or to the themes page. There’s also an Edit Site button that opens the WordPress customizer.
If you’re unsure about what some options do, don’t worry! We’ll explain each part of the WordPress admin in the next section.
How to use your WordPress admin panel (15 steps)
At first glance, the WordPress dashboard might feel a bit daunting due to its many features. However, the left-side menu is your main area of focus.
In this section, we’ll break down the various options in the menu, making it easier for you to find what you need when managing your website.
Create and manage pages and posts
Creating and managing pages and posts is a key part of using WordPress. On the left-side menu in the admin area, you’ll find two options: Pages and Posts.
What is the difference between a Page and a Post? A page and a post in WordPress might feel similar when you create them. However, The main difference is, Pages are not included in the “Blog” section. If the homepage of your site is a blog, The “Page” you create won’t be displayed in the blog. However, You can display it in the menu or direct link. Posts on the other hands are included in the blog.
When you click on either option, you’ll see a list of all the pages or posts you’ve made. This list shows published content, drafts, and even a trash bin for deleted items.
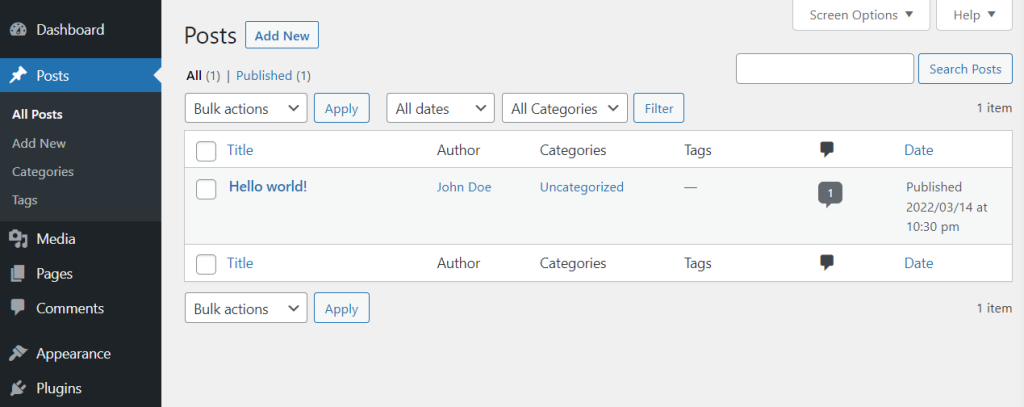
Each entry in the list includes details like the author, category, tags, comments, and publish date. By hovering over a post or page, you can quickly open the editor or make a quick edit. If you want to learn how to use the WordPress editor (also known as the Block Editor), it’s a good idea to check out the official Gutenberg page.
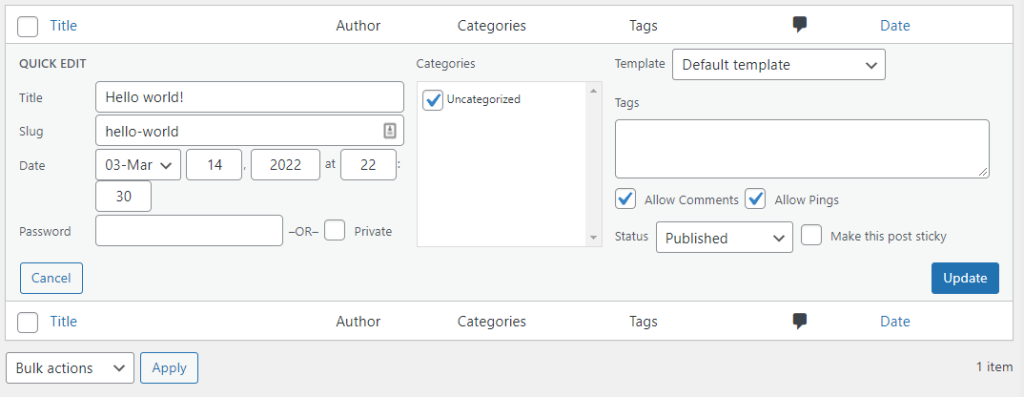
The Quick Edit option lets you change basic settings for a post without opening a new page.
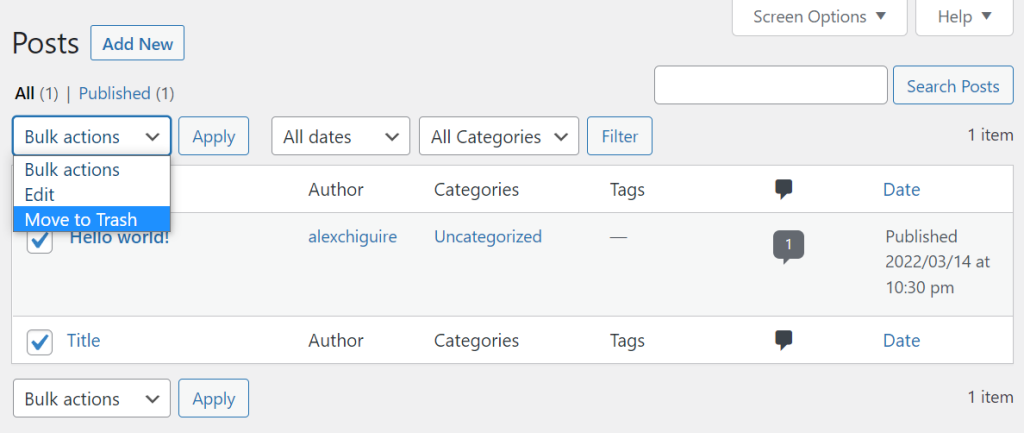
If you want to edit multiple posts at once, you can use the Bulk Actions menu at the top of the list. It lets you edit several posts or move them to the trash.
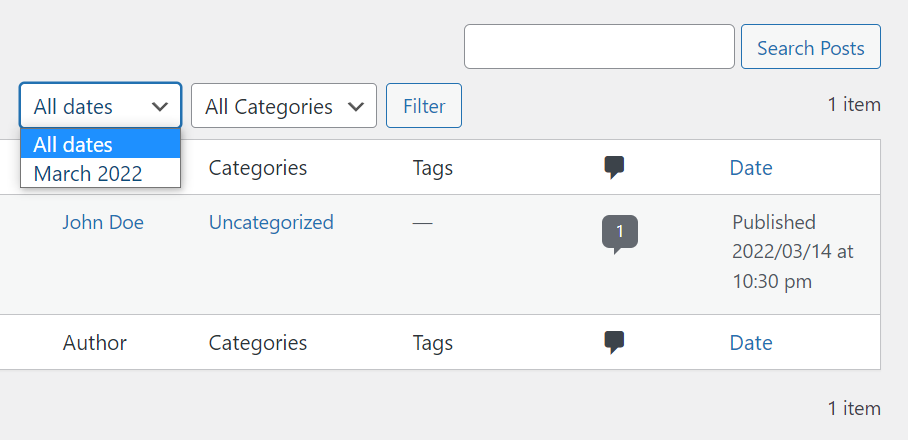
As your content library grows, you can use the search and filter tools to help you find what you need. You can filter posts by date and category or use the search bar for specific entries.
The steps for adding a new page or post are the same. Just go to Posts → Add New or Pages → Add New, and this will take you to the Block Editor. You can also find an Add New button on the main Posts or Pages screen.
Overall, managing posts and pages in WordPress is quite similar, with the main difference being the two types of content you’re working with.
Create and manage WordPress categories and tags
WordPress uses a system to organize posts called taxonomies, which include categories and tags. Categories are broader groups, while tags are more specific details.
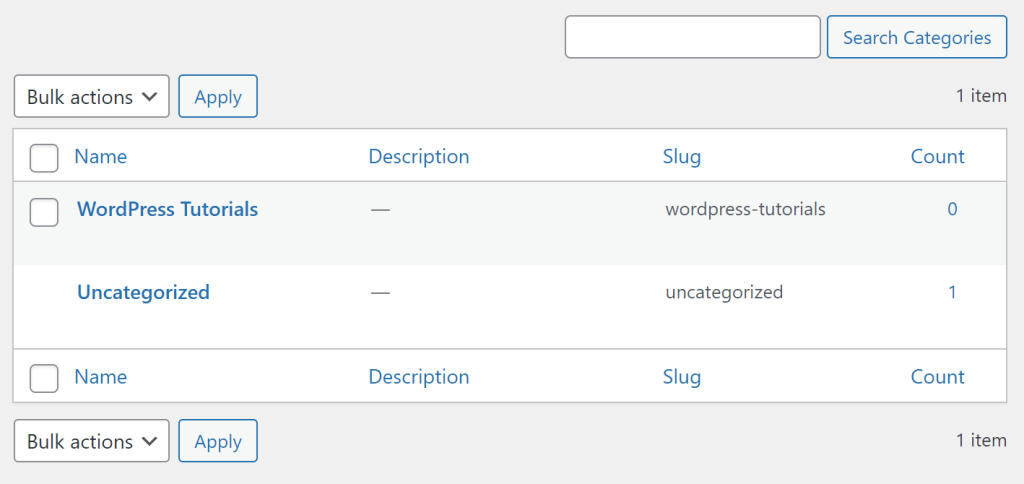
For example, this article could be in the “WordPress Tutorials” category, and you might tag it with terms like “WordPress Dashboard” and “WordPress Login.”
You can create as many categories and tags as you like and use them together on your posts. To get started, go to Posts → Categories. Here, you’ll see a list of current categories and an option to add new ones.
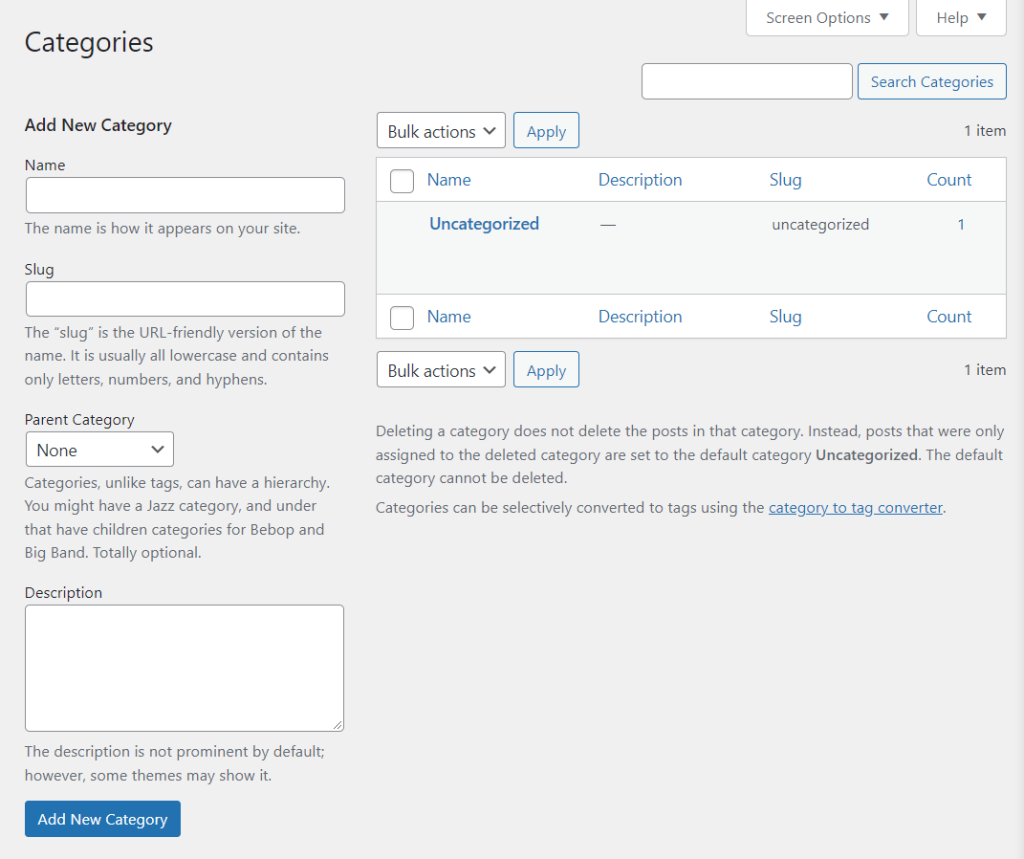
To create a new category, choose a name for it. You can also add a short description and choose a parent category if you want.
The slug is a URL-friendly version of the category name. So, if you name a category “WordPress Tutorials,” the slug would be something like /wordpress-tutorials.
Once you add a category, it will show up in the list on the right. To assign a category to a post, you’ll do that in the editor.
The Tags page works the same way. You can name each tag, create a slug, and write a description for it.
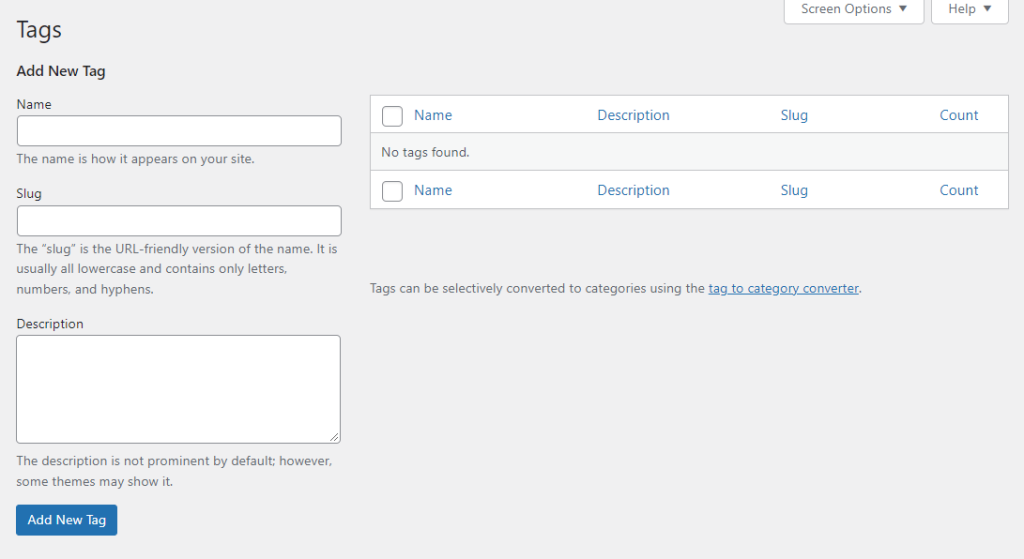
Like categories, you can assign tags to posts in the editor.
Using categories and tags helps visitors easily navigate your content and find related posts. As you add more content, it’s a good idea to keep updating your categories and tags.
Upload and manage media files
Media files are an important part of any website. WordPress supports many types of media formats, so it’s a good idea to check the official WordPress.org page for a full list of supported file types.
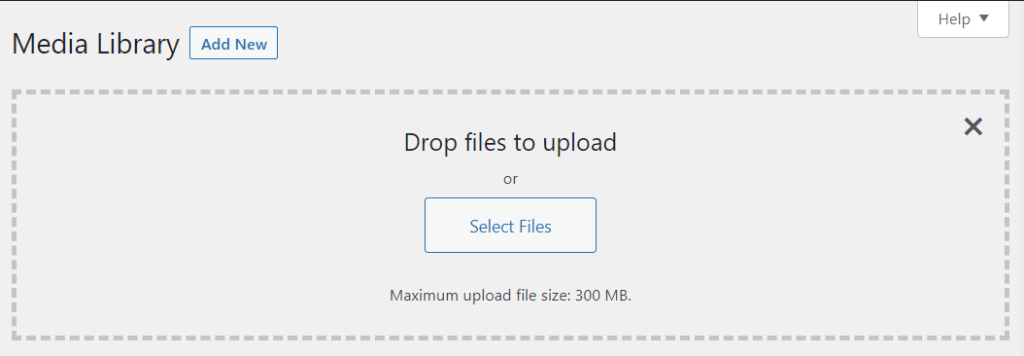
You can upload and display popular image, video, and audio formats using the WordPress media library, found under Media → Library. This library shows all the media files you’ve uploaded. To add new files, use the Add New button or go to Media → Add New.
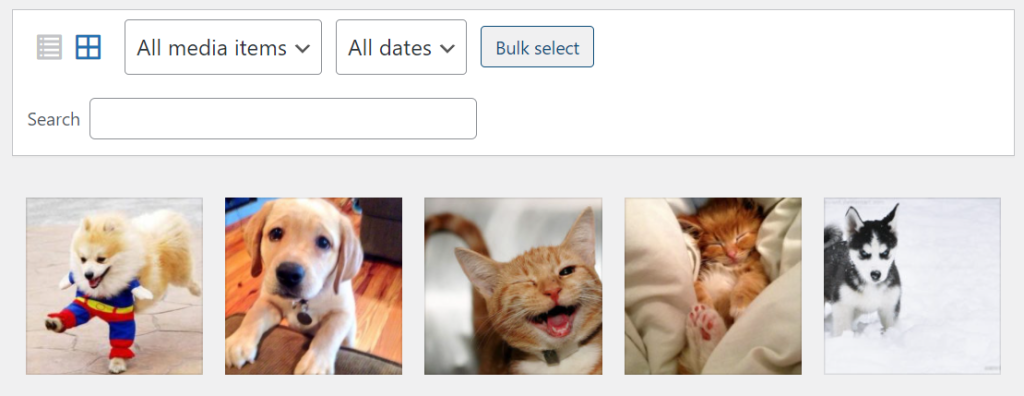
When you upload a file, WordPress will let you either drag it into the upload area or click on the Select Files button to find files on your computer. You can upload several files at once, but keep in mind there’s a limit to the maximum file size, which depends on your web host and site settings.
After uploading, you can click on any file in the media library to see its details, including the file name, metadata, alt text, captions, descriptions, and URL. You can edit this metadata from the details screen. For images, there’s also an Edit Image option that opens a simple image editor.
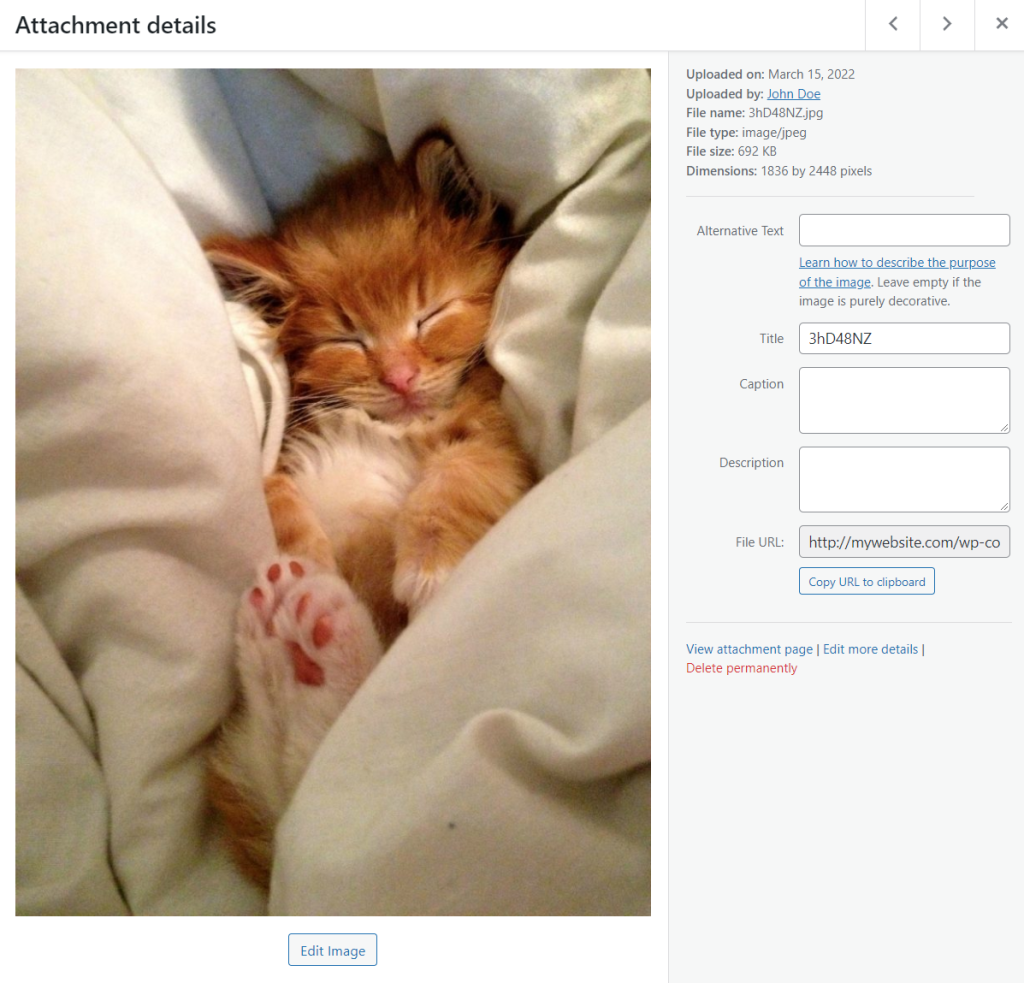
The built-in image editor allows you to crop, rotate, flip, and resize images. When you upload an image, WordPress automatically creates a thumbnail that you can resize as well. Don’t forget to click Save to keep your changes. For audio and video files, you can edit metadata and play the files, but WordPress doesn’t include editing tools for these formats.
As your media library grows, you might want to use the filtering tools to sort files by type and date. There’s also a search function and options to select multiple files for editing or deletion.
You can upload as many media files as you like, but be aware that your hosting plan may limit your storage space. To keep your site running smoothly, it’s a good idea to regularly clean up your media library by removing unused files.
Just a quick tip: If you try to upload a file type that WordPress doesn’t support, you’ll see an error message.
Manage WordPress comments
Since WordPress started as a blogging platform, it has a strong comments system. If you turn on the comments feature, users can leave replies to your posts and pages.
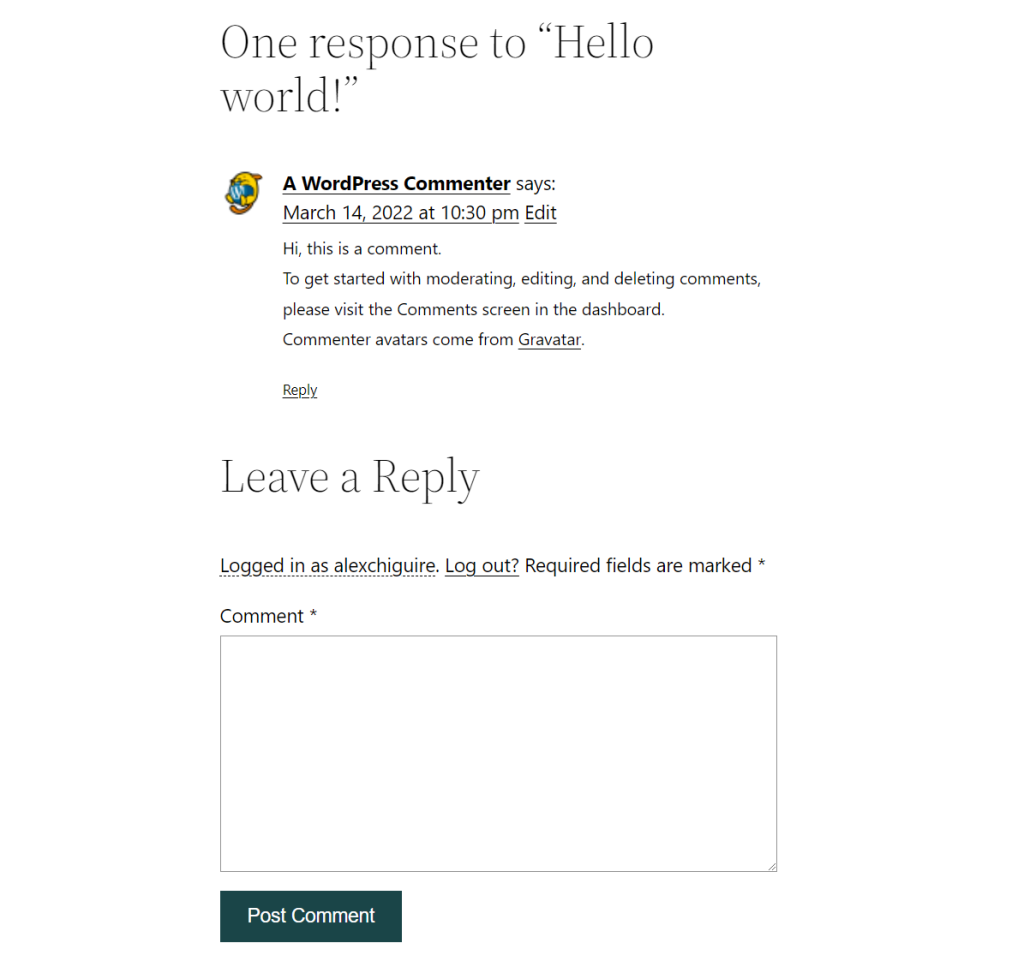
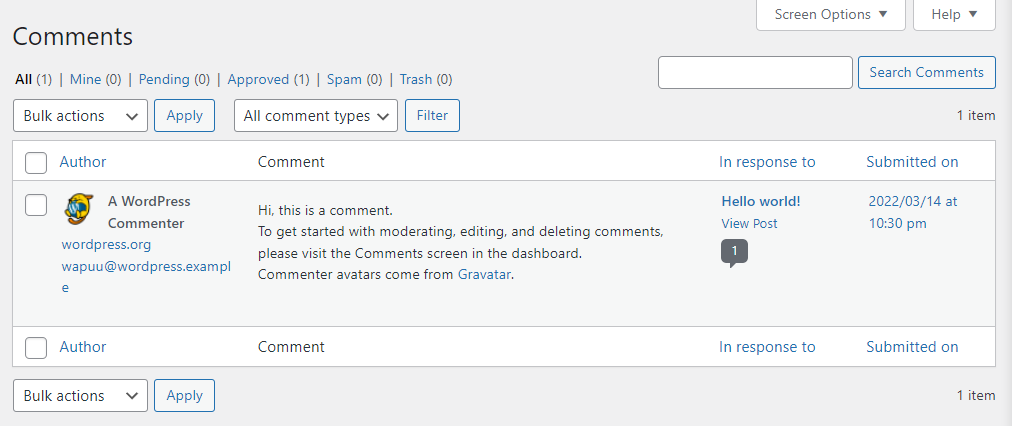
You have complete control over these comments. To manage them, go to the Comments page, where you can see all the comments made on your site along with their statuses.
Comments can be approved, pending, sent to the trash, or marked as spam. WordPress has some built-in spam detection, but you will need to sort through and approve comments yourself.
To adjust your comment settings, go to Settings → Discussion. Here, you’ll find various options for how comments work on your site.
The option to Allow people to submit comments on new posts lets you decide if visitors can leave comments. If you turn this off, comments will be disabled completely.
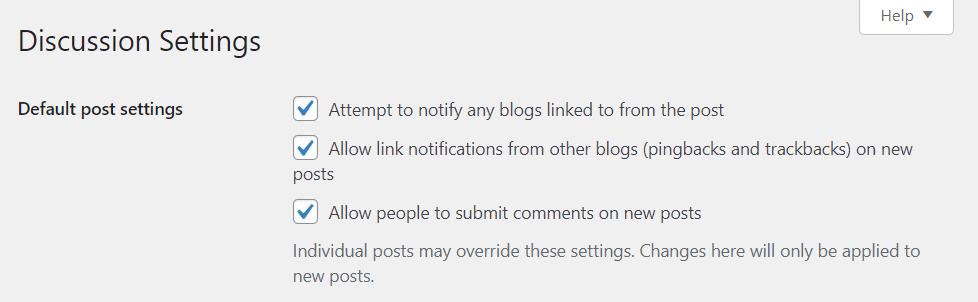
If you keep it on, scroll down to the Other comment settings section. Here, you can set what information users need to provide to comment and whether they must register.
This section also has options for automatically closing comments after a certain time, managing cookies, enabling nested comments, and adding pagination to the comments.
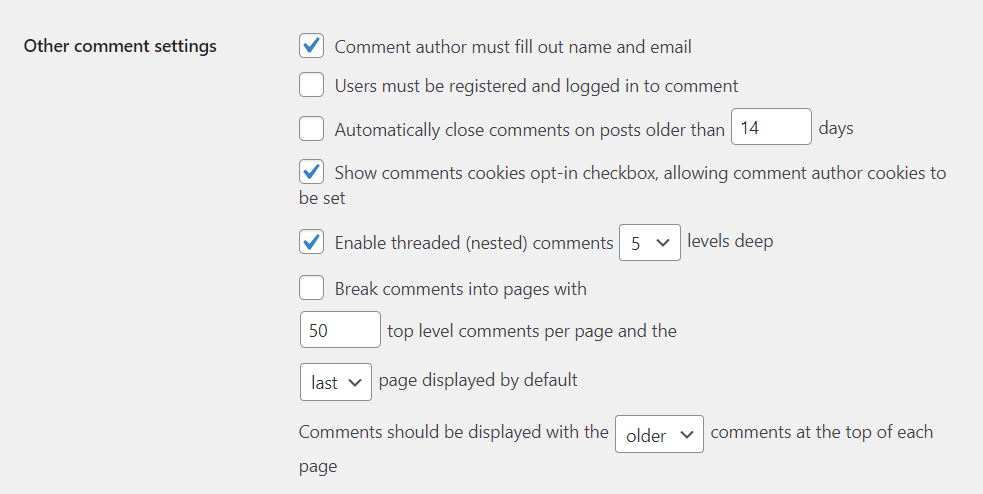
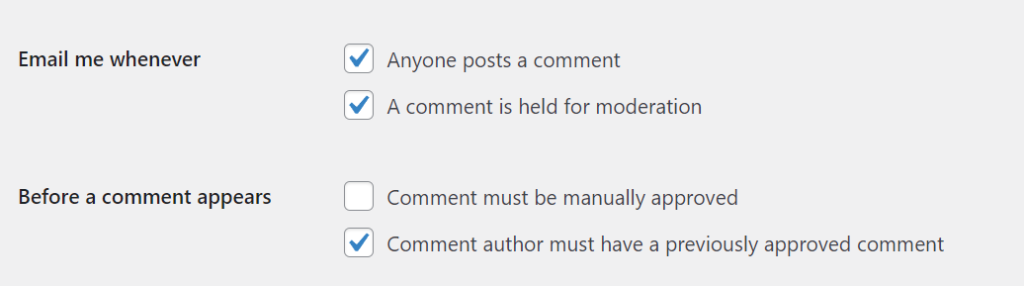
In the Discussion settings, you can choose to get notifications when visitors leave comments or when comments need your approval. In the Before a comment appears section, you can set whether comments need to be manually approved.
There’s also an option that allows users with approved comments to skip the moderation process.
To make it easier to manage comments, WordPress has a feature that can automatically flag comments with certain words or details like usernames, emails, or IP addresses.
While the default WordPress comments system works pretty well, it might have trouble with spam as your site grows. You may want to install a plugin to help reduce comment spam.
Manage Your Website’s Appearance
The Appearance menu in the WordPress admin dashboard lets you pick a theme for your site. You can also use this menu to access the full-site editor.
To choose a theme, go to Appearance → Themes. WordPress comes with several default themes to start with.
You can select any of these themes by hovering over it and clicking Activate. Changing your theme will significantly alter your site’s look, so it’s a good idea to use the Live Preview tool first to see how the theme works.
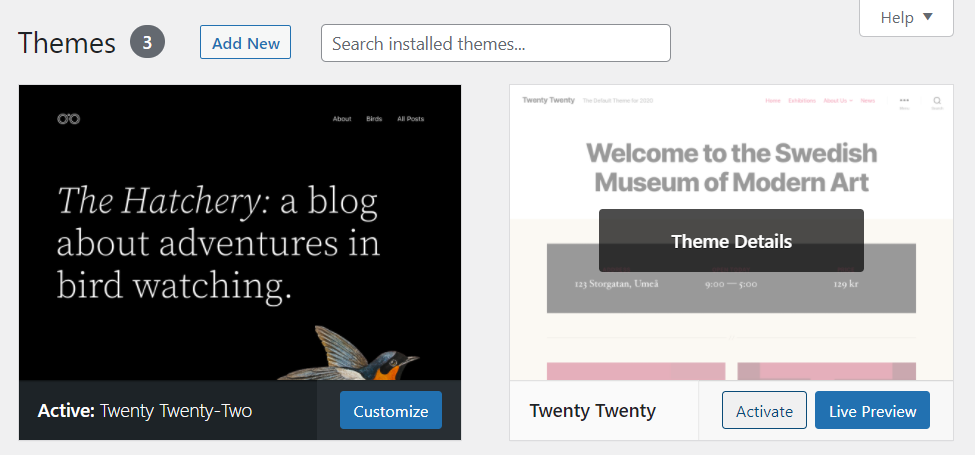
The preview feature lets you customize the theme’s style to check if it fits your needs. If you don’t like the theme, you can always explore other options.
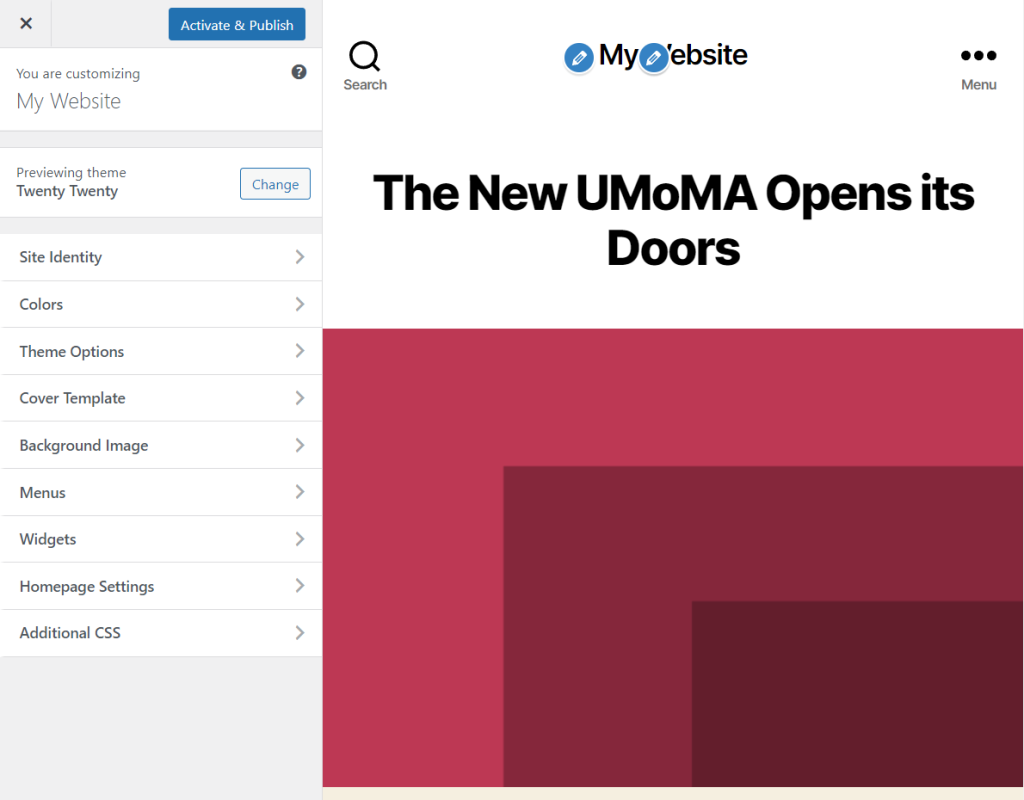
To find more themes, go back to the Themes tab and click on Add New. This will open the WordPress.org theme repository, which has a large number of free themes.
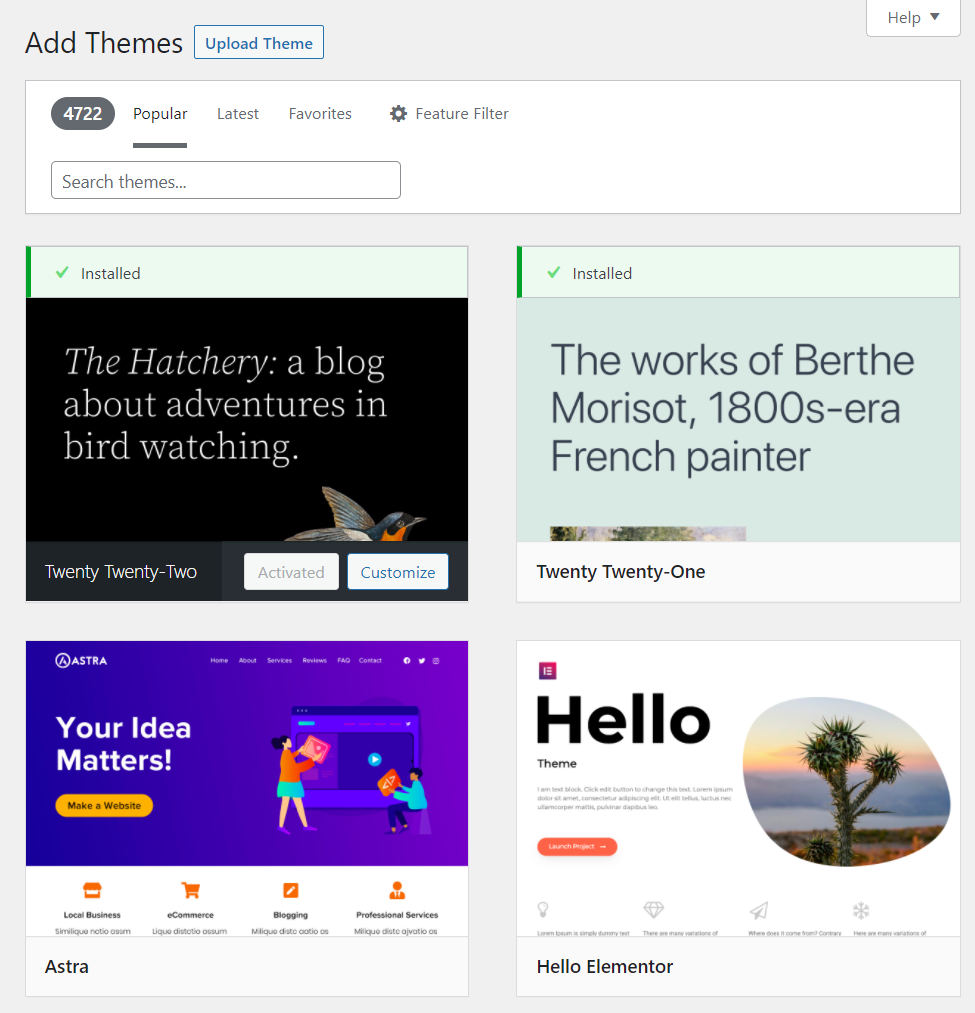
From there, you can choose any theme you like and click Install or Preview to see it before adding it to your site.
If you have theme files that you want to upload directly, use the Upload Theme button. This option allows you to upload themes in .zip format, which is what you’ll need to do for premium themes you buy from other places.
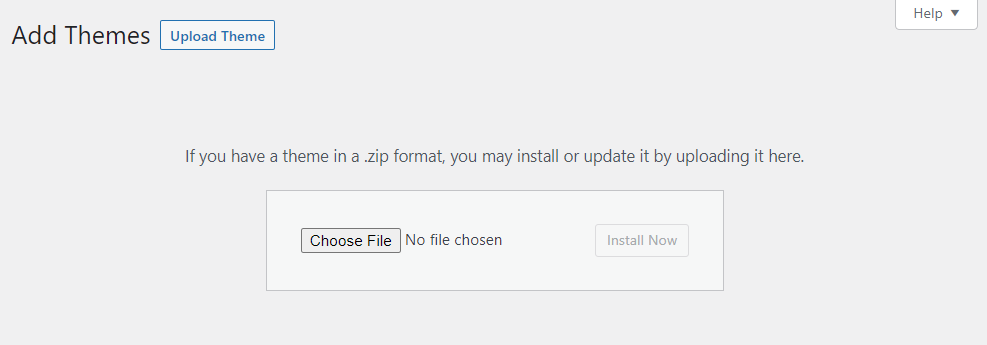
Once you install a theme, it will show up in the Appearance → Themes menu. You can install as many themes as you want, but only one can be active at a time.
If you go to Appearance → Editor, you can open the WordPress full-site editor. This new feature lets you edit your theme templates using the Block Editor.
Manage Plugins and Tools
There are many WordPress plugins available, each adding new features and tools to the platform, which is part of why it’s so popular.
When you set up a new website, your web host might already install some plugins for you. To check which plugins you have, go to Plugins → Installed Plugins.
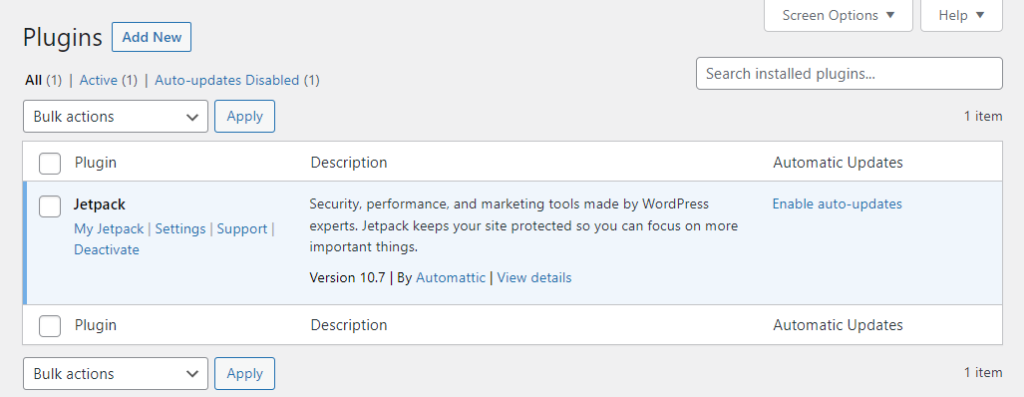
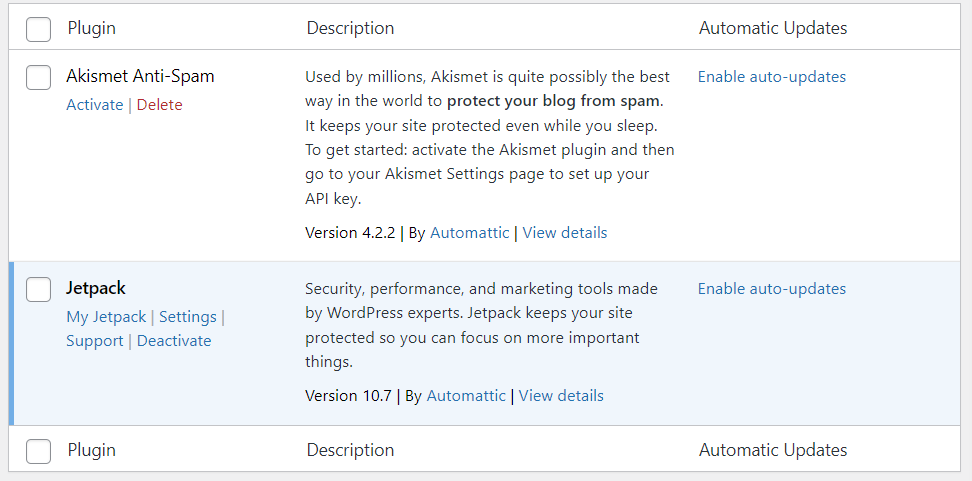
Here, you’ll see a list of both active and inactive plugins, along with some basic details about each one. You can also turn on automatic updates for them.
If you want to activate a plugin that’s currently inactive, just click the Activate option under its name. To turn off a plugin, click Deactivate.
To add new plugins, click Add New at the top of the page. This will take you to the official plugin repository, where you can browse thousands of options.
To install a plugin, click Install Now and wait for WordPress to download it. Once it’s ready, you can activate it by clicking the Activate button.
If you have a plugin file that you want to upload directly, click Upload Plugin and then choose the .zip file you wish to upload.
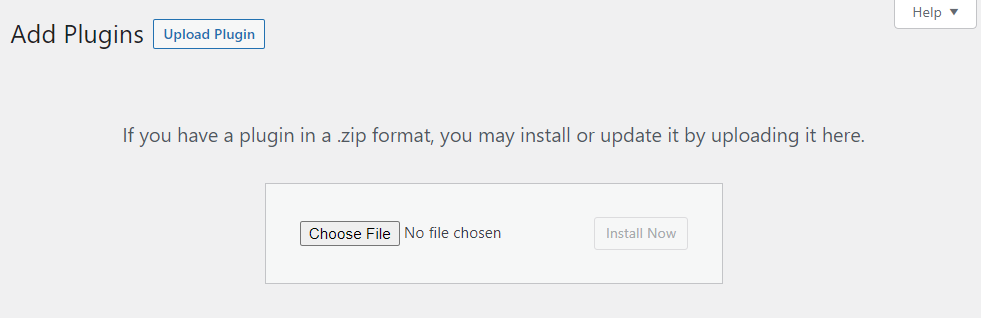
So, this is how you can manage plugins in WordPress. You would mostly use manual zip upload feature when you have bought a proprietary plugin that is not available for free in WordPress plugin repository.
Manage WordPress Updates
To keep your site running smoothly, it’s important to keep everything updated. This includes the WordPress core, as well as any plugins and themes you use.
You can check for updates by looking at the Plugins and Themes pages. WordPress will show you a notice in the left menu indicating how many updates are available.
Updating plugins is easy. Just find the ones that need updates and click the “Update Now” option below them.
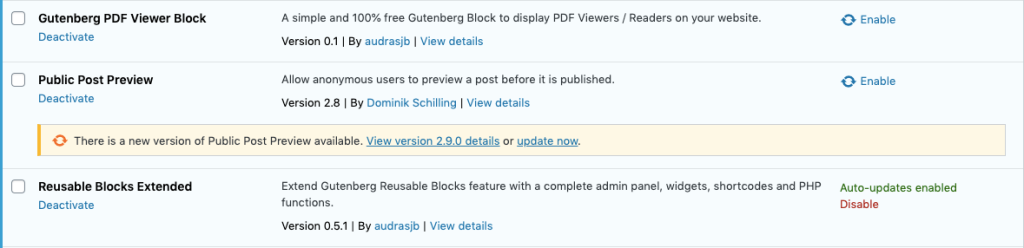
WordPress will automatically download and install the necessary files. If you enable auto-updates for a plugin, you won’t have to remember to update it yourself. You can do this by clicking the “Enable auto-updates” option next to the plugin.
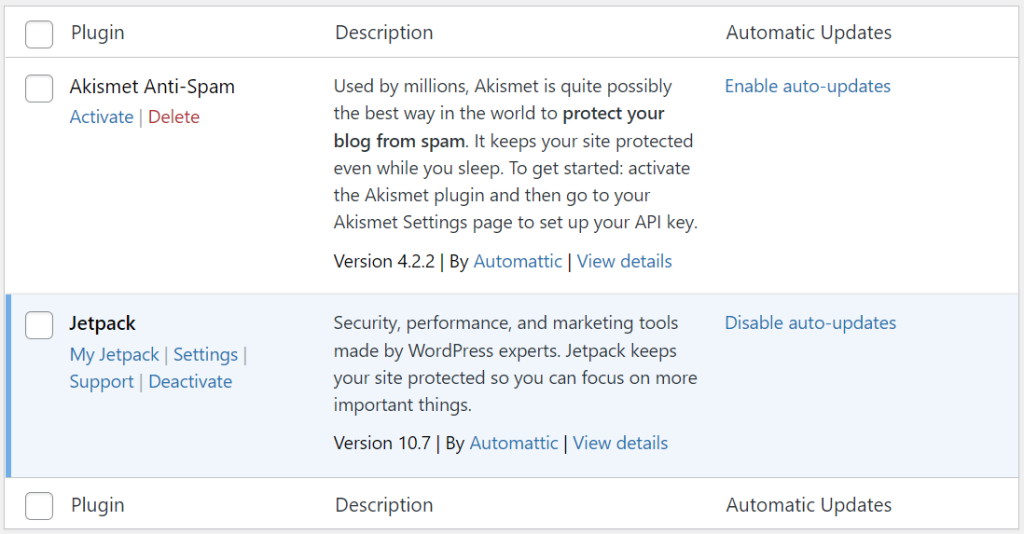
For a complete view of everything that needs updating, go to Dashboard → Updates. This page lists any plugins or themes that require updates and shows if there are new versions of WordPress available.
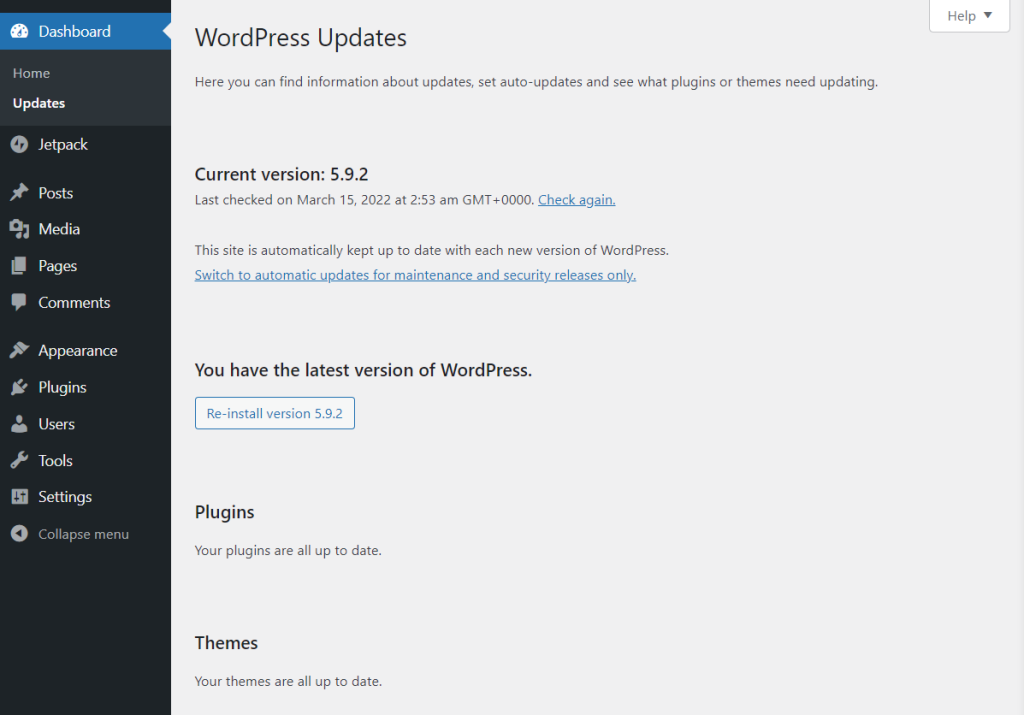
It’s usually hard to miss updates if you check the WordPress admin panel regularly. Keeping up with updates will help make your site more secure.
Manage User Accounts in WordPress
When you create a website with WordPress, it automatically gives you an administrator account. WordPress has a built-in user system that includes different roles, such as:
- Administrator
- Author
- Editor
- Contributor
- Subscriber
Your access to the WordPress dashboard will depend on your user role. As the site owner, you should have full access to all settings and pages.
To see all existing user accounts, go to Users → All Users.
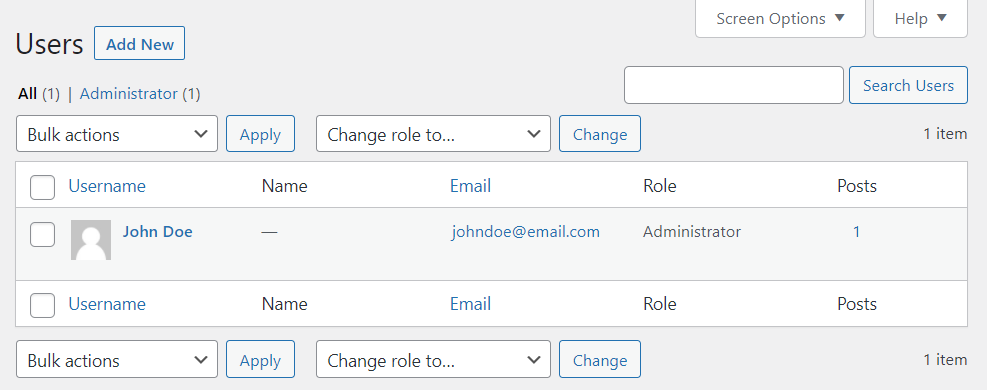
If you want to add a new user, click on Add New at the top or select Users → Add New from the left menu. On the next screen, you can enter a username, email, first and last name, a website, and a password for the new account.
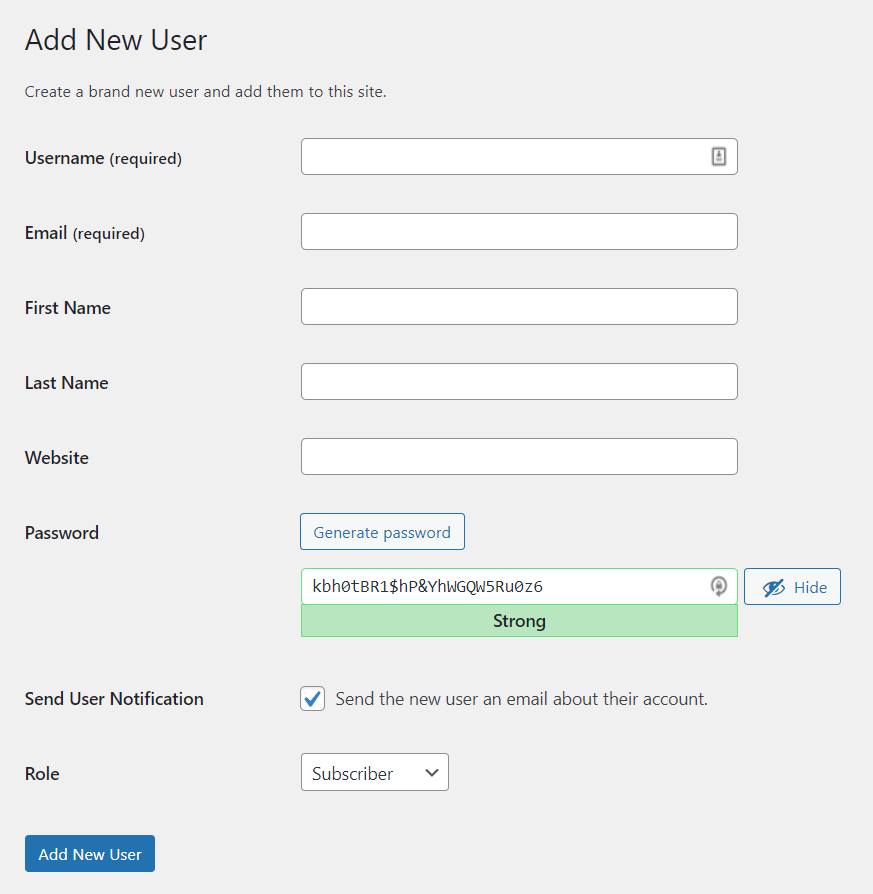
By default, you only need to provide a username and an email. If you keep the Send User Notification option checked, WordPress will send a notification to that email.
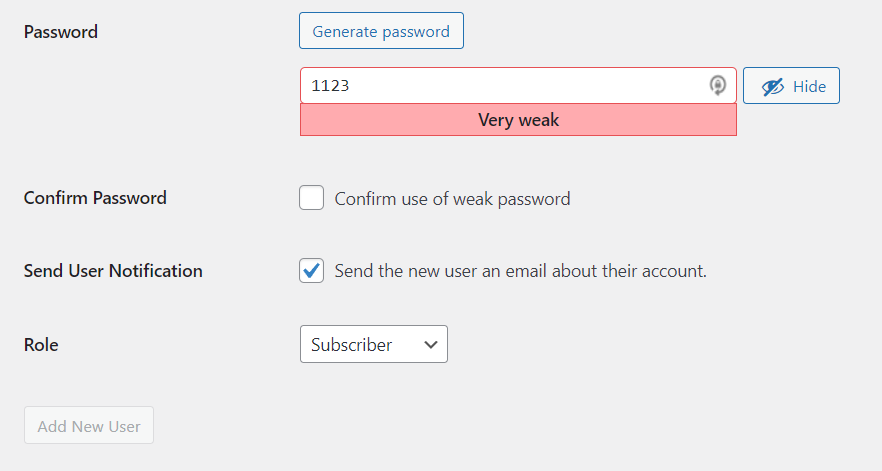
WordPress will also create strong passwords for new accounts. If it notices a weak password, it will ask you to confirm if you want to keep it.
You can choose a role for the new user using the Role menu. Once you fill in all the details, click on Add New User.
If you prefer not to add users manually, you can allow visitors to register on your site. To do this, go to Settings → General and check the box for Anyone can register under Membership. You can also set a default role for new users here.
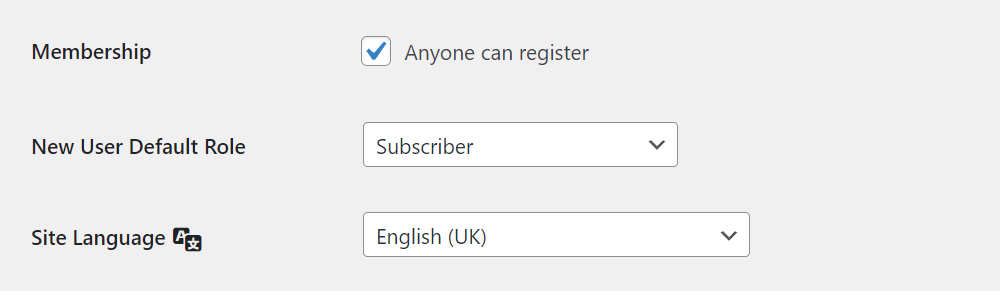
So, this is the complete out-of-the-box user management that WordPress provides. You can also use additional plugins to add more functionality to user management module in WordPress.
How to Configure WordPress Settings
Most of the setup options for your WordPress site can be found in the Settings menu. We’ve already discussed the Discussion settings, so now let’s explore the other options you have available.
WordPress General Settings
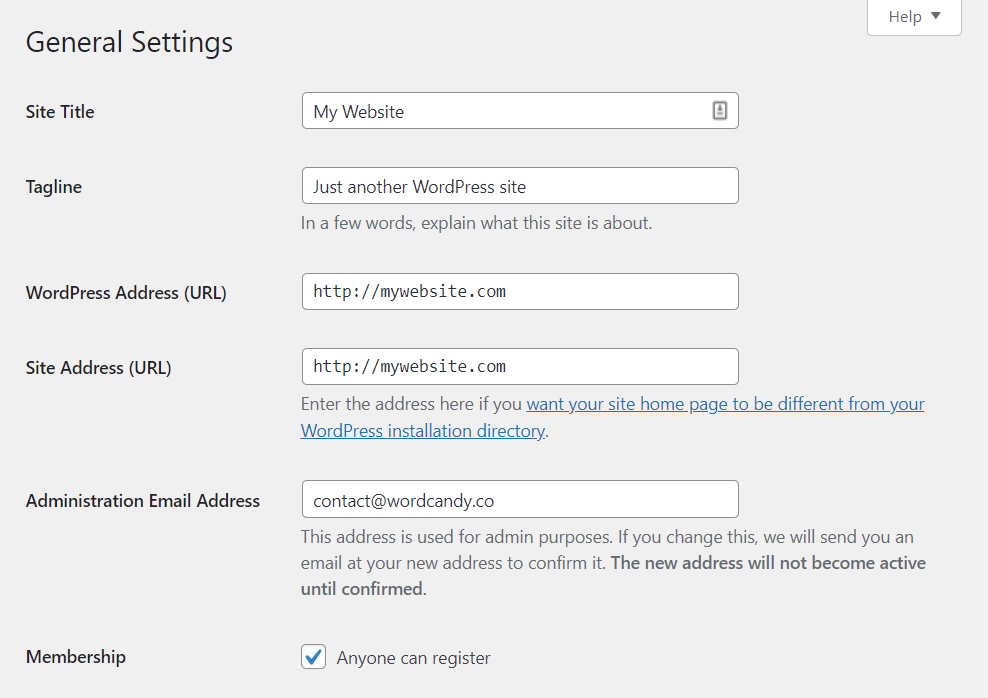
The WordPress General Settings page lets you choose a title for your website and set up its URLs. You can also change your admin email and allow user registration from this page.
If you scroll down, you’ll find options to change the language of the WordPress admin. You can also adjust the timezone, select how dates and times are displayed, and decide which day the week starts on.
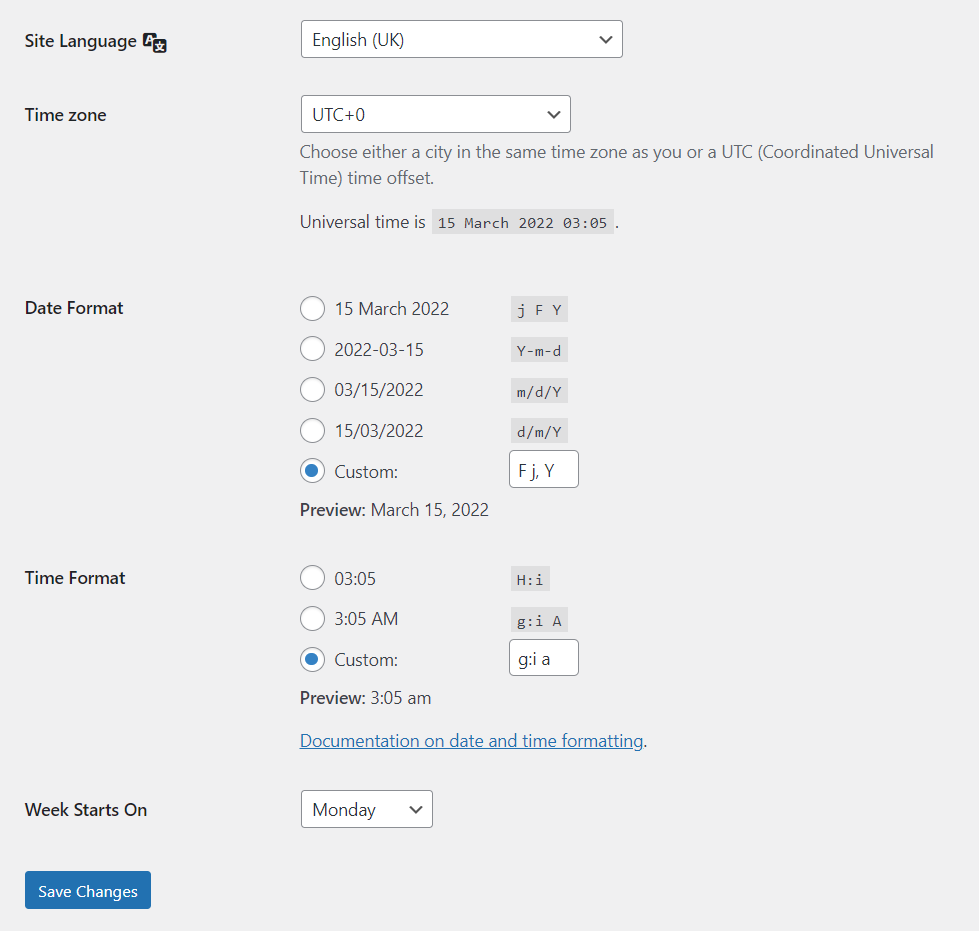
Once you’re satisfied with your changes, just click the Save Changes button. Generally, you only need to set these options once.
WordPress Writing Settings
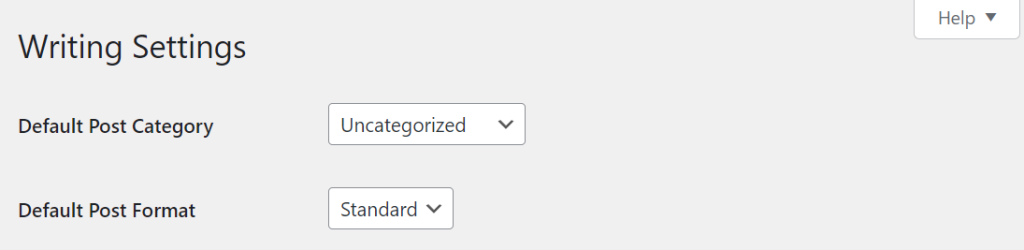
The Settings → Writing page lets you set up the default post formats and categories. If you use custom post types, changing these defaults can be useful.
WordPress also has a unique feature called Post via email. This lets you publish posts by sending them to a specific email address. However, you might not use this feature often. Typically, each post needs to be carefully edited and formatted, which is best done with the Block Editor.
WordPress Reading Settings
The Settings → Reading page is where you can choose what your site’s homepage will be. You can select either a list of your latest posts or a specific static page.
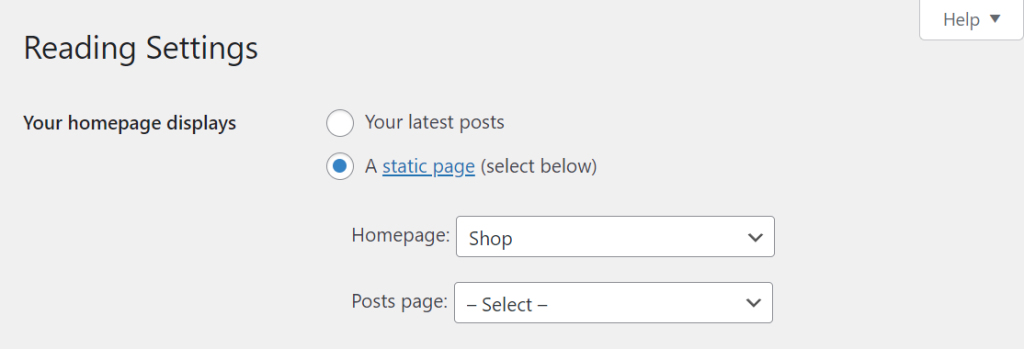
If you scroll down, you can set how many posts you want to show on your blog pages. For older posts, visitors will need to click through to see more. You can also decide if you want to show post summaries or the full content in your blog feed.
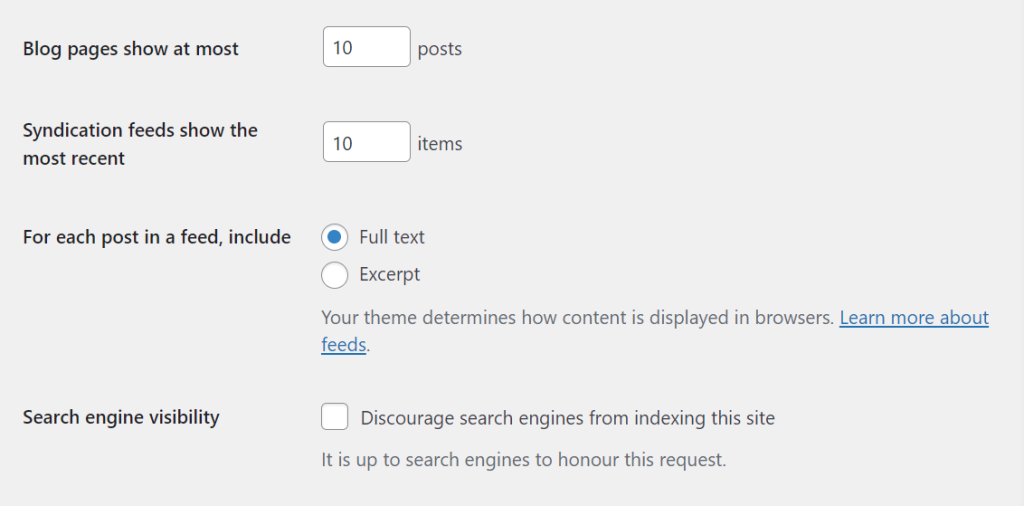
Lastly, there’s an option to discourage search engines from indexing your site. This will stop your website from showing up in search results.
Usually, you want your site to be found in search results to attract more visitors, so it’s best not to disable indexing unless you have a specific reason, like keeping your site private.
WordPress Media Settings
The Settings → Media page lets you set the default size for new images you upload. When you add an image to WordPress, it automatically creates several versions of that image in different sizes.
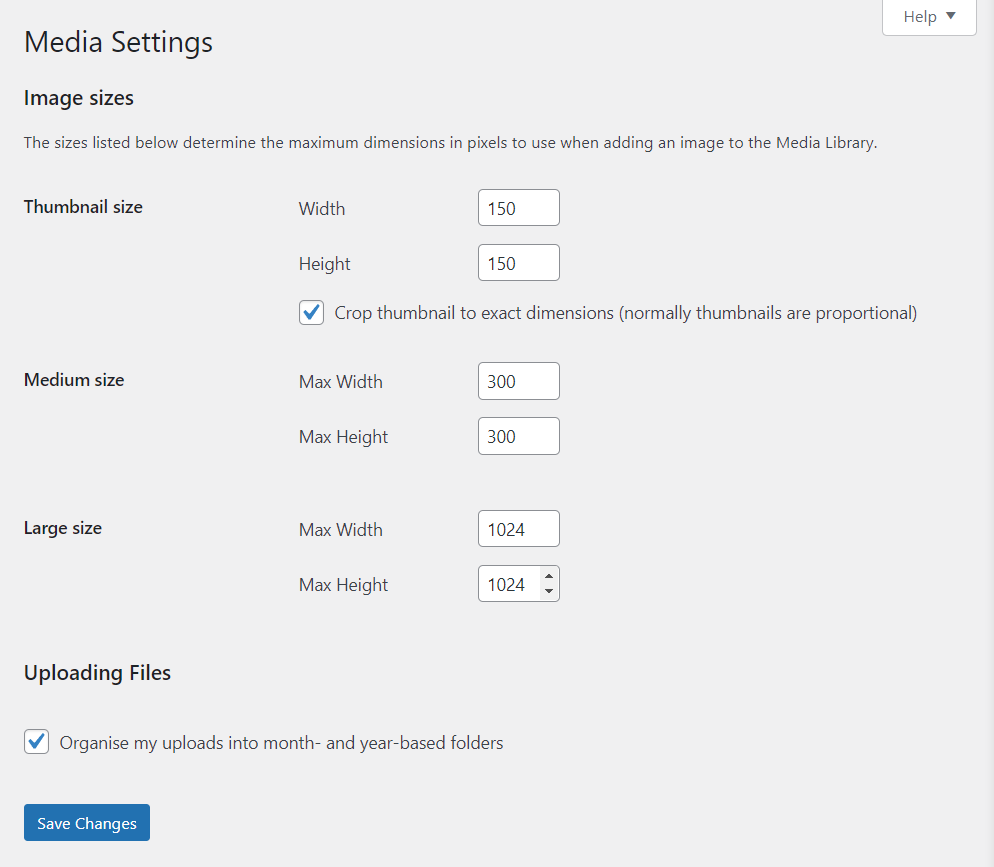
This way, you can choose the size you want when adding images to your posts. If you don’t like the default sizes, you can adjust them.
At the bottom of the page, there’s an option to have WordPress sort your media files into folders based on the date. These folders won’t be visible in the WordPress admin area; you’ll need to use File Transfer Protocol (FTP) to access them.
WordPress Permalink Settings
Permalinks are important for how WordPress operates. When you create a new page or post, WordPress automatically makes a link for it. The format of this URL depends on the permalink structure you choose.
To select a structure, go to Settings → Permalinks. Here, you’ll see different options for URL formats. The part of the URL that changes comes after your domain, like yourwebsite.com.
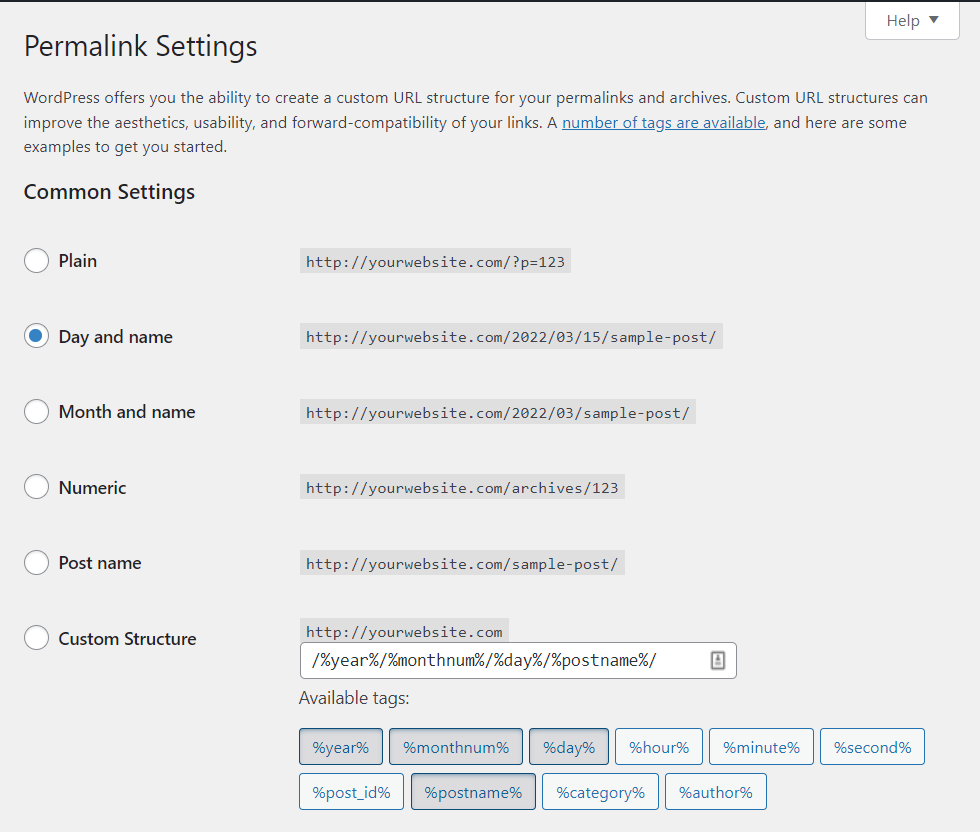
It’s best to pick a URL format when you first set up your website. Changing the permalink structure later can cause issues and might hurt your search engine rankings.
The most common permalink structures are the Post name and Month and name options. These formats are short, and you can set the slug for each URL when you edit your post or page.
If you’re using WooCommerce, the Permalinks page also lets you adjust the URL structure for your products. Just remember that the default WooCommerce options don’t include numbers or dates.
WordPress Privacy Settings
User privacy is very important, and WordPress has a built-in tool to help you create a privacy policy page for your site.
To use this tool, go to Settings → Privacy. If you choose the option to create a new Privacy Policy Page, WordPress will automatically set up a page for you with a template.
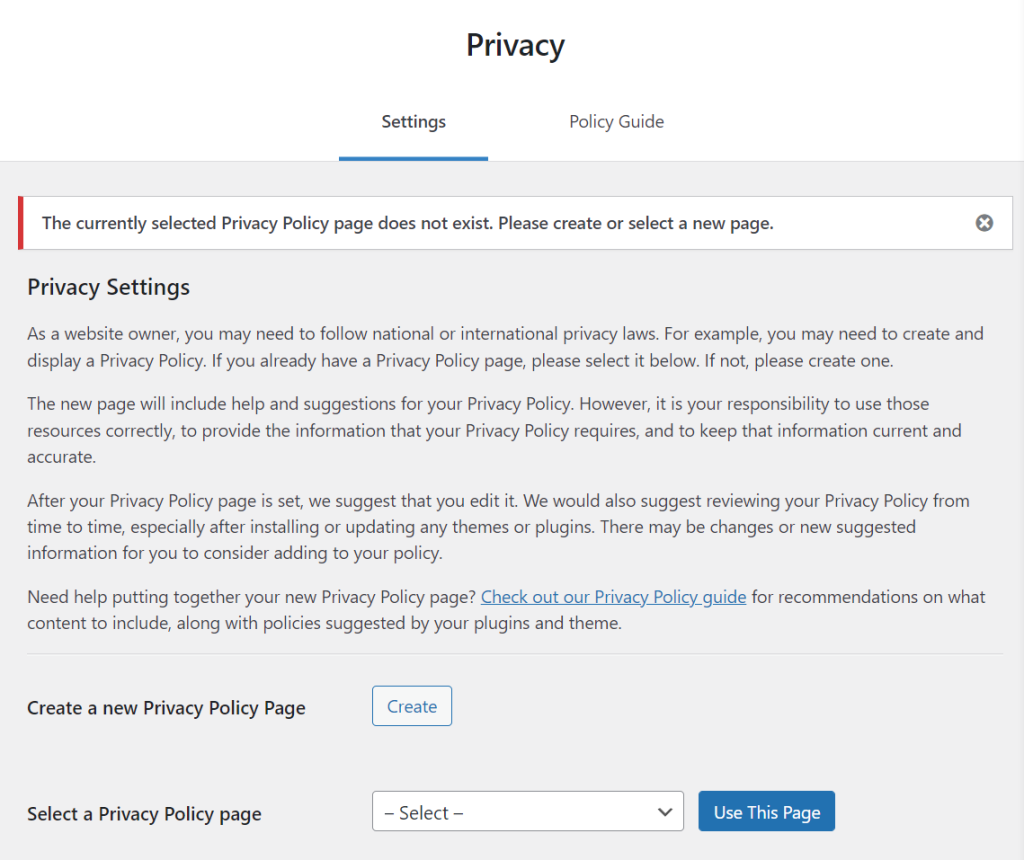
You can also select an existing page to use as your privacy policy, which gives you complete control over how it looks and what it says.
Visitors will be able to see your privacy policy from the login and registration screens, and you can add links to it in other places on your site.
How to Use the WordPress Customizer?
The customizer is a tool in the WordPress dashboard that helps you adjust some basic settings for your website, but not its design.
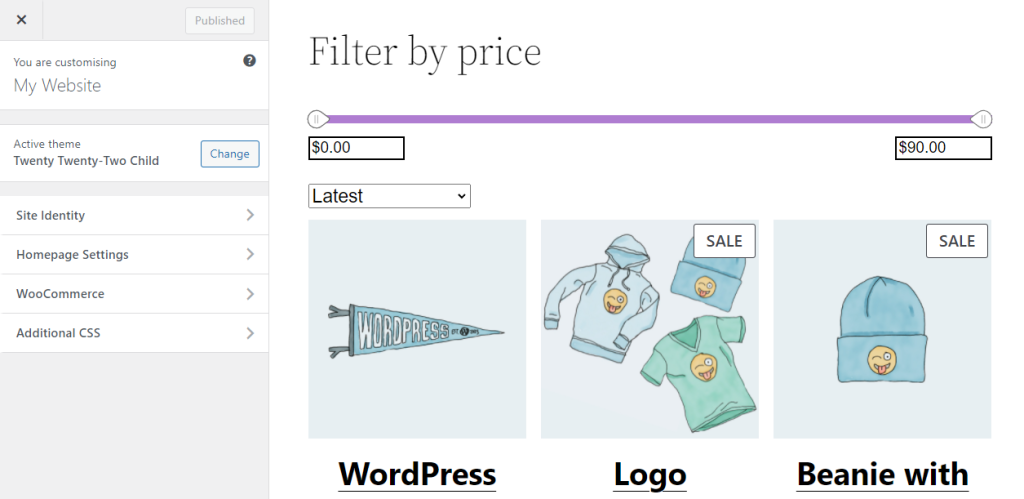
To open the customizer, go to Appearance → Customize in the admin area. A new page will show up with a menu on the left and a preview of your site on the right.
In the left menu, you can see your site’s title and the theme you’re using. This menu lets you change or preview different themes without leaving the customizer.
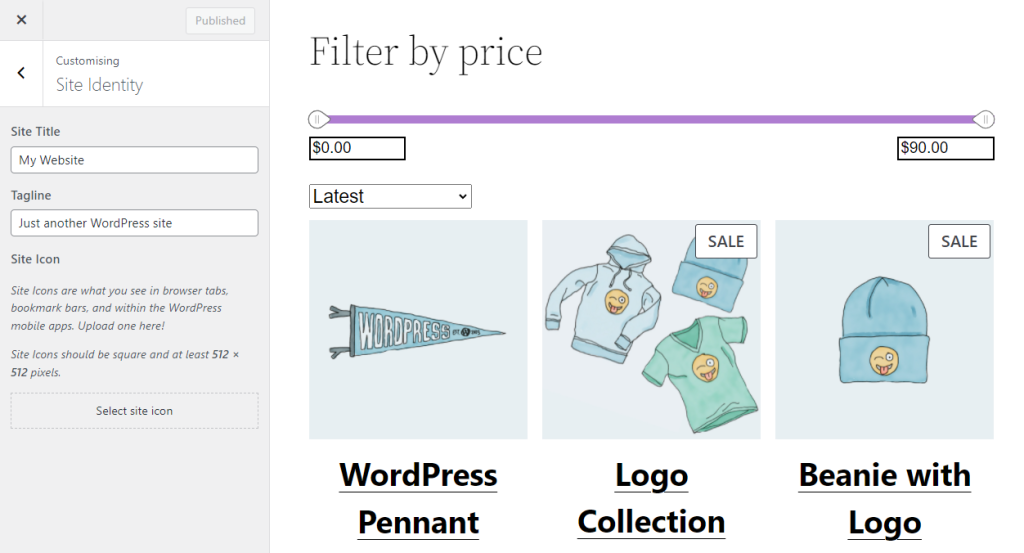
If you click on the Site Identity tab, you can update your site’s title and tagline.
The Homepage Settings tab allows you to decide what your homepage will display. You can choose between a static page or your latest posts.
Some plugins, like WooCommerce, may add extra tabs to the customizer menu, showing different options based on what you have installed.
There’s also an Additional CSS tab where you can add your own CSS code. This is one of several ways to customize your site’s style. Keep in mind that any CSS added here will affect the entire website.
Conclusion
In conclusion, “The Ultimate WordPress Administration Guide 2024” provides all the essential tools and tips you need to manage your WordPress site effectively. From setting up your website to customizing its design and keeping everything updated, this guide covers it all. With clear instructions and helpful advice, you can confidently navigate the WordPress dashboard and make the most of your website. Whether you’re a beginner or looking to improve your skills, this guide will help you create a successful online presence.
Related guides
7 Common Hosting Mistakes Beginners Make (And How to Avoid Them)
7 common hosting mistakes beginners make in 2026: no backups, ignored updates, bad host choice, weak passwords, single point of failure, no staging. With fixes for each.
WordPressWebsite Migration Backup Checklist: What to Save and How to Test
Prepare a website migration backup: inventory files, databases, email and DNS, check archive integrity, test recovery and plan a safe final synchronization.
WordPressCore Web Vitals in 2026: A Practical Fix Guide for Site Owners
Core Web Vitals 2026: practical fixes for LCP, INP, and CLS. Real root causes, what to measure, common misconceptions, and a priority order of fixes for site owners.
WordPressFixing the WordPress “Death Loop”: When Missing Files slow down your site
You’ve just launched your new WordPress site or pushed a big update. In your staging environment, everything ran perfectly.