
GICT knowledge base
Schedule Automatic Backup to Interserver Storage Plan from Directadmin and WHM VPS
Published
The backups are an inevitable part of the websites/servers while considering the importance of the data that we’re dealing with. Interserver offers backups for all our shared accounts (Standard, WordPress Managed, Reseller and Boost) via the Jetbackup service. For VPS and Dedicated servers, we have Storage plans. Storage plans easily work as a destination for cPanel or Directadmin backups, as a well as Jetbackup. Anything that supports rsync over ssh, FTP, SCP/SFTP should work with a storage plan.
Storage Plan:
- Directadmin Control panel
- Schedule backup to Storage plan from VPS via remote FTP or sFTP
- Can be used as Cloud storage using Owncloud or NextCloud (like Gdrive)
- You can host websites as well (no email account feature btw)
- Price as per the predefined plan
- Storage plans do not have backups on their own. ZFS hybrid raidz2 is used to have multiple redundancy on drive failures.
- Refer: InterServer – Storage Hosting
In this tutorial, I’m dealing with the steps to schedule backup to Interserver Storage plan from Directadmin and cPanel/WHM VPS or Dedicated servers
Directadmin Servers:
- Login to http://ip_address:2222/ with ‘Admin’ privilege
- Access Dashboard >> Admin Backups >> Schedule Backup
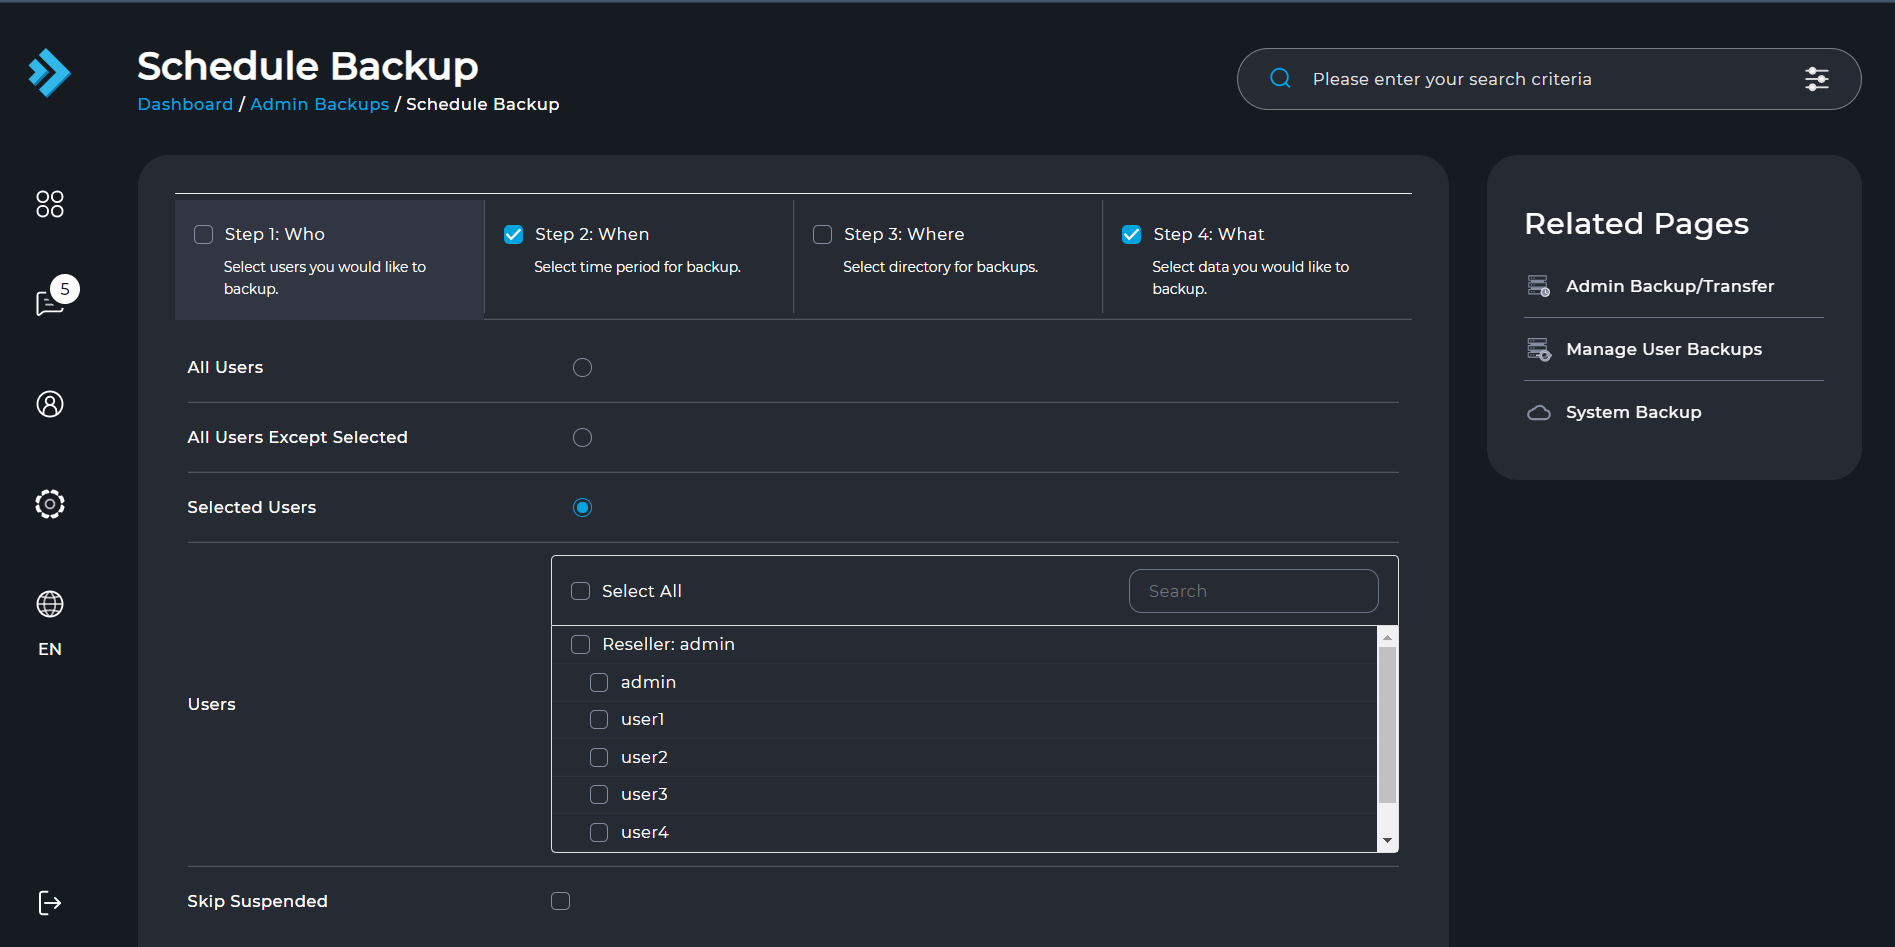
- Step 1 (Who): Select the users you would like to backup. You can select ‘All Users’ in case of full ‘server’ backup
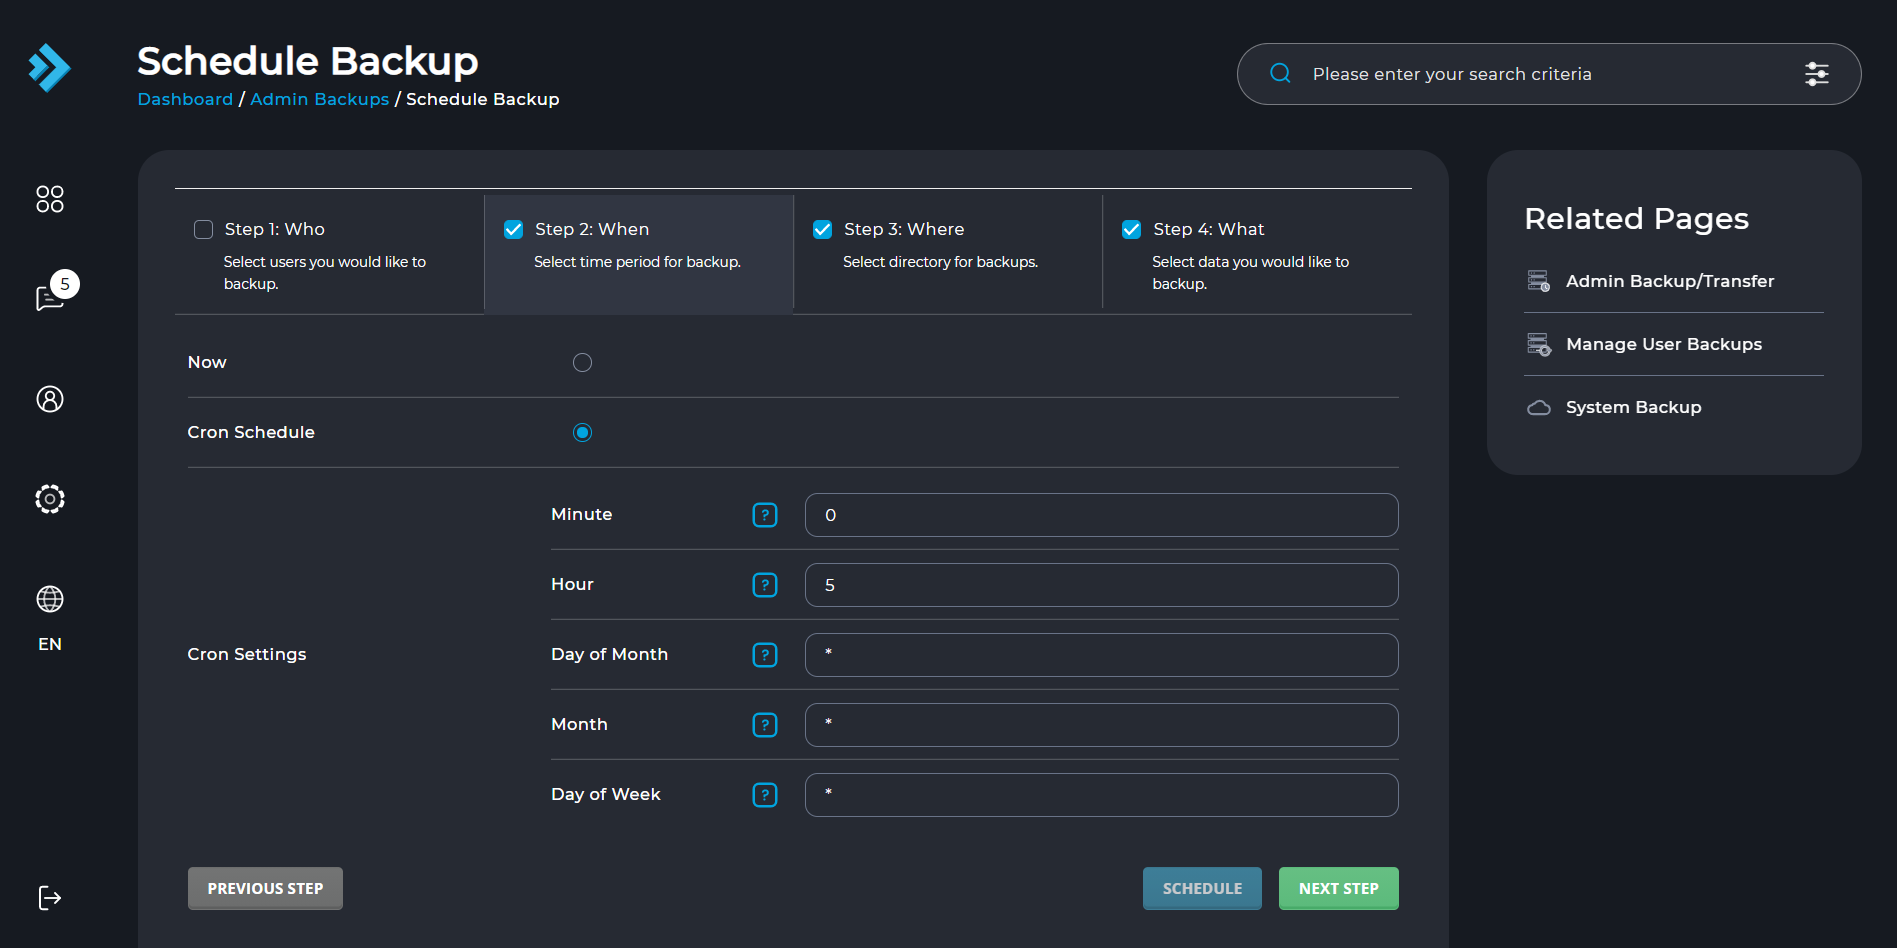
- Step 2 (When): Select time period for the backup >> Cron Schedule >> You can schedule as per the need
Some useful info about cronjob:
Valid cron time values are the numbers indicated and *.
You can specify exact times using commas to separate them. eg: 1,2,3 (minutes 1,2 and 3)
You can specify spans using a dash. eg: 5-7 (minutes 5 to 7)
You can specify intervals using a star and a forward slash. eg: */2 (every 2nd minute)
You can combine them to create a more precise schedule. eg: 1,5,11-15,30-59/2 (minutes 1, 5, 11 to 15 and every 2nd minute between 30 and 59)
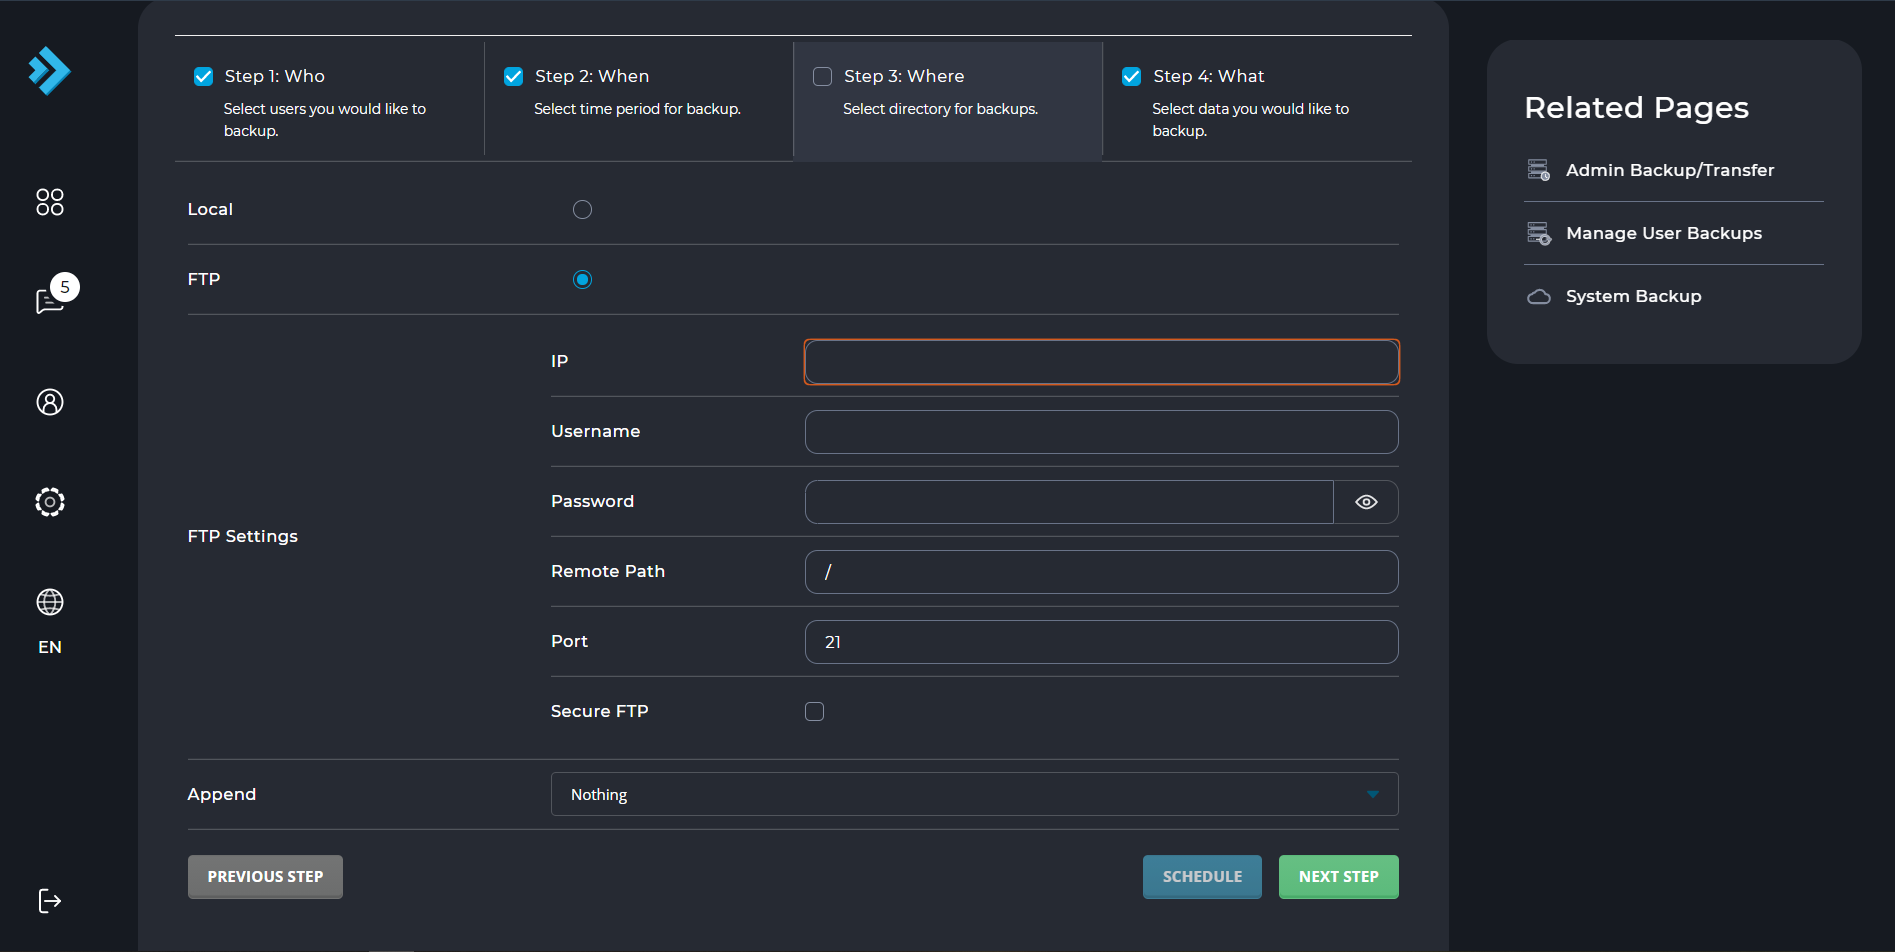
- Step 3 (Where): Here you can specify the IP, Username (stxxxx), Password, Remote path (the path should be /home/stxxxx/. You can see that in Storage plan >> Dashboard / FTP accounts) and port number (21), which we’ve send to the registered email while ordering storage plan.
- Step 4 (What): You can select the data to Backup. Better opt ‘All Data’ and click Schedule
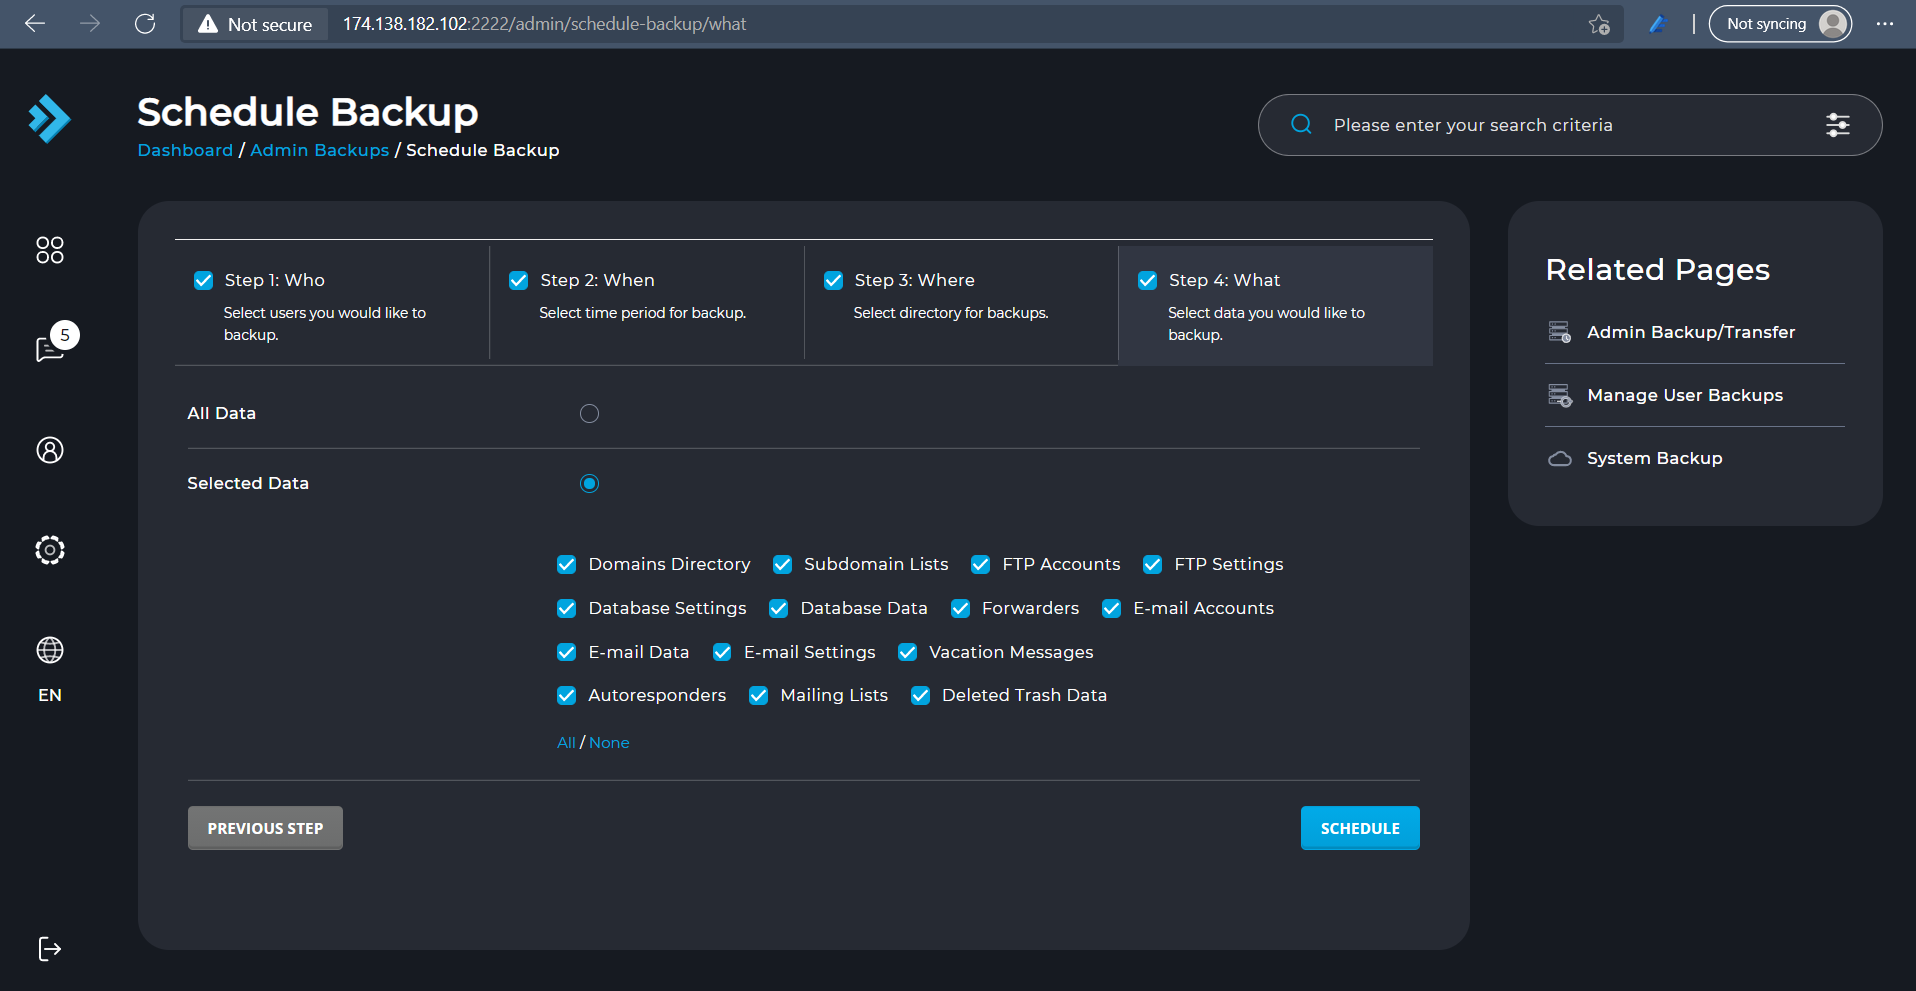
That’s it! The backup is scheduled now
cPanel/WHM Servers
The same can be done in cPanel/WHM server. We already discussed those steps in another tutorial. Here is the link: WHM Backup Configuration Explained – Interserver Tips
Only thing, you have to note is the ‘Destination Type’ should be FTP.
If you’re having any issues. Feel free to contact our Live Chat support via https://chat.is.cc/livechat?mode=popout.Our support team will be able to assist you with any service you have ordered through us.
Related guides
Host Additional Domains on an Eligible InterServer Account
Check your hosting limits, choose a separate site or alias and use cPanel or DirectAdmin with deliberate DNS, content and certificate verification.
cPanelHardening Your cPanel Server: Beyond the Basics After CVE-2026-41940
Security is a moving target. With the recent discovery of CVE-2026-41940, it has become clear that just having a firewall isn't enough anymore.
cPanelcPanel and Plesk notice: Awstats,. Webalizer and Analog stats are being removed
Important Update: cPanel and Plesk Phasing Out Legacy Statistics Tools If you regularly check your website traffic through your hosting control panel, we have an...
cPanelThe dangers of shared licenses (in other words unofficial/cracked licenses)
Why Cracked cPanel Licenses Aren’t Worth the Risk: A Guide for InterServer Customers When you’re managing a server, every dollar counts.