
GICT knowledge base
How to Install Portainer CE with Docker on Linux
Published
Managing Docker containers through the command line can be really challenging, especially when you’re dealing with multiple containers, images, and networks. Remembering all those commands and keeping track of everything becomes difficult as your projects grow. This is where Portainer CE comes in as a game-changer for Docker management.
Portainer Community Edition is a free and lightweight tool that gives you a beautiful web interface to manage all your Docker containers. Instead of typing commands in the terminal, you can simply click buttons and see everything visually. It makes Docker management much easier for both beginners and experienced developers. In this guide, we’ll walk through the complete process of installing Portainer CE on your Linux system and getting it up and running.
What Makes a Portainer Special?
Before we dive into the installation, let’s talk about why Portainer has become so popular among developers and system administrators:
- Simple and intuitive: You can deploy containers, manage images, configure networks, and handle volumes without memorizing complex commands.
- Visual interface: See the health and status of your containers in real-time, making troubleshooting much easier.
- Lightweight: Portainer itself runs as a Docker container, so there’s no complex installation process.
- Efficient workflow: You’re essentially using Docker to manage Docker, which streamlines your entire container management experience.
Prerequisites: What You’ll Need
Before we begin the installation process, make sure you have the following ready:
- Linux system: Ubuntu, Debian, CentOS, Fedora, or any other major distribution.
- Sudo privileges: A user account with administrative access.
- Docker: We’ll cover the installation if you don’t have it yet.
Step 1: Installing Docker on Your Linux System
Since Portainer runs as a Docker container, getting Docker installed and configured properly is our first priority. The installation process differs slightly depending on your Linux distribution, so I’ll cover both Debian-based and RHEL-based systems.
For Ubuntu, Debian, and Mint Users:
If you’re running Ubuntu, Debian, or Linux Mint, start by updating your package index and installing the necessary dependencies:
sudo apt update
sudo apt install -y ca-certificates curl gnupg
Next, create a directory for Docker’s keyring and download the official Docker GPG key:
sudo install -m 0755 -d /etc/apt/keyrings
curl -fsSL https://download.docker.com/linux/ubuntu/gpg | sudo tee /etc/apt/keyrings/docker.asc > /dev/null
Now add Docker’s official repository to your system:
echo "deb [arch=$(dpkg --print-architecture) signed-by=/etc/apt/keyrings/docker.asc] https://download.docker.com/linux/ubuntu $(lsb_release -cs) stable" | sudo tee /etc/apt/sources.list.d/docker.list > /dev/nullUpdate your package index again and install Docker:
sudo apt update
sudo apt install -y docker-ce docker-ce-cli containerd.io
For CentOS, Fedora, and Rocky Linux Users:
If you’re on a RHEL-based system, the process is a bit simpler. Add the Docker repository:
sudo dnf config-manager --add-repo https://download.docker.com/linux/centos/docker-ce.repoThen install Docker and its components:
sudo dnf install -y docker-ce docker-ce-cli containerd.ioConfiguring Docker for Regular Users
By default, Docker requires root privileges to run commands, which means you’d need to prefix every Docker command with sudo. That gets tedious quickly. Let’s fix that by adding your user to the Docker group:
sudo usermod -aG docker $USER
newgrp docker
This allows your regular user account to run Docker commands without needing sudo every time.
Starting and Enabling Docker
Now let’s make sure Docker starts automatically when your system boots up, and start the service right away:
sudo systemctl enable --now docker
sudo systemctl start docker
To verify everything is working correctly, run these test commands:
docker run hello-world
docker --version
The first command downloads and runs a test container that prints a welcome message. If you see that message, Docker is working perfectly. The second command simply displays your installed Docker version.
Step 2: Creating a Storage Volume for Portainer
Portainer needs a place to store its configuration, user data, and other persistent information. Docker volumes are perfect for this because they survive even if you delete and recreate the Portainer container.
Create a new volume specifically for Portainer:
docker volume create portainer_dataYou can verify the volume was created successfully:
docker volume lsYou should see portainer_data listed among your Docker volumes.
Step 3: Installing and Running Portainer CE
Now comes the exciting part – actually installing Portainer. This single command pulls the latest Portainer image and starts it with all the necessary configuration:
docker run -d -p 8000:8000 -p 9443:9443 --name portainer --restart=always -v /var/run/docker.sock:/var/run/docker.sock -v portainer_data:/data portainer/portainer-ce:ltsLet me break down what this command does:
- -d flag: Runs Portainer in detached mode (in the background).
- -p flags: Maps ports 8000 and 9443 from the container to your host system for web interface access.
- –restart=always: Ensures Portainer automatically restarts if it crashes or when your system reboots.
- Volume mounts: The first one (/var/run/docker.sock) gives Portainer access to your Docker daemon, while the second (portainer_data:/data) stores persistent data.
Accessing the Portainer Web Interface
Once the container is running, open your web browser and navigate to:
https://your-server-ip:9443
If you’re accessing Portainer from the same machine it’s installed on, you can use:
https://localhost:9443
Your browser will likely show a security warning because Portainer uses a self-signed SSL certificate. This is completely normal and safe in this context. Click through the warning (usually “Advanced” then “Proceed to site”) to continue.
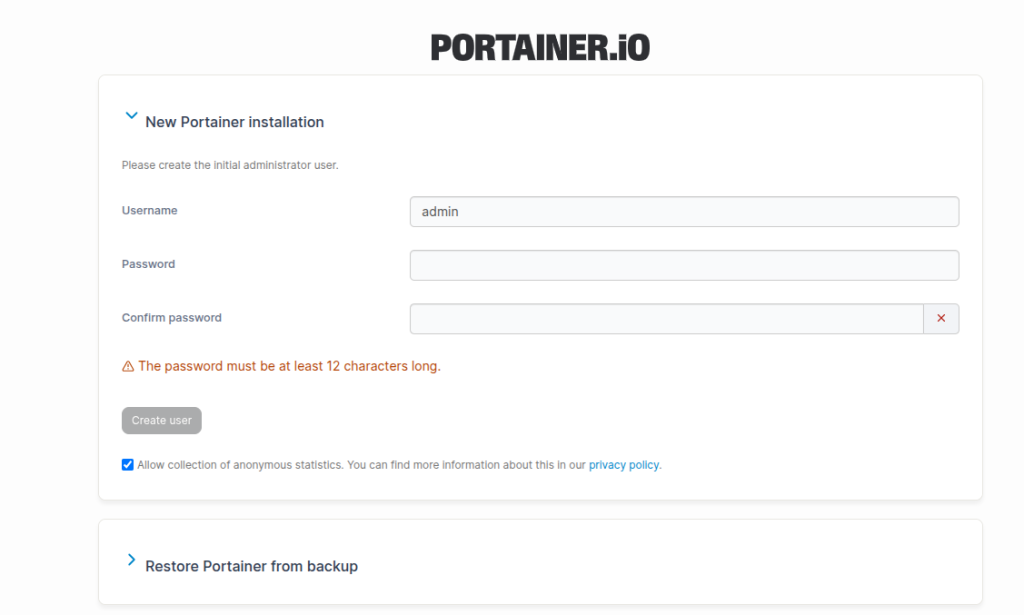
Initial Setup
When you first access Portainer, follow these steps:
- Create admin account: Choose a strong username and password for full control over your Docker environment.
- Select environment: Choose “Docker” for local Docker management.
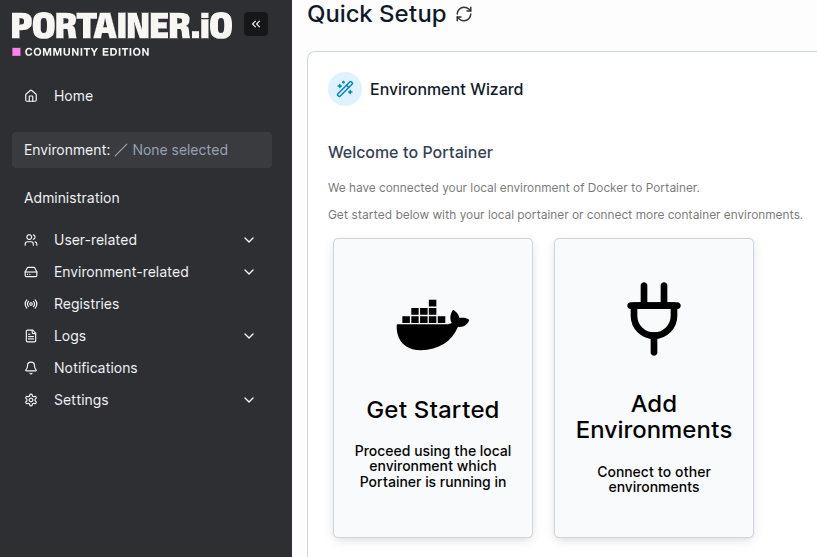
- Connect: Select “Connect using the local Docker socket” and click “Connect.”
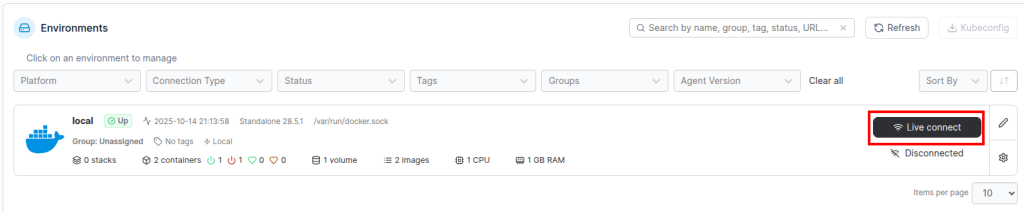
- Access dashboard: You’ll be taken to the main Portainer dashboard.
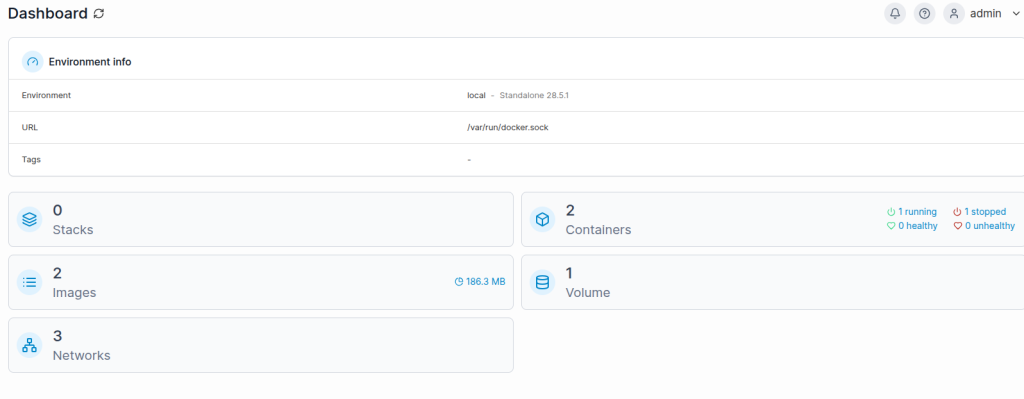
To confirm Portainer is running correctly, check your running containers:
sudo docker psYou should see the Portainer container listed and running.
Step 4: Testing Portainer with a Sample Container
Let’s deploy a simple web server to see how easy Portainer makes container management. We’ll use Nginx, a popular web server.
From the Portainer dashboard, click on “Containers” in the left sidebar. Then click the “Add container” button at the top. You’ll see a form with various options.
Fill in these details:
- Container name: nginx-webserver
- Image: nginx:latest
- Port mapping: Set host port to 8080 and container port to 80.
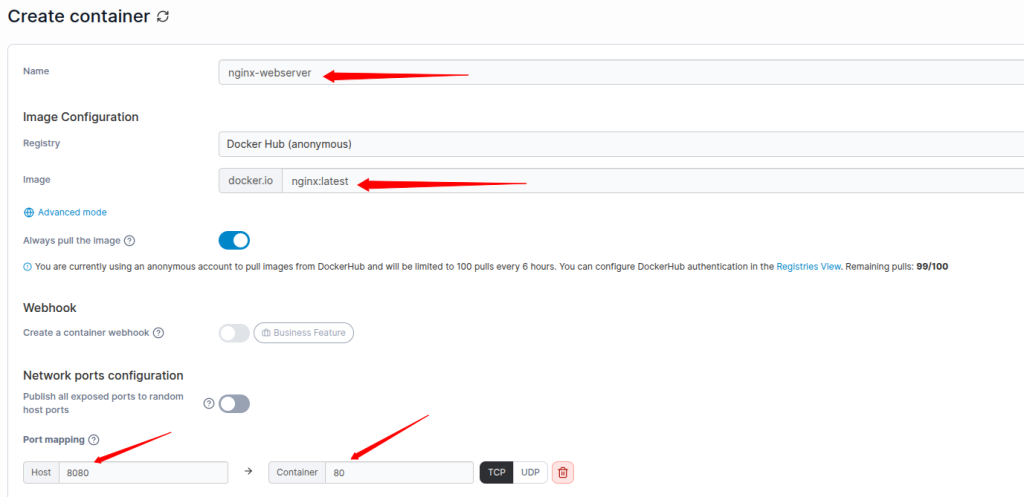
Scroll down and click “Deploy the container.” Portainer will pull the Nginx image if it’s not already on your system and start the container. Within moments, you’ll see your new container appear in the containers list with a green “running” status.
To verify the Nginx server is working, open your browser and visit:
http://your-server-ip:8080
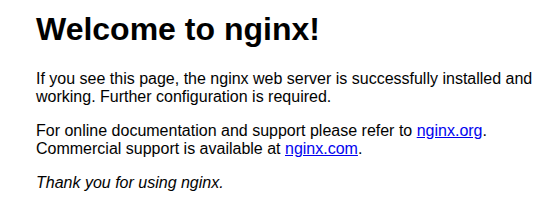
You should see the Nginx welcome page. Congratulations – you just deployed a container using Portainer’s web interface!
Step 5: Managing Portainer Itself
Sometimes you’ll need to manage Portainer itself. Here are the essential commands:
Start Portainer (if it’s stopped):
docker start portainerStop Portainer:
docker stop portainerRestart Portainer:
docker restart portainerRemove Portainer completely (warning: this deletes the container but not the volume):
docker rm -f portainerIf you ever need to reinstall Portainer, your configuration and data will still be in the portainer_data volume, so you won’t lose anything.
Conclusion: Your Docker Management Journey Begins
You’ve successfully installed and configured Portainer CE on your Linux system. Here’s what you’ve accomplished:
- Simplified management: What once required memorizing dozens of Docker commands can now be done through an intuitive web interface.
- Visual control: Monitor container health, view logs, manage networks, and handle volumes all from your browser.
- Efficient workflow: Deploy new services and manage existing ones with just a few clicks.
- Free and open source: Access all these features without spending a penny.
Portainer transforms Docker from a command-line tool into a visual, accessible platform. Whether you’re managing a single container or orchestrating dozens of services, Portainer makes the job easier and more efficient.
Now that you have Portainer running, take some time to explore its features. Try deploying different containers, experiment with networks, and see how much easier Docker management can be.
Related guides
How to Self-Host Karakeep with AI Tagging on a VPS
Self-host Karakeep with local Ollama tagging. Restrict first-user setup, disable public registration and verify collection, search and suggested tags.
Docker ManagementHow to Set Up a Private & Self-hosted Docker Registry
Host a private Docker registry with HTTPS and authentication. Push an image, pull its recorded digest on another host and verify the transferred file.
Docker ManagementDocker Compose Beyond Basics: Multi-Container Apps That Actually Work
Docker Compose Beyond Basics: build production multi-container apps with shared data, dependencies, restart policies, and reboot-safe networking.
Docker ManagementFix Docker Application Permissions Without Changing Its Data Root
Diagnose Docker bind-mount and volume permissions by runtime identity and mapping. Avoid recursive data-root changes and unsafe startup repair jobs.