
GICT knowledge base
How to Create cPanel Accounts from WHM
Published
In this documentation, we can check how to create cPanel accounts from WHM.
1 ) Login to your WHM account.
2 ) Navigate to WHM »Account Functions »Create a New Account.
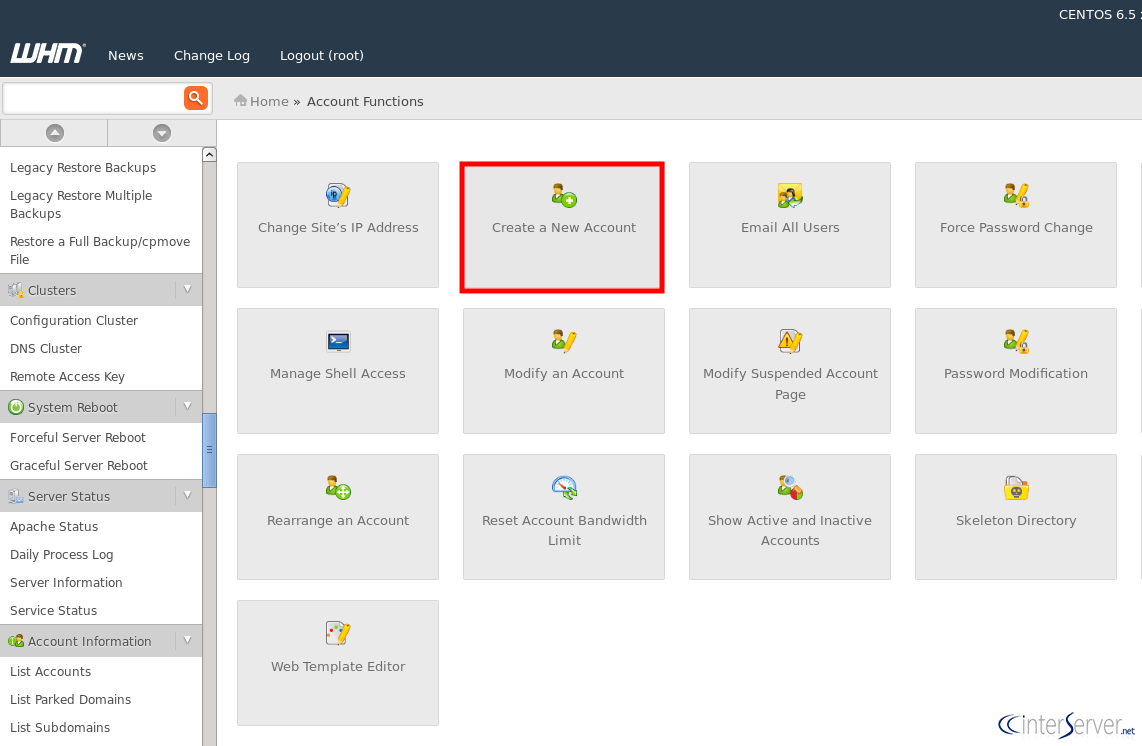
3 ) Click ‘Create a New Account’ button.
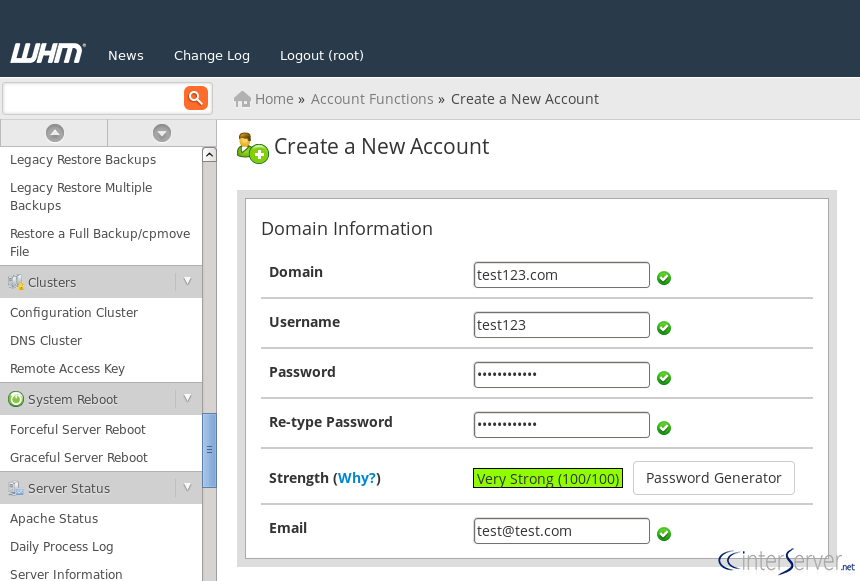
4 ) Domain Information
Here we can enter the account details.
Enter the domain name for the new account.
Enter the username for the account.
Enter the password and confirm it.
Enter the email address to get notifications.
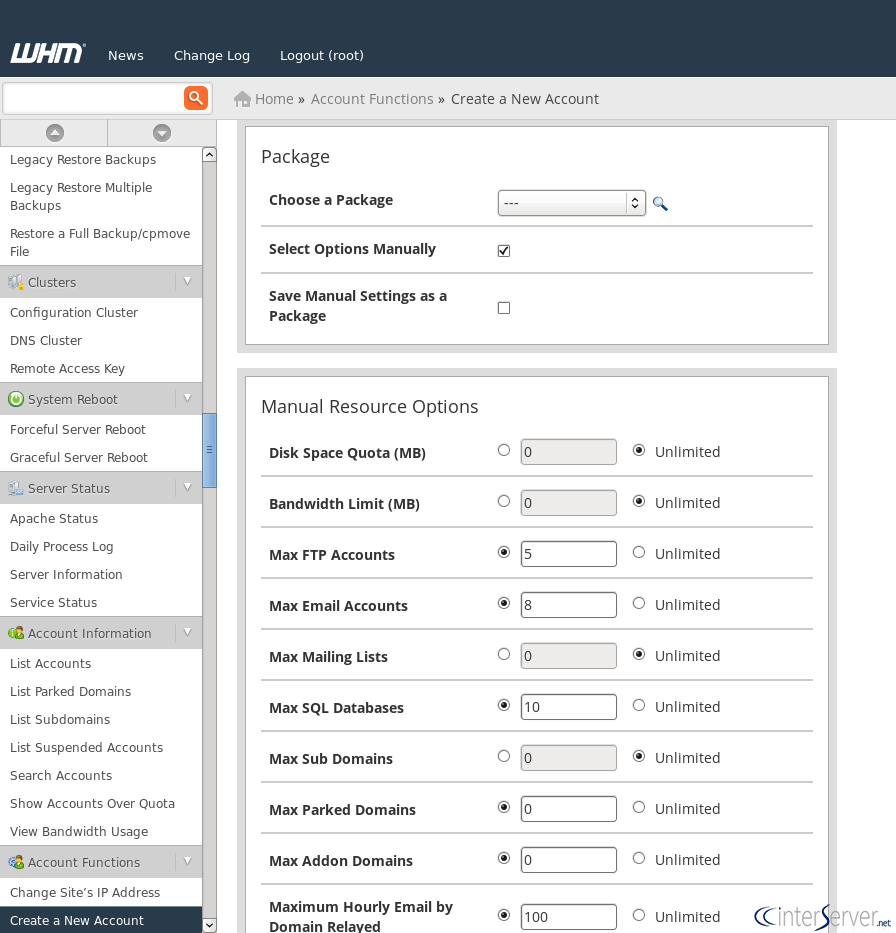
5 ) Package
We can select the package from ‘Choose a Package’ option. In cPanel, packages are mainly used to easily assign the same group of settings to multiple cPanel accounts. If you don’t have any package, then you can click the button ‘Select Options Manually’ and set limitations.
6 ) Settings
We can select the Theme and Language from here.
In cPanel, we are commonly using the following themes.
– X3 or paper_lantern for accounts that host websites.
– X3mail for accounts that only serve mail.
Locale option is used to select the language which you want.

7 ) Reseller Settings
If you want to create a reseller account, then you can select the option ‘Make the account a reseller’. If you want to allow the new reseller to own the account, then you can select the option ‘ Make the account own itself’, i.e. the user can modify the account.

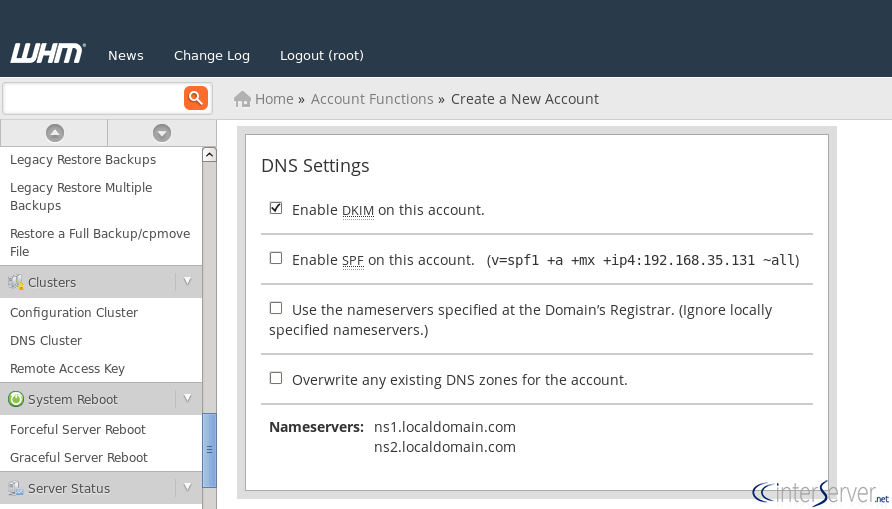
8 ) DNS Settings
We can enable DKIM and SPF to the account by clicking the corresponding options from DNS settings. These two options are using as spam prevention methods.
If the nameservers of the domain are going to be on another server, select the option ‘Use the nameservers specified at the Domain’s Registrar’.
If you want to check for DNS zones that may conflict, you can click the option ‘Overwrite any existing DNS zones for the account’. That will overwrite the existing DNS zone.
9 ) Mail Routing Settings
We can use mail routing settings to specify how mail should be routed for the newly created account. You can select one of the following.
Automatically Detect Configuration – This is the default and recommended configuration. It automatically detects the suitable settings.
Local Mail exchanger – It accepts mail locally for the new account.
Backup Mail Exchanger – This option configures the server to be a backup mail exchanger.
Remote Mail Exchanger – This option can be used if it does not accept mail locally for the domain.
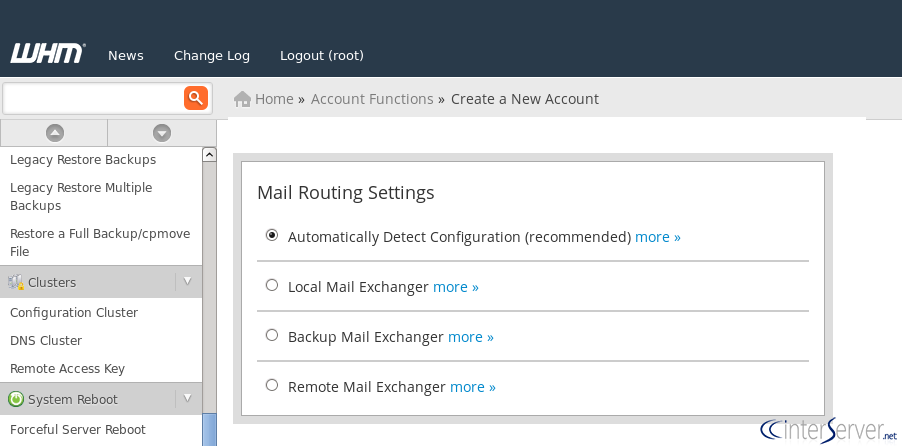
After updating the details, you can click the ‘Create’ button to create the account.
This is how we can create cPanel accounts from WHM.
If you need any help with the account creation, please contact our support department and we will help you with it.
Related guides
How to Install and Uninstall JetBackup for cPanel
How to Install JetBackup for cPanel. JetBackup is one of the leading backup solutions for cPanel & WHM that offers a user-friendly GUI. It provides
WHMSetup SendGrid on your cPanel VPS/Server
Setup SendGrid on your cPanel VPS/Server. SendGrid provides a cloud-based service for reliable transactional and marketing email.
WHMChange cPanel Nameserver Software to PowerDNS Carefully
Review WHM nameserver selection, resolver dependencies, cluster compatibility and DNSSEC requirements before a planned PowerDNS service change.
WHMTroubleshooting Jailed Shell on OpenVZ
cPanel/WHM providing Jailed shell environment for users, this feature giving high-level security for users when doing ssh access to their server.