
GICT knowledge base
How to Enable Demo Mode in WHM?
Published
In this tutorial, we are going to discuss about how to enable/disable demo mode in WHM. This feature allows you to convert any cPanel account on your server to a demo account in which we can provide the clients with a demo cPanel account so that the users can log into the account and browse. It restricts the users from making live changes to the website. The demo account appears to be fully functional but restricts the user’s ability to alter files and folders. It is commonly used as a sales tool for showing the appearance of their control panels to their clients. You can refer the following steps to enable demo mode in WHM.
1) Log in to your WHM.
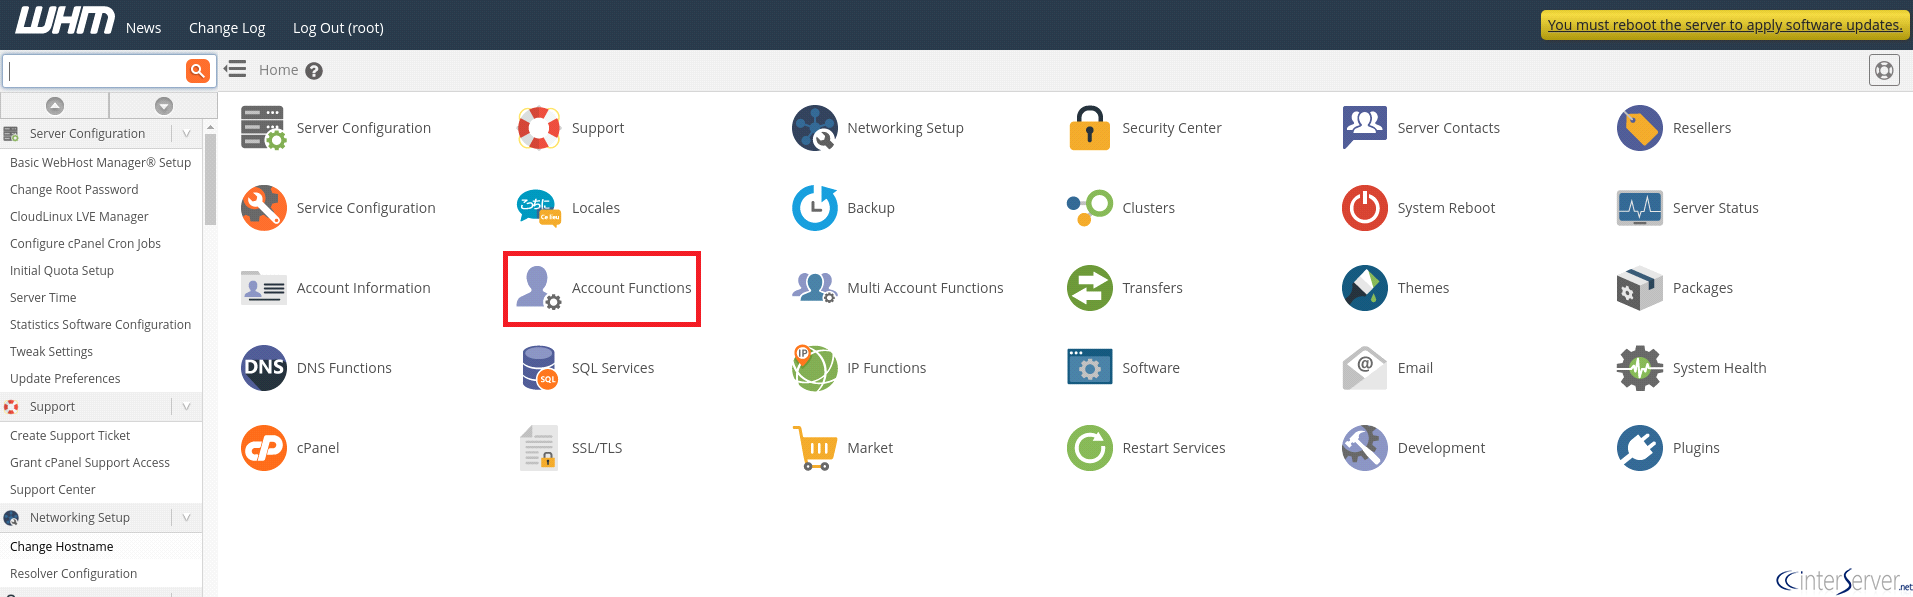
2) Click on the “Account Functions” icon.
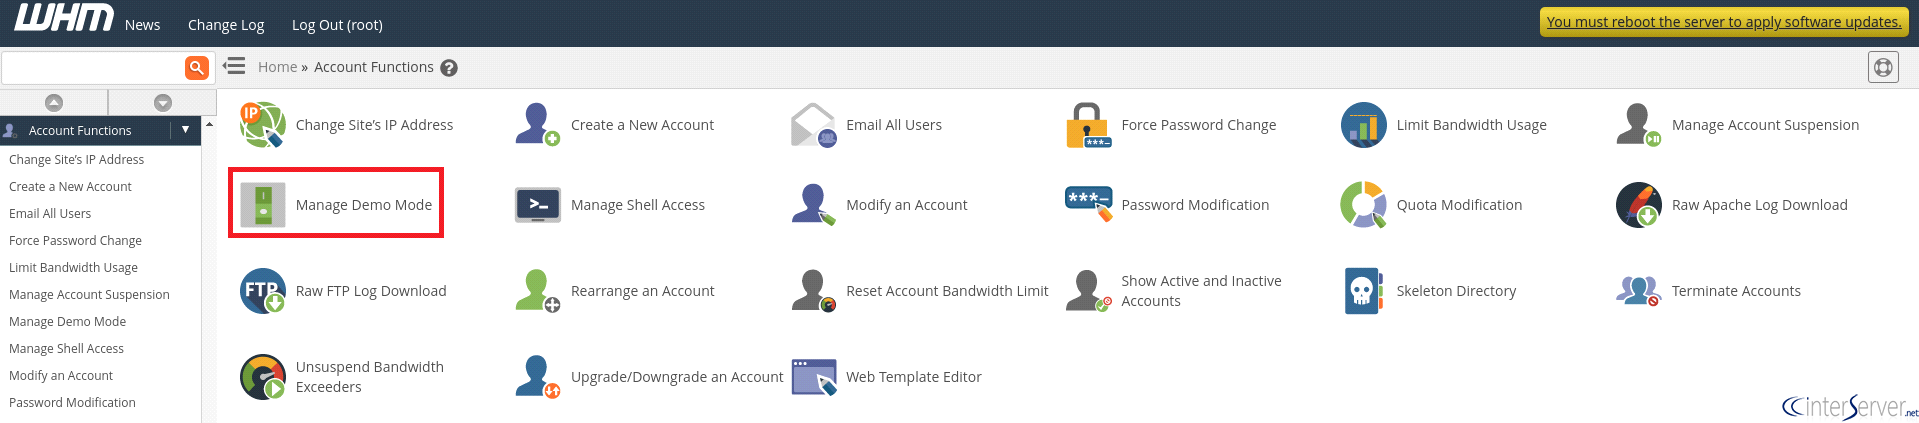
3) Click on the “Manage Demo Mode” icon.
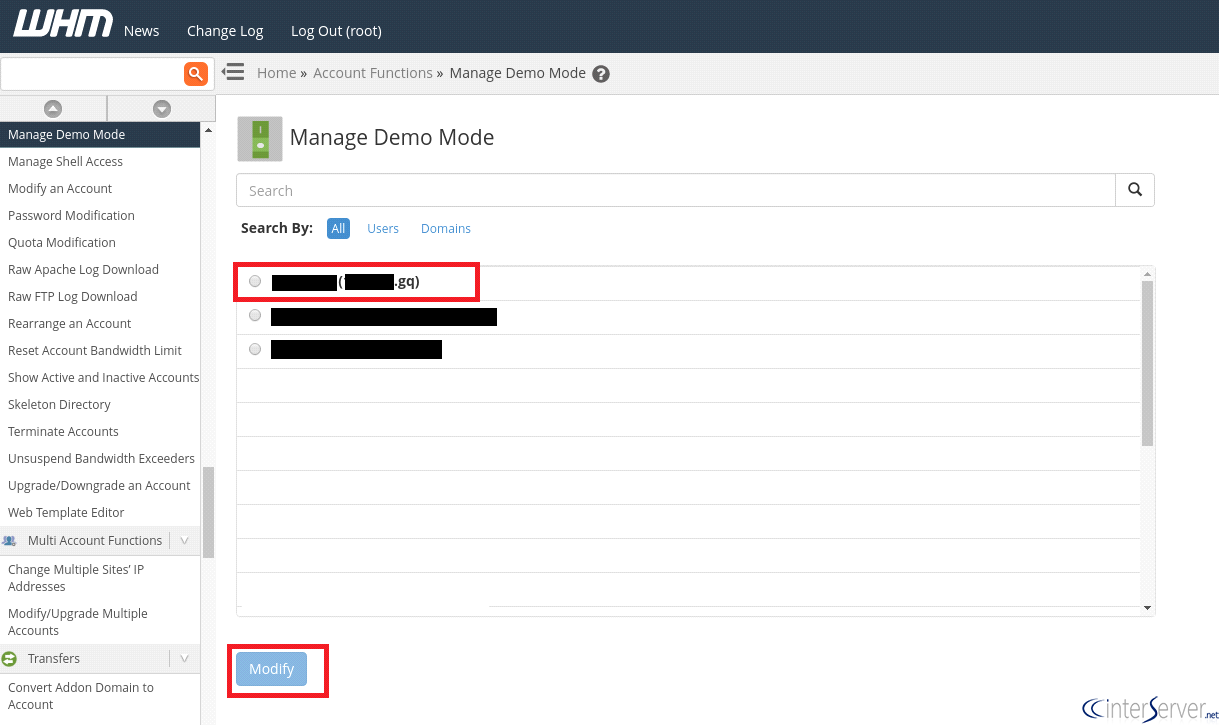
4) Select the account which you want to enable demo account and click the “Modify” button.
5) Click the “Enable” button.
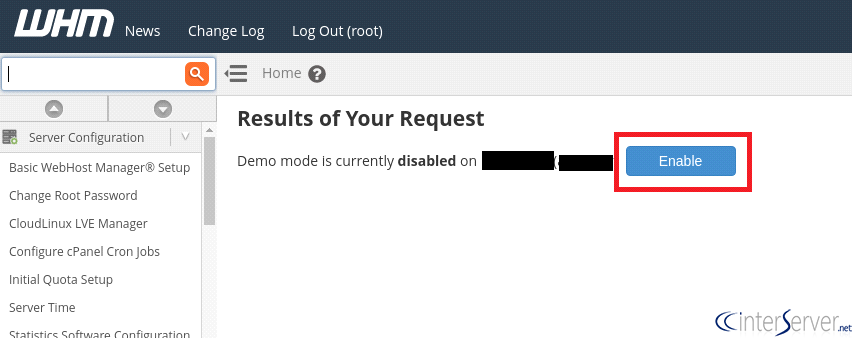
6) Click the “Disable” button if you want to disable this feature.
If you need any further help, please do reach our support department.
Related guides
How to Install and Uninstall JetBackup for cPanel
How to Install JetBackup for cPanel. JetBackup is one of the leading backup solutions for cPanel & WHM that offers a user-friendly GUI. It provides
WHMSetup SendGrid on your cPanel VPS/Server
Setup SendGrid on your cPanel VPS/Server. SendGrid provides a cloud-based service for reliable transactional and marketing email.
WHMChange cPanel Nameserver Software to PowerDNS Carefully
Review WHM nameserver selection, resolver dependencies, cluster compatibility and DNSSEC requirements before a planned PowerDNS service change.
WHMTroubleshooting Jailed Shell on OpenVZ
cPanel/WHM providing Jailed shell environment for users, this feature giving high-level security for users when doing ssh access to their server.