
GICT knowledge base
How to Enable or Disable WordPress Automatic Updates
Published
WordPress is an awesome content management system that powers millions of websites online. It is an Open-source content management system. It means that thousands of developers all around the world contribute to the system. To deliver all the changes and improvements provided by the developers to end users, WordPress has an upgrade feature. It allows us to update WordPress whenever we want, or we can set the settings to automatic.
It is a good practice. Automatic Updates protects your site when vulnerabilities arise in WordPress. In this tutorial, I will show you two methods to manage automatic updates in your WordPress. Here are the methods.
- Enable or Disable Automatic Updates from wp-config.php.
- Manage Automatic Updates using a plugin.
Let’s get started with the first method.
Enable or Disable Automatic Update from wp-config.php
To use this method, you must have permissions to access and update wp-config.php file on your server. If you have this access, log in to your cPanel and click on the File Manager.
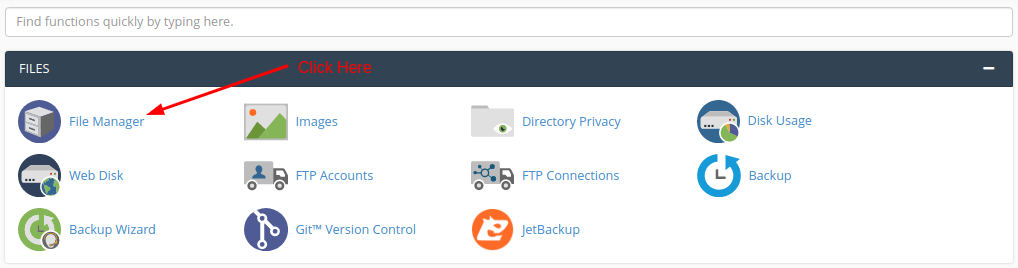
Now, find and edit the wp-config file of your WordPress site.
If you want to enable automatic updates, You have to add the following line to your wp-config.php file.
define('WP_AUTO_UPDATE_CORE',true);
You can add it anywhere you want in the wp-config.php file. We recommend you to add it at the end of the file to keep it more readable. In this tutorial, I have added it in the middle of the file.
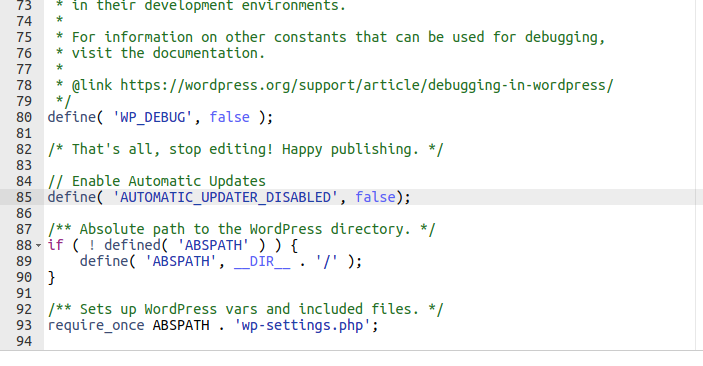
And, if you wanto to disable automatic updates, you have to add the following line or update the existing line like the following.
define('WP_AUTO_UPDATE_CORE',false)
This is how you can manage automatic updates manually. If you don’t have access to edit the wp-config.php file, you can use the second method.
Manage automatic updates using a Plugin
One of the best plugin to manage automatic updates is Easy Updates Manager. Install and activate that plugin from the plugins manager.
Once installed and activated, click on the Updates option from the admin bar. See the following screenshot for reference.
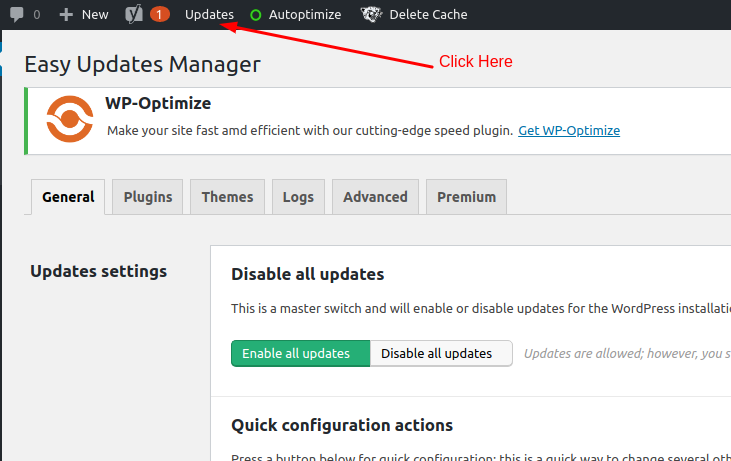
On this page, you will be able to set the whole update plan. You can manage different types of updates. There are a lots of update options available for you in this plugin.
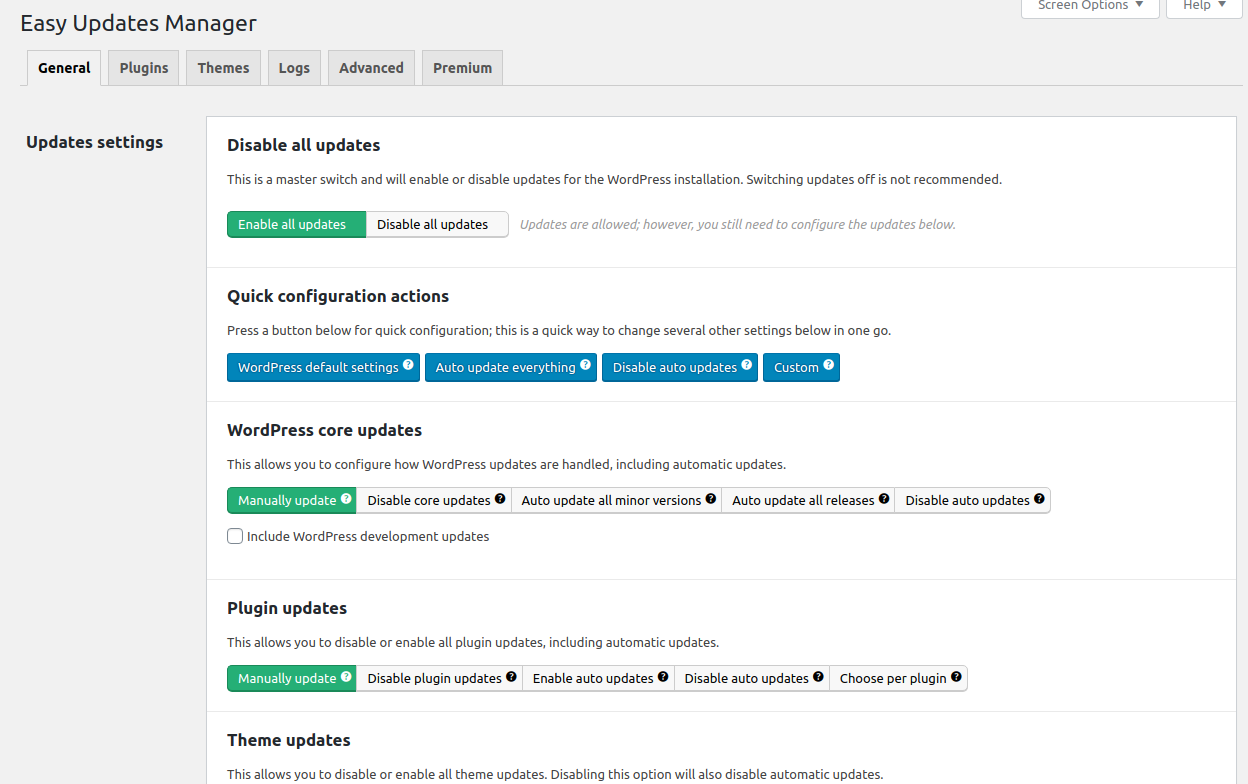
Update the settings according to your requirements. You do not have to find the save button because all the changes are done instantly. So, this is how you can manage automatic updates in WordPress using a plugin. This method is recommended as it allows you to have more control on Automatic updates.
We hope this tutorial was helpful for you. If you have any questions regarding automatic updates in WordPress, please let us know in the comment section given below. If you are an active InterServer customer, feel free to contact our awesome support staff.
Related guides
7 Common Hosting Mistakes Beginners Make (And How to Avoid Them)
7 common hosting mistakes beginners make in 2026: no backups, ignored updates, bad host choice, weak passwords, single point of failure, no staging. With fixes for each.
WordPressWebsite Migration Backup Checklist: What to Save and How to Test
Prepare a website migration backup: inventory files, databases, email and DNS, check archive integrity, test recovery and plan a safe final synchronization.
WordPressCore Web Vitals in 2026: A Practical Fix Guide for Site Owners
Core Web Vitals 2026: practical fixes for LCP, INP, and CLS. Real root causes, what to measure, common misconceptions, and a priority order of fixes for site owners.
WordPressFixing the WordPress “Death Loop”: When Missing Files slow down your site
You’ve just launched your new WordPress site or pushed a big update. In your staging environment, everything ran perfectly.