
GICT knowledge base
cPanel Plugin File Generator
Published
In cPanel & WHM there is a feature called “cPanel Plugin File Generator” which allows you to generate an installation file for a cPanel plugin. The installation file automates the plugin installation process and stores the desired configuration for your plugin. In the cPanel interface, items function as links to particular interfaces (for example, Email Accounts or File Manager). Each item must reside in a group (for example, Files or Databases). Here, plugins allow you to add links from the cPanel interface to your own applications or to third-party sites. This interface creates plugin files that can contain one or more items.
1) Login to your WHM.
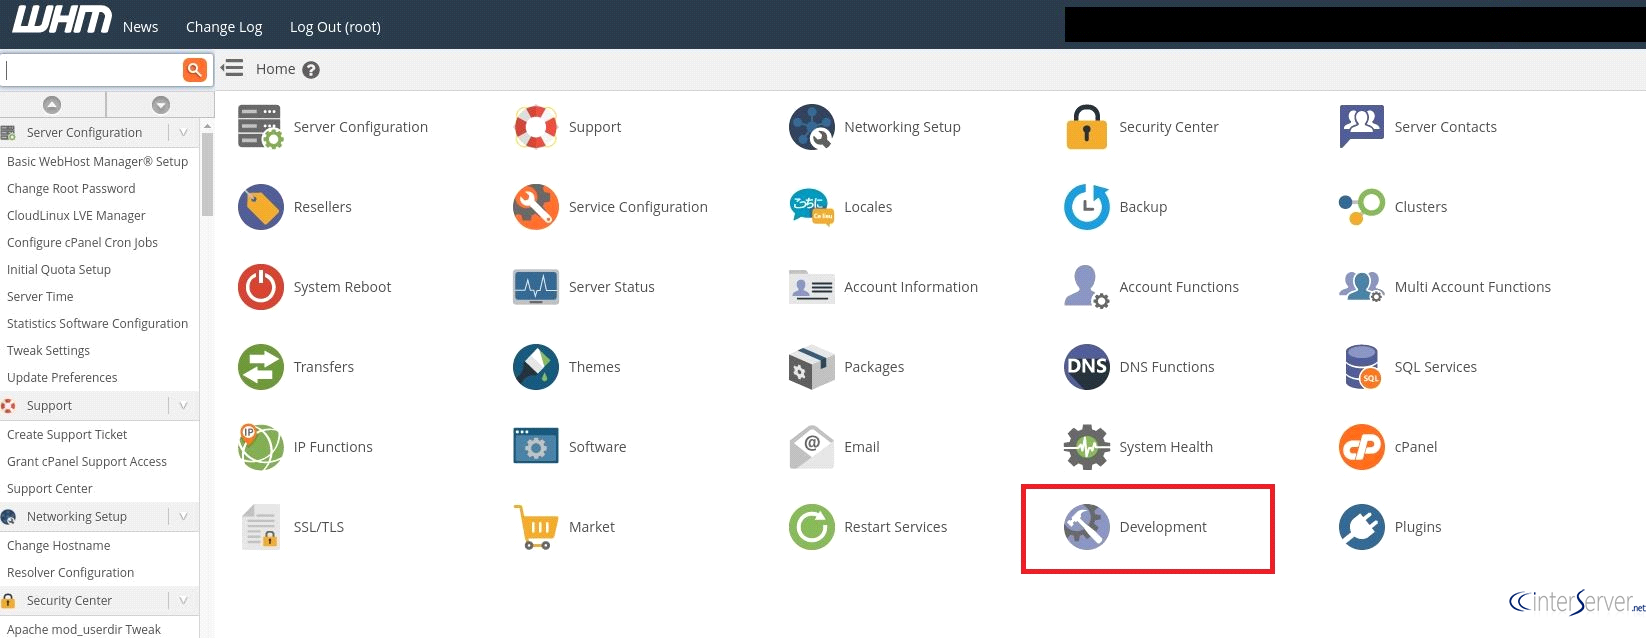
2) Go to “Development” section from the page.
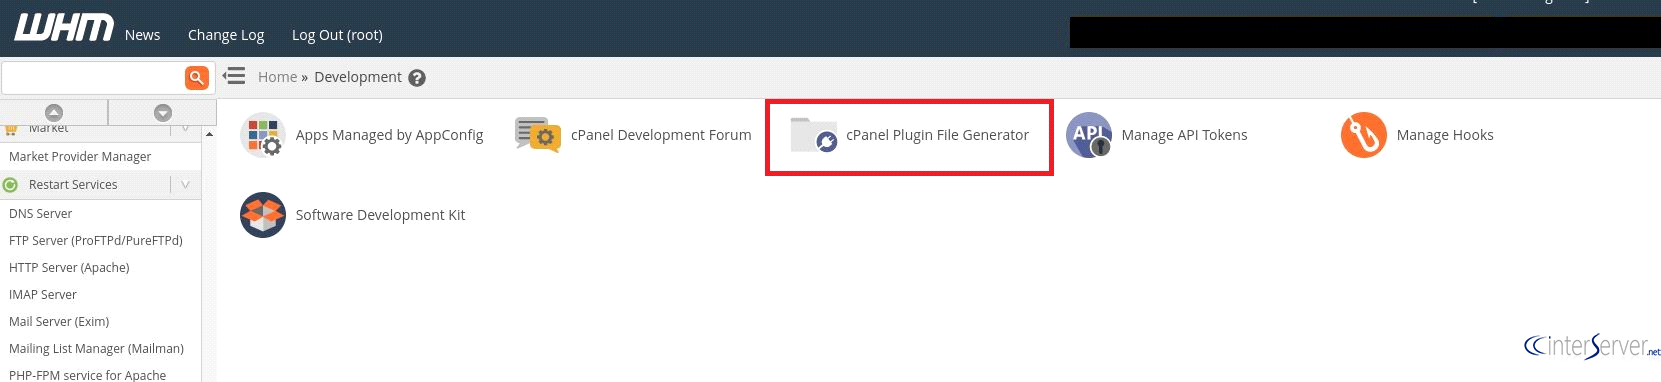
3) Next, you need to select the option “cPanel Plugin File Generator”.
4) Perform the following steps to generate a plugin installation file.
Use the left side of the form to add each of your desired items, then click the “Generate” button on the right to generate the plugin.
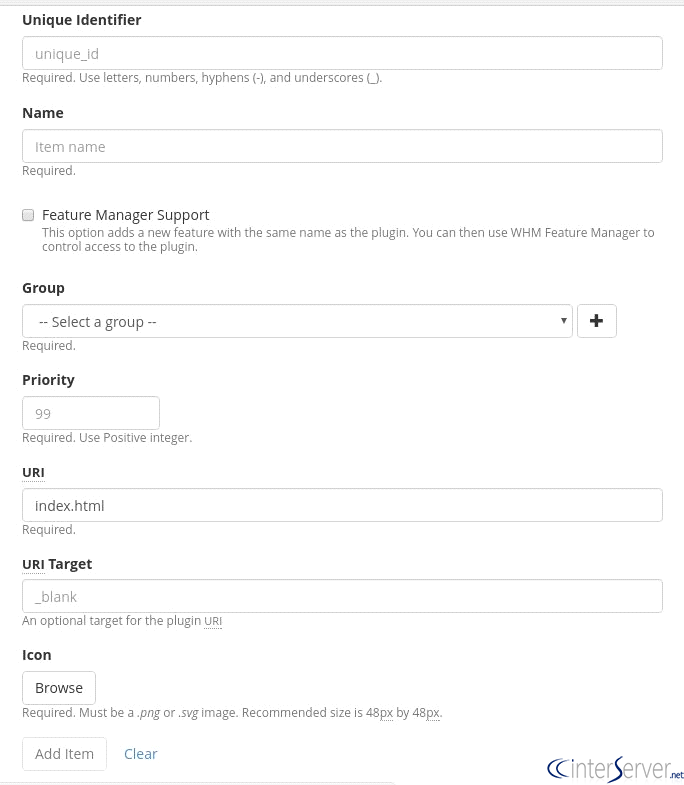
1) The first field is “Unique Identifier” text box, here we need to enter the plugin’s identifier value. If the Unique Identifier which you have entered already exists, then a warning message will appear. If you want to overwrite the existing plugin, then select the Overwrite existing cPanel item checkbox. If you want to keep the existing plugin, you must enter a different Unique Identifier value.
2) Here, enter the display name in the “Name” text box.
3) Next, select the group in which the plugin icon will appear from the “Group” menu. If you want to create a new group, then click on the add icon (plus button) and enter the new group name in the New Group Name text box.
4) Here, you need to enter a number between 1 and 99 in the “Priority” text box. A plugin icon with a priority of 1 appears higher than an icon with a priority of 99.
5) Now, enter the plugin location in the “URI” text box.
6) Click “Browse” to select an icon file for the plugin.
7) Last, you need to click “Add Item” to add your new item to the New Plugin Information section of the interface.
8) If you need to add another item in the plugin installation file, then Repeat steps 1 through 7 to do so. This will be the same for all the items.
9) Enter the plugin’s name in the “New Plugin Information” text box and click Generate to generate the new plugin installation file.
5) To download the new plugin installation file, click the link in the banner that appears at the top of the interface. The system saves the file in .tar.gz format in the /var/cpanel/cpanel_plugin_generator/ directory.
6) After you download the plugin installation file, use the following script to install the plugin to the Paper Lantern theme.
# /usr/local/cpanel/scripts/install_plugin
If you need any further help, please do reach our support department.
Related guides
Host Additional Domains on an Eligible InterServer Account
Check your hosting limits, choose a separate site or alias and use cPanel or DirectAdmin with deliberate DNS, content and certificate verification.
cPanelHardening Your cPanel Server: Beyond the Basics After CVE-2026-41940
Security is a moving target. With the recent discovery of CVE-2026-41940, it has become clear that just having a firewall isn't enough anymore.
cPanelcPanel and Plesk notice: Awstats,. Webalizer and Analog stats are being removed
Important Update: cPanel and Plesk Phasing Out Legacy Statistics Tools If you regularly check your website traffic through your hosting control panel, we have an...
cPanelThe dangers of shared licenses (in other words unofficial/cracked licenses)
Why Cracked cPanel Licenses Aren’t Worth the Risk: A Guide for InterServer Customers When you’re managing a server, every dollar counts.