
GICT knowledge base
Mount Custom ISO on KVM VPS
Published
You may already know that InterServer provides a vast list of operating systems to choose from when creating your VPS. But did you know that you can also upload custom ISO files and create a VPS with the image OS of your choice? This tutorial will guide you through the process.
VPS Specifications
You can purchase a VPS ranging from one slice to 32 slices. Each slice starts at $3/month and includes:
- 2GB RAM
- 30GB Disk Space
All VPS servers come with full root/administrator access, allowing you to configure them exactly as per your requirements with total control.
Support Policy
If you need assistance with your VPS setup, support is available. However, please note our Managed Support policy:
Managed Support Policy
We offer fully managed support at no additional charge for VPS servers with 8 or more slices. For servers with fewer than 8 slices, support is limited to hardware and network stability.
KVM and OS Compatibility
Only KVM VPS servers support uploading custom ISO images. Virtuozzo (which is now sunsetted) or Hyper-V VPSs do not offer this feature. If you want to upload and run your custom ISO image, be sure to select a KVM VPS.
⚠️ Important Note for Windows Users: Windows is untested with KVM on our platform. If you intend to run a Windows-based system, we strongly recommend using our Hyper-V platform for the best stability and performance.
Custom ISO Requirements & Warnings
InterServer makes this process simple and user-friendly. Our development team has automated this feature and integrated it directly into the client portal, meaning no manual operations are required from support.
However, before you begin, please ensure your ISO meets the following criteria:
- Direct HTTPS URL: The file must be hosted on a secure SSL URL with Range Support. If this is not available, Support can pull the ISO locally for you.
- Virtio Support: Your ISO must support virtio or virtio-scsi. Due to performance issues and larger overhead, IDE is not offered as it does not provide paravirtualized support.
⚠️ Important Note on ISO Errors
While our system checks remote ISOs for range support and correct SSL, please note that an error in an ISO may cause a system to fail to load until the ISO is ejected. Errors can result from:
- Invalid file format.
- The remote URL going offline.
- Range support failing to work.
How to Upload a Custom ISO
Want to learn how to upload your custom ISO? Follow our step-by-step guide to create a VPS tailored to your needs.
1) Log in to your InterServer client area: https://my.interserver.net/
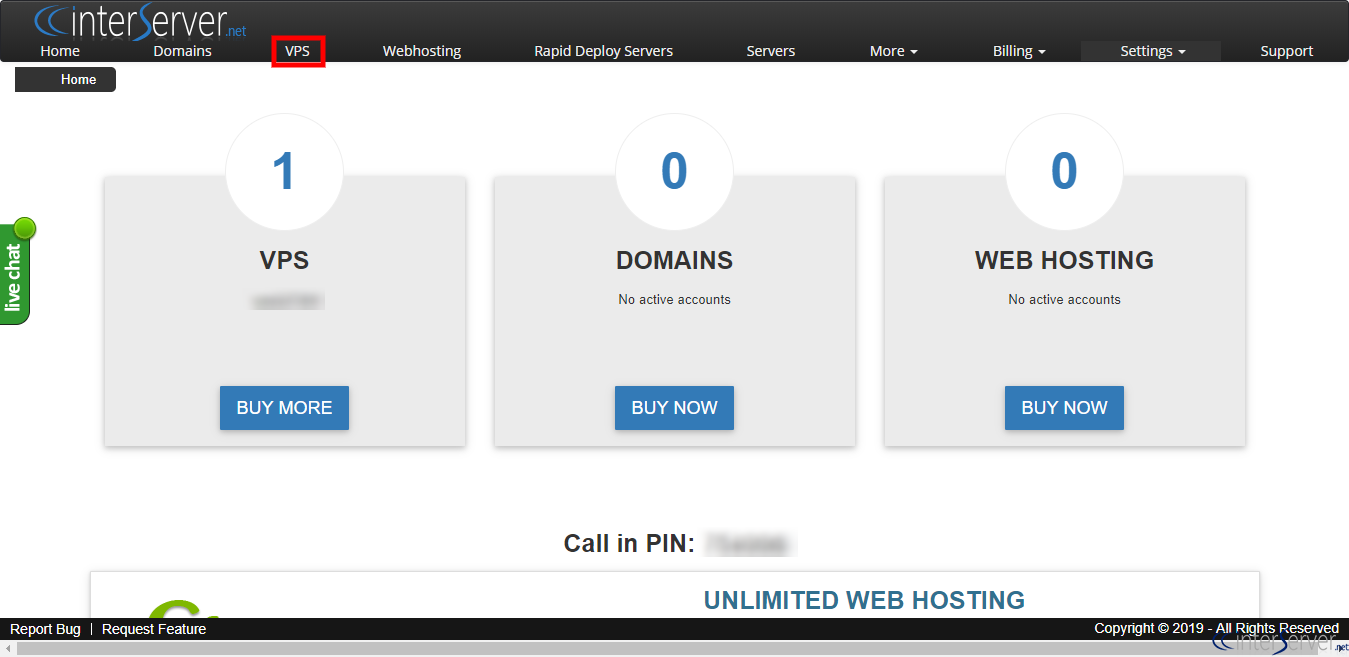
2) Once you are logged in, click on the “VPS” tab to list your active servers.
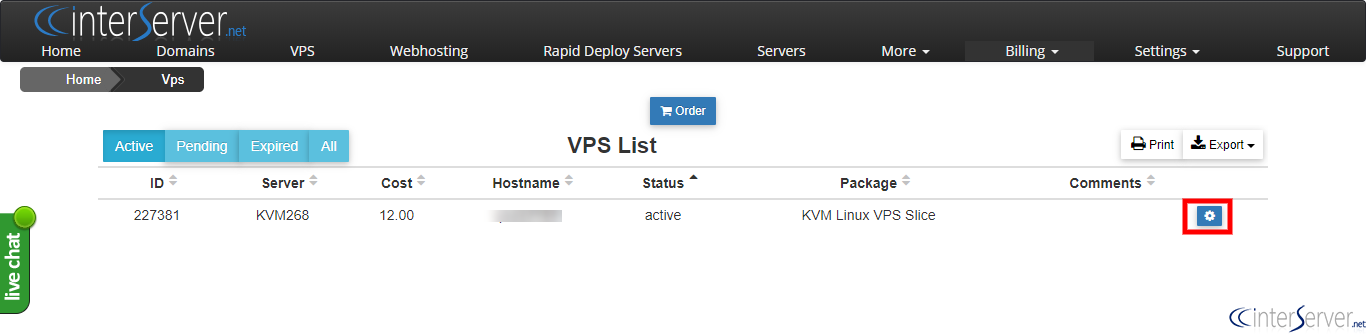
3) Click on the Gear Icon next to the VPS server to access the Management panel.
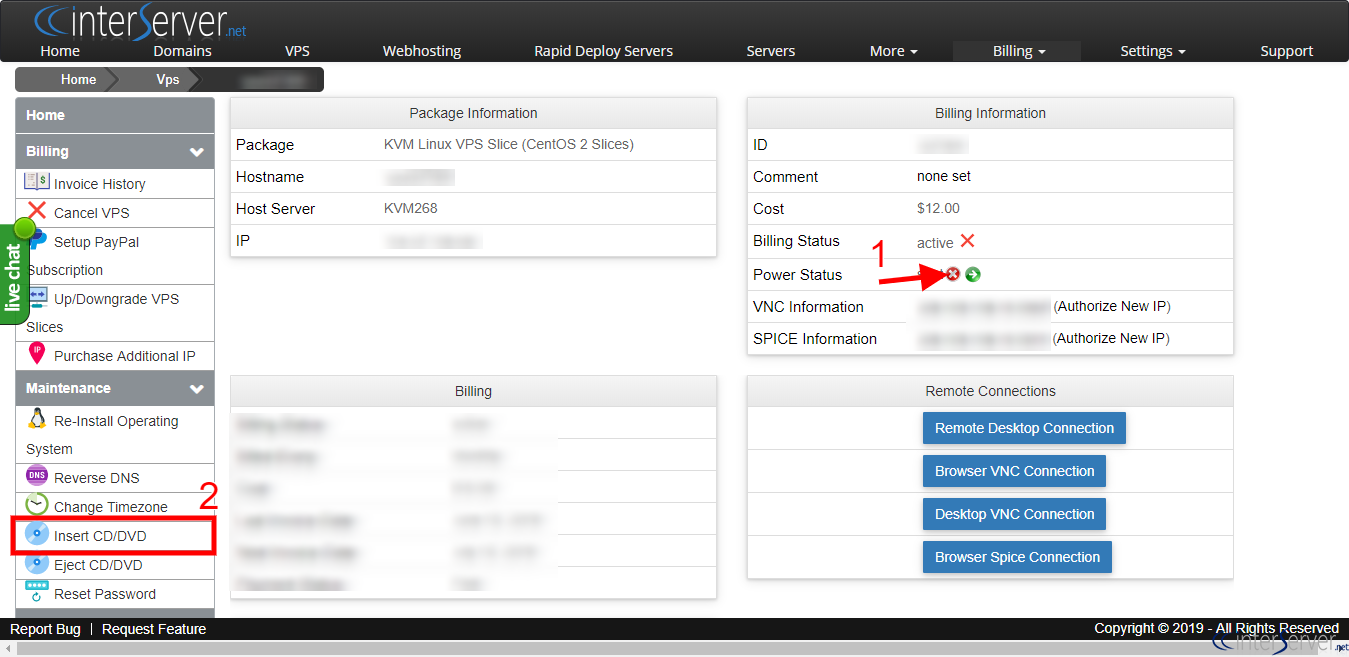
4) Once inside the VPS management panel:
- Click the red Shut Down button (top-left card next to “Power Status”) to halt the server. Please allow about 2 minutes for this action to complete.
- Once halted, click the “Insert CD/DVD” button located in the left sidebar under the “Maintenance” section.
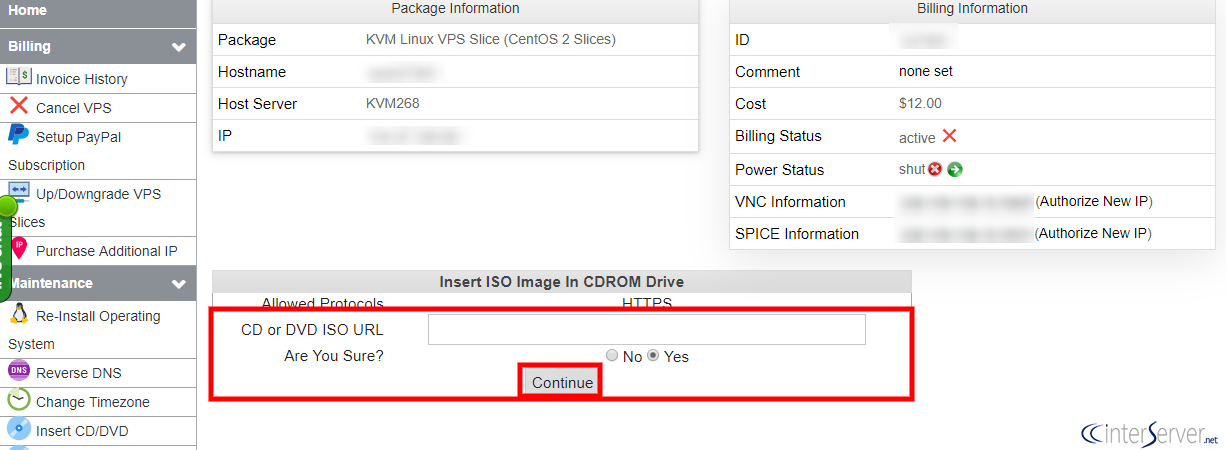
5) Paste your secure ISO URL into the field “CD or DVD ISO URL.” Select ‘Yes’ when asked ‘Are You Sure?’, then click the “Submit” button. This will mount the ISO to the VPS; please allow 2-5 minutes for the process to complete.
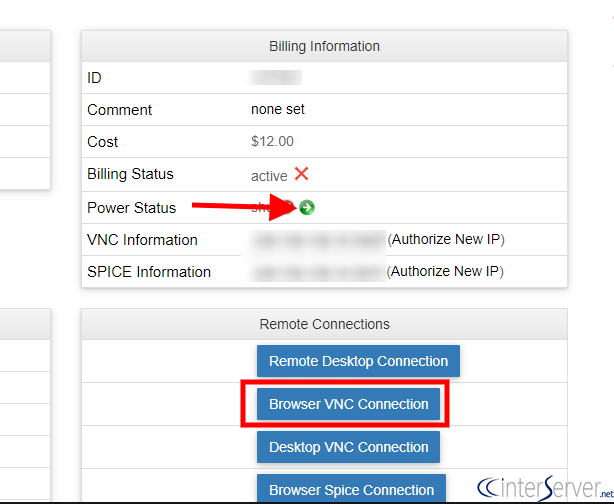
6) Once the ISO mount is complete, start the VPS again by clicking the green “Boot Up” icon (top-right box next to “Power Status”). Wait a few minutes for the system to boot. Then, connect to the server by clicking the “Browser VNC Connection” button. This will launch the system console, allowing you to proceed with the OS installation as usual.
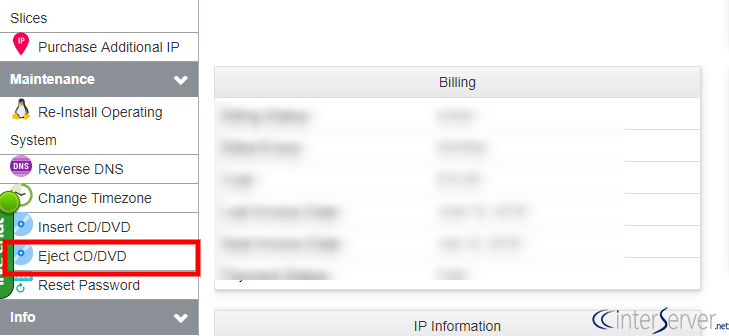
7) After the installation is complete, you must stop the VPS from booting from the CDROM. Shut down the server again, and then click on the “Eject CD/DVD” button.
And that is how you use a custom ISO on your Virtual Private Server! We hope this article helped you install your favorite OS image.
If you require additional information or need further assistance, please get in touch with our support team via [email protected].
Related guides
Nested Virtualization for InterServer KVM Systems
We regularly review our infrastructure to ensure the highest levels of performance, stability, and security for your applications.
KVMHow to view a KVM full backup file – backup (.zst)
Understanding Your Backup File If you are restoring a full backup from my.interserver.net, you might notice the file format requires a specific setup to open.
KVMRolling back a snapshot – what is kept and what is lost
Rolling Back the Clock: How ZFS Snapshots Work on Your InterServer VPS So, you’ve just signed up for an InterServer VPS, or maybe you’re considering it.
KVMIs RDP Supported on a KVM VPS? Not preinstalled by default.
Is RDP Supported on a KVM VPS? If you are looking into signing up for an InterServer KVM VPS, you might be wondering how you’ll actually interact with your new server.