
GICT knowledge base
Manage NodeJS Through cPanel
Published
Node.js is an open-source, cross-stage JavaScript runtime environment for building up a different assortment of instruments and applications. In spite of the fact that Node.js is not a JavaScript system, a number of its essential modules are composed in JavaScript, and engineers can compose new modules in JavaScript. Node.js is mainly used for hosting different kinds of applications like the Ghost blogging platform etc. InterServer now provides NodeJS support within our shared hosting servers, and you can create/manage applications easily via your hosting cPanel control panel interface.
The below are the steps on how we can install and manage NodeJS application:
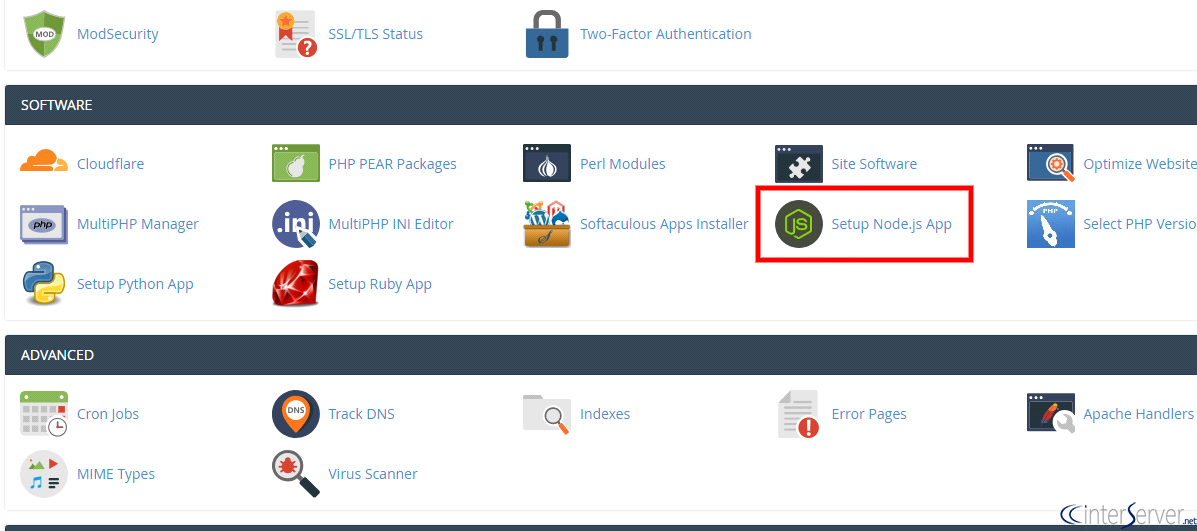
1) Login to the hosting cPanel control panel and click on “Setup Nodejs App” button under the Software tab to access the NodeJS managing area.
2) Click on the “Create Application” button at the top-right corner to create a new application.

3) Fill out the details for the new application and click on the “Create” button at the top-right corner.
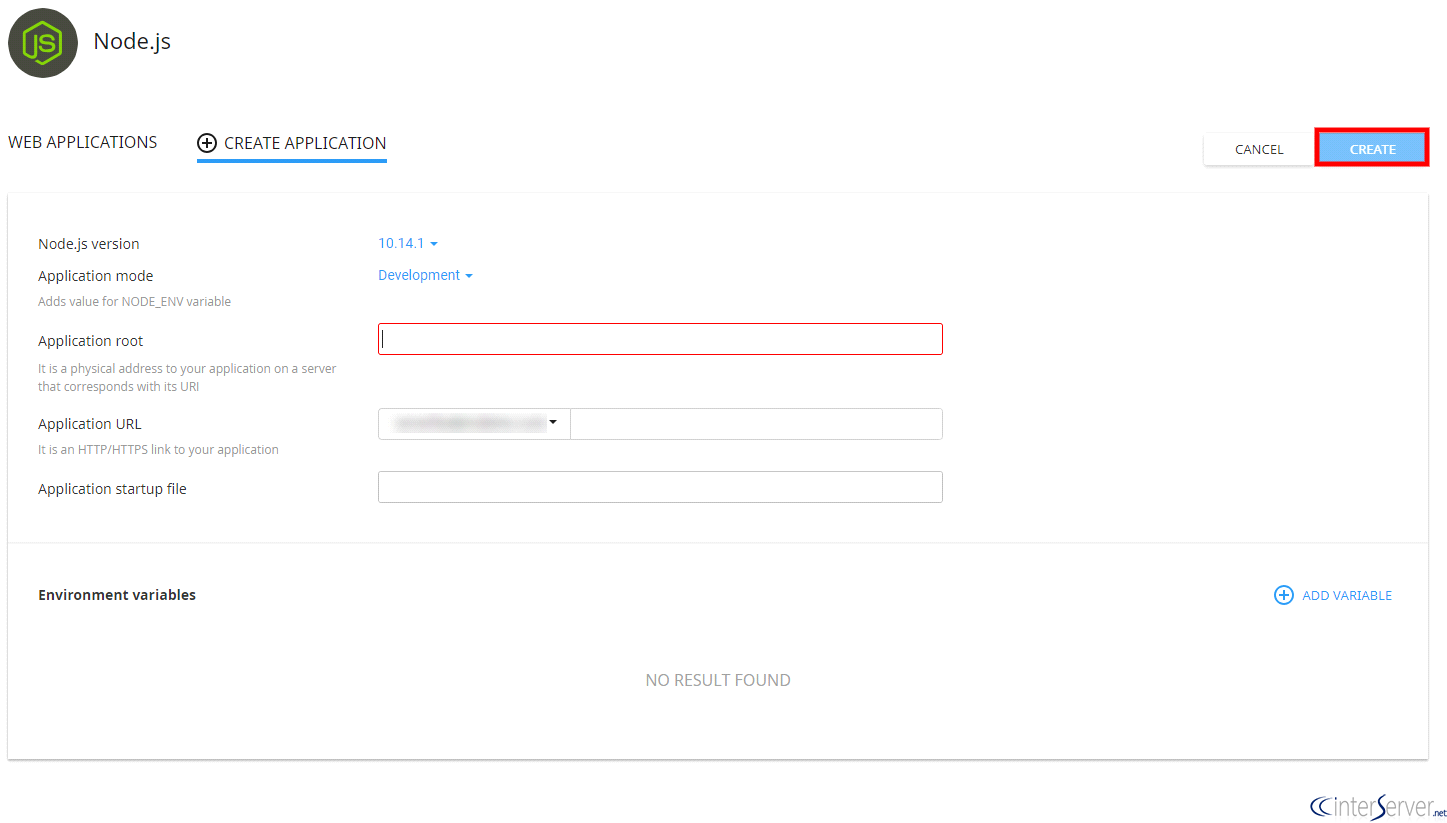
Node.js version – Select the Node.js version from the drop-down menu
Application mode – Choose application mode from the menu, either Production or Development
Application root – Specify the physical location to the application
Application URL – Specify the HTTP/HTTPS URL to the application
Application startup file – Specify the .js file name here
4) Once you have created the application, you can stop/restart/edit/remove the application via the interface.
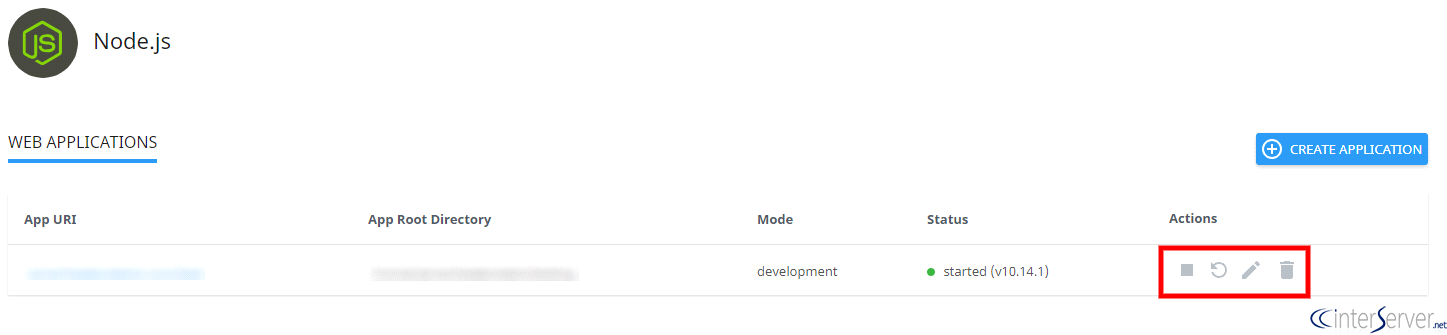
5) When clicking ‘Edit’ icon, you can make changes to the already created application including the variables you have set on it.
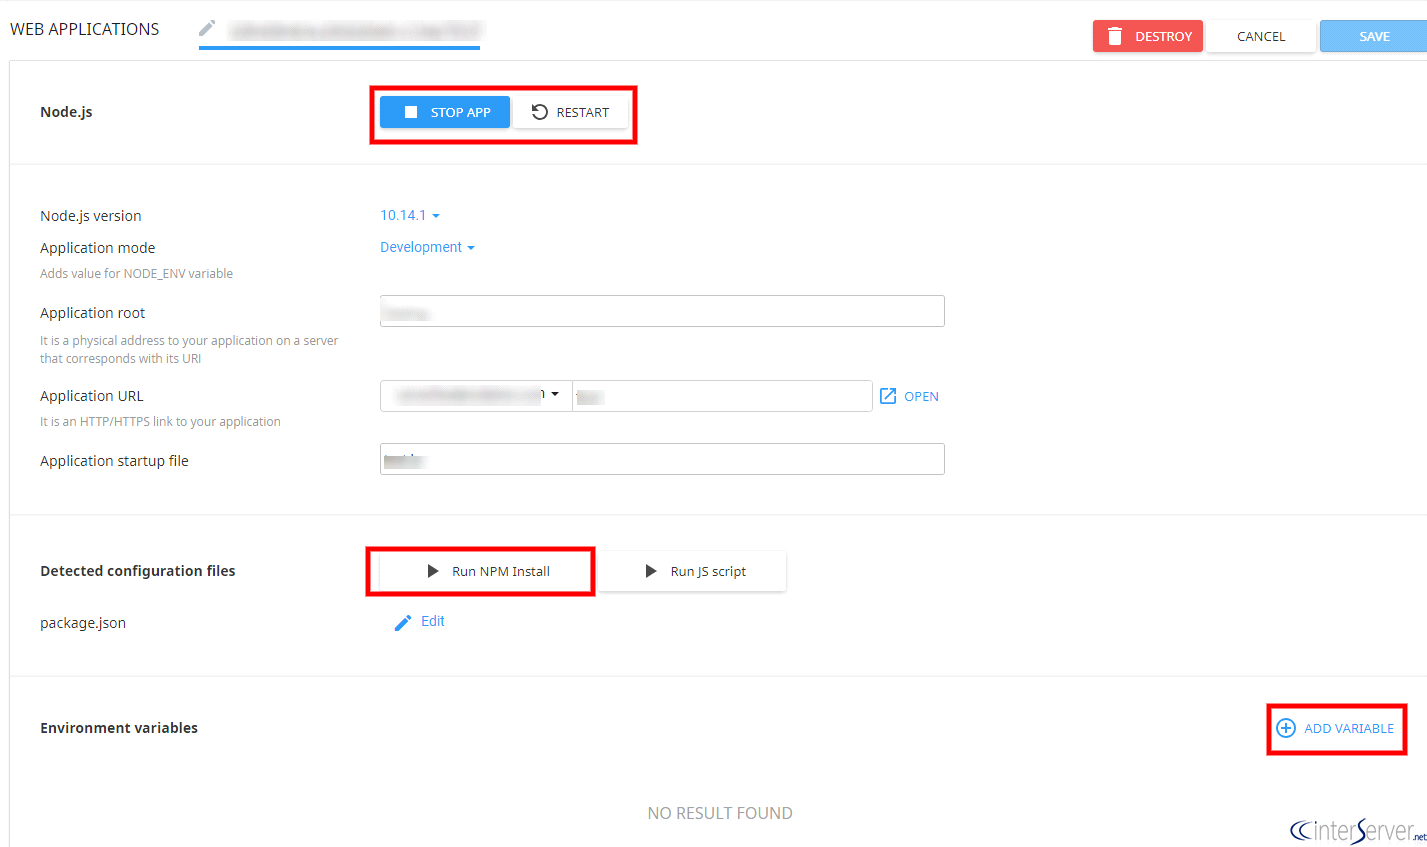
These are the options in the NodeJS application edit interface:
Stop/Restart application – You can stop/restart the application by click on that specific icon.
Destroy – To remove the NodeJS application
Run NPM Install – To install the package(s) mentioned in the packages.json file in the application root folder.
Run JS script – To run a command specified in packages.json file script section.
ADD VARIABLE – To add a variable for the application.
6) You can also alter other settings such as Node.js version, application mode/root/URL and the startup file. Once you have made the changes, click on the “Save” button and restart the application once to take in effect.
Please feel free to reach out our support department if you should require any assistance with this.
Related guides
How to Add Redis Cache to Node.js Apps
Complete guide to adding Redis cache in Node.js apps. Learn setup, database query caching, session storage, and production tips with code examples.
Node.jsHow to Deploy Node.js Applications with Nginx
Learn how to deploy Node.js apps with Nginx reverse proxy. Complete step-by-step tutorial covering server setup, SSL certificates, PM2 process management, and production...
Node.jsHow to create CRUD API with Node.js and Express – Beginner’s Guide
Learn how to build a simple CRUD API with NodeJS and Express in this beginner-friendly guide.
Node.jsHow to Delete Data in MongoDB Using Node.js
Master data deletion in MongoDB using Node.js with safe filters, bulk operations, soft deletes, and best practices for performance, security, and compliance.