
GICT knowledge base
How to Install and Configure Node.js and NPM on Windows
Published
Node.js is an open-source, cross-platform JavaScript runtime environment that executes JavaScript code without a web browser. It was created in 2009 by Ryan Dahl, and the Node.js Foundation sponsors its development. Node.js allows developers to run JavaScript on the server side, previously limited to only running on the client side, in web browsers.
Node.js uses the V8 JavaScript engine, the same engine that runs JavaScript in Google Chrome, to execute code. It allows for efficient and fast performance. Node.js also has a built-in package manager called npm (Node Package Manager), which makes it easy to install and manage modules and packages for use in Node.js applications.
Node.js is widely used for building web applications, real-time applications, command-line tools, and more. It is popular among developers due to its asynchronous, non-blocking I/O model, making it well-suited for handling multiple connections simultaneously, such as in web servers or real-time applications. It makes Node.js an ideal choice for building scalable and high-performance applications.
Node.js also has a large and active community, which has created a wide range of modules and packages that we can easily integrate into Node.js applications. It has greatly reduced the development time for many projects. Let’s dive in and learn how to install Node.js and npm on Windows Enviroment.
Install Node.js and NPM on Windows
To install Node.js and npm on Windows, download the installer from the official website, run the installer, follow the prompts, restart your computer, then verify the installation by running node -v and npm -v in Command Prompt or PowerShell. It is also recommended to set the environment variables for Node.js and npm to easily run from any directory. In this article, we will learn how to install Nodejs and npm on the Windows environment. So follow the steps from here.
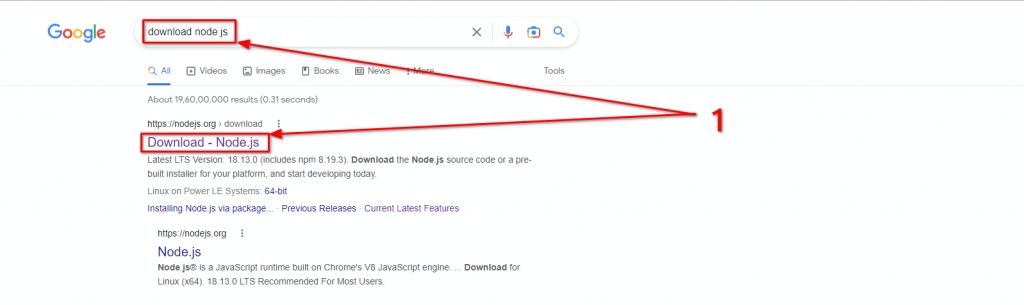
Step 1: Open any browser you have and goto google search engine. Then, search for “Downlod Nodejs”. Then, click on the first link that is available as “Downalod – Node.js” as shown in the image below.
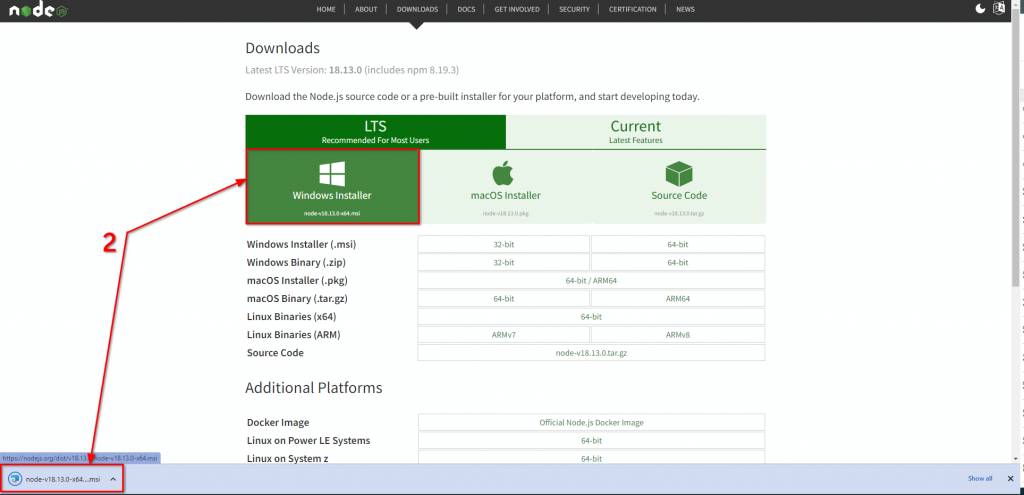
Step 2: Click on the Windows Installer from the official Node.js website. Once you click on the version button, the download process will automatically start, as seen in the image below.
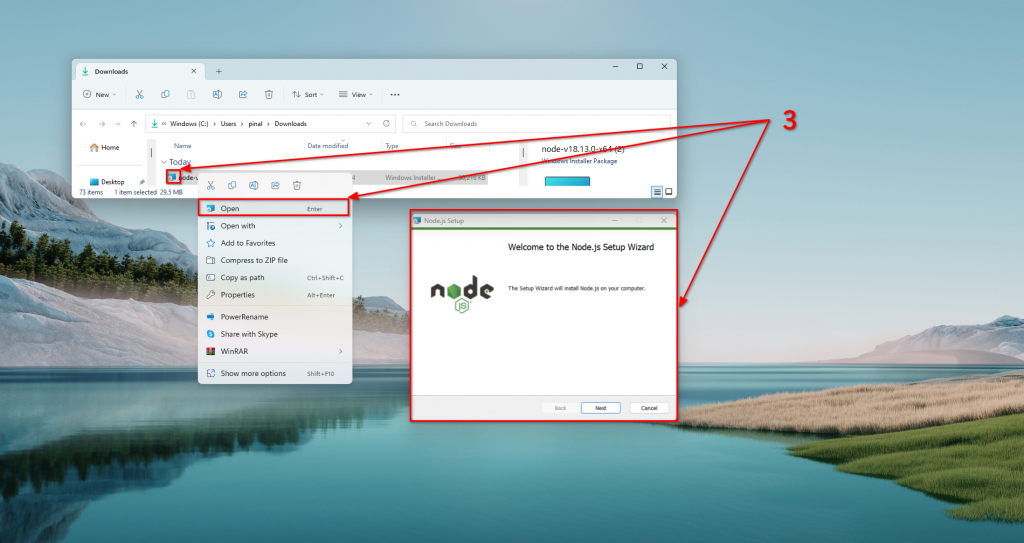
Step 3: Once the download process is finished, go to the file folder. Then double click on the Node.js setup file and execute it. A new pop-up window will be open, as seen in the image below.
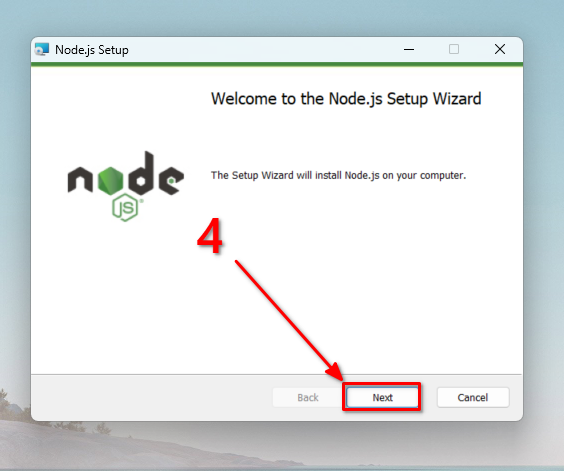
Step 4: Then, click on the “Next” button to start the installtion process. See below image as a reference.
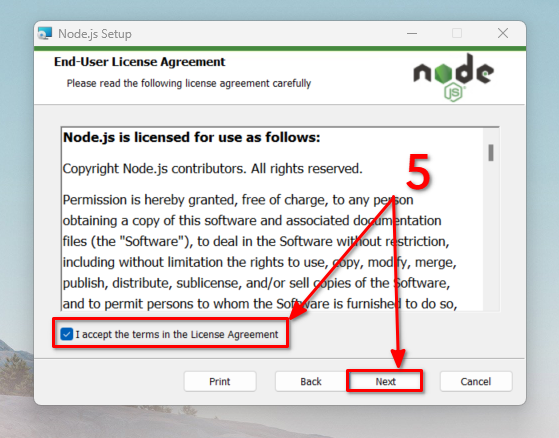
Step 5: Here, click on the checkbox that is available just below the lisence agreement. Then, click on the next button as shown in the image below.
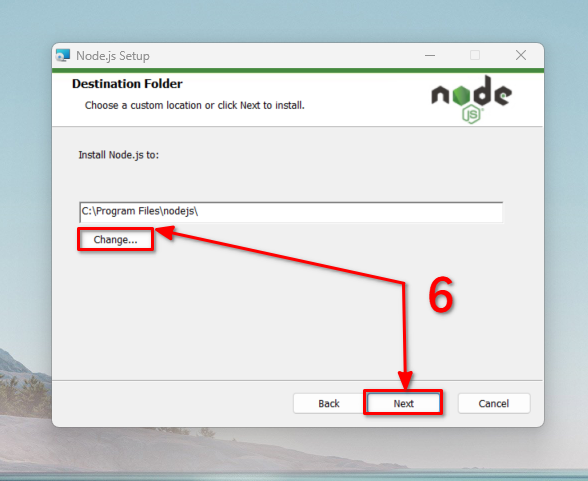
Step 6: After accepting the lisence and terms, the setup will ask for the location where you want to install the Node.js. You can change the location using Change button, then click on the next button as shown in the image below.
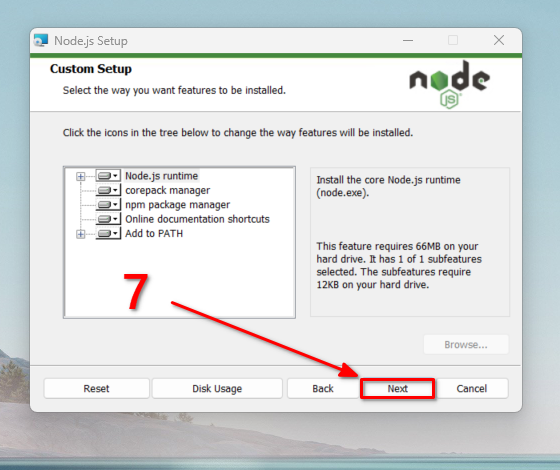
Step 7: On the next page, this installer will give brief information about the features included in this setup. Here you can see that npm will also install using this setup. Leave as it is and click on the next button as shown in the image below.
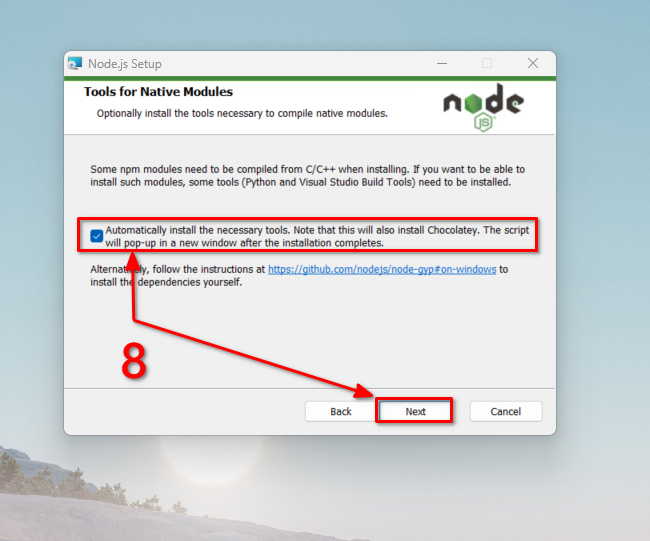
Step 8: On the next page, click on the checkbox that says “autometically install necessary tools.” Click on the next button as shown in the image below.
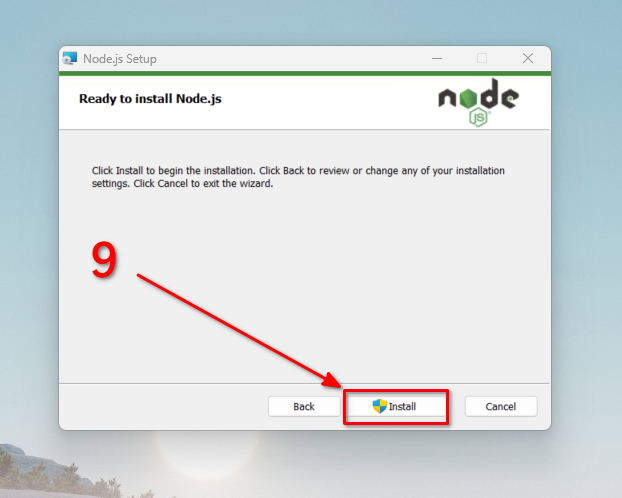
Step 9: At the end, click on the Install button to start the installation process, as seen in the image below. Once you click on the install button, a authentication pop-up will come, click on Yes to continue the installation process.
Step 10: Once the installation process is completed, click on the Finish button as shown in the image below.
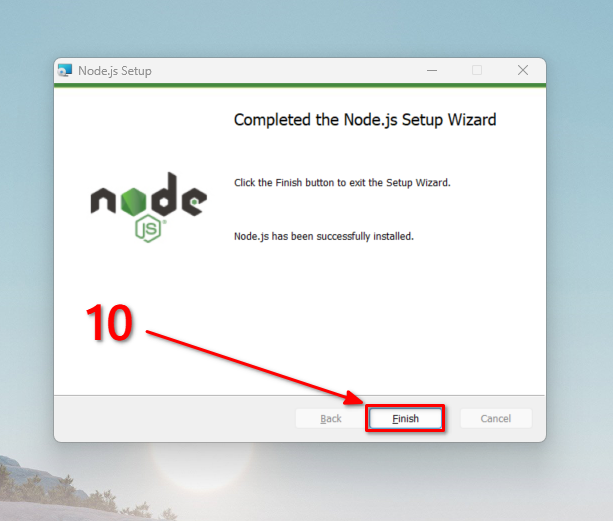
We just successfully installed Node.js and npm on windows system. Now, follow the below steps to verify the Node.js and npm.
Verify Node.js and NPM installation
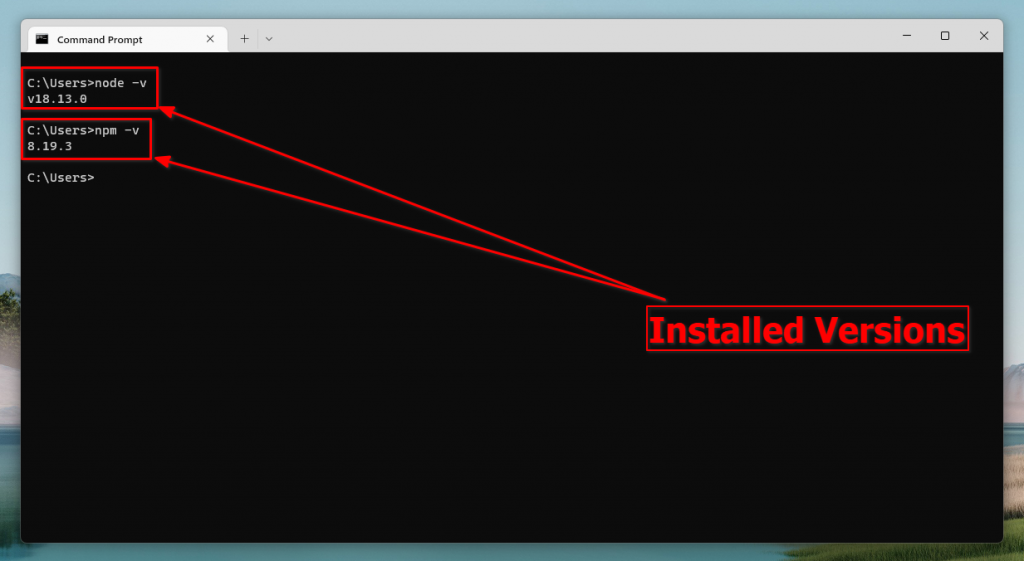
Goto start and search for command prompt or press Windows + R, then type cmd. Then, type “node -v” and “npm -v” that provides the installed verison information of the node.js and npm. See below image as a reference, here we show how you can verify the installation. If you cannot verify the node.js and npm after installation, try again after restarting the device.
Set up the Environment Variables
In addition, It is recommended to set the environment variables for Node.js and npm. It will allow you to easily run Node.js and npm from any directory on your computer. Mostly, the environment variables will automatically set by the Node.js installer. But still you must know how to set environment veriables on windows. Follow the steps from here to setup environment variables for Node.js.
Step 1: Search for “Environment Variables” in the Start Menu and select “Edit the system environment variables”.
Step 2: Click the “Environment Variables” button.
Step 3: Scroll down the “System Variables” section and find the “Path” variable, then click the “Edit” button.
Step 4: Click the “New” button and enter the path to the Node.js executable, typically “C:\Program Files\nodejs”.
Step 5: Click “OK” to save the new path.
Step 6: Close all open Command Prompt or PowerShell windows to ensure the changes take effect.
Conclusion
Installing Node.js and npm on Windows is a straightforward process that we can complete by downloading the installer from the official website, running the installer, and following the prompts. After installation, it is important to verify the installation by running node -v and npm -v in Command Prompt or PowerShell. Additionally, setting the environment variables for Node.js and npm will allow you to easily run the tools from any directory. With Node.js and npm installed, you can access a powerful JavaScript runtime environment and package manager, making it easier to build and manage your projects.