
GICT knowledge base
How to initialize new disks
Published
The following steps show how to initialize a new disk by using Disk Management
Open Disk Management with administrator permissions.
In the search box on the taskbar, enter Create and format hard disk partitions.
Select and hold (or right-click) Create and format hard disk partitions, and then select Run as administrator > Yes.
If you can’t open Disk Management as an administrator, follow these steps:
In the search box on the taskbar, enter Computer Management.
Select and hold (or right-click) Computer Management, and then select Run as administrator > Yes.
After Computer Management opens, go to Storage > Disk Management.
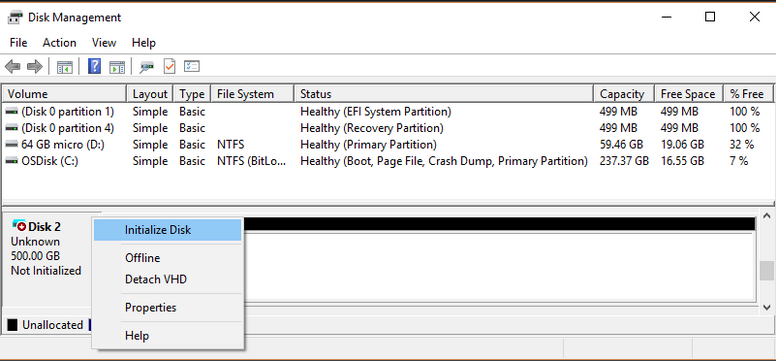
In Disk Management, select and hold (or right-click) the disk you want to initialize, and then select Initialize Disk. If the disk is listed as Offline, first select and hold (or right-click) the disk, and then select Online.
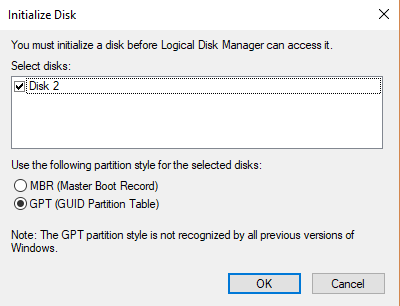
In the Initialize Disk dialogue box, make sure the correct disk is selected, and then choose OK to accept the default partition style. If you need to change the partition style (GPT or MBR).
The disk status briefly changes to Initializing and then to the Online status.
Select and hold (or right-click) the unallocated space on the drive, and then select New Simple Volume.
Select Next. Specify the size of the volume, and then select Next again.
For the volume size, the common approach is to accept the default size, which uses the whole drive.
Specify the drive letter you want to assign to the volume, and then select Next.
Specify the file system you want to use (usually NTFS), select Next, and then Finish.