
GICT knowledge base
How to set up RabbitMQ server on Ubuntu
Published
RabbitMQ is a message queuing tool written in Erlang language, developed by Pivotal Software. It is an open-source application that helps your organization to send and receive messages from server to client.
Many companies around the globe use RabbitMQ because it is reliable and easy to install and operate.
In this tutorial, we will learn how you can install RabbitMQ on your Ubuntu Linux operating system. All the necessary steps for installing RabbitMQ on your Ubuntu are mentioned below. Make sure that you execute each of these commands in the given sequence.
We have also provided the installation screenshot for your aid.
Commands To Install RabbitMQ On Ubuntu OS
Before beginning the installation process of RabbitMQ, we need to ensure that its dependencies are already installed.
We have to ensure that Ubuntu’s apt manager is updated and upgraded; the commands for doing so are mentioned below.
Prerequisites For Installing RabbitMQ
First of all, we will update repositories in Linux and purge erlang to avoid any conflict from the system. So, connect with your server with SSH and then execute the following command as a sudo or root user.
$ sudo apt-get update && sudo apt-get upgrade
$ sudo apt-get purge erlang*
It may take a few minutes. Once the execution is complete, you can start the installation of RabitMQ using the following steps.
Install RabbitMQ in Ubuntu
The installation is very simple. First we add the recommended repository to the list and update all the lists using the first 3 commands given below. Then we are installing rabbitmq-server on our system.
$ echo 'deb http://www.rabbitmq.com/debian/ testing main' | sudo tee /etc/apt/sources.list.d/rabbitmq.list
$ wget -O- https://www.rabbitmq.com/rabbitmq-release-signing-key.asc | sudo apt-key add -
$ sudo apt-get update
$ sudo apt-get install rabbitmq-server
We have successfully installed RabbitMQ on the Ubuntu server. Now we need to manage the RabbitMQ services and learn how to start and enable the RabbitMQ server.
Here are the basic commands to start and stop the RabbitMQ service whenever required.
$ sudo service rabbitmq-server start
$ sudo service rabbitmq-server stop
$ sudo service rabbitmq-server status
By default, the service will be running just after the installation. You can execute the status command to check the current status of RabbitMQ service. If it is not running, you can execute the start command to start the process.
How To Create Admin User In RabbitMQ
When we install RabbitMQ, a default user is created that has a password – guest. Since it is a default user, it has limited access.
Every tool we use has an administrator user with all the access. So, to use all the features of RabbitMQ, we have to create an admin user.
Commands For Creating Admin User In RabbitMQ
$ sudo rabbitmqctl add_user superuser superpassword
$ sudo rabbitmqctl set_user_tags superuser administrator
$ sudo rabbitmqctl set_permissions -p / superuser ".*" ".*" ".*"
Here we have created a user – superuser and its password – superpassword. We have alloted them their respective tags and have given them admin permissions. You can change the username and password of the user having all the permissions. Keep the password very strong.
What Is a Management Plugin In RabbitMQ And How To Enable It
The management plugin in RabbitMQ is a web-based graphical interface that runs on the HTTP API. The main function of this RabbitMQ management plugin is to manage the nodes and clusters in RabbitMQ.
If Web Based management is enabled in RabbitMQ. In that case, monitoring nodes and clusters become effortless, and minor configuration changes can be easily updated with the help of the web-based management plugin. So it is crucial to set up a management plugin and enable it for the users of RabbitMQ.
Execute the following Commands to install the management plugin:
$ sudo rabbitmq-plugins enable rabbitmq_management
$ sudo ss -tunelp | grep 15672
$ sudo ufw allow proto tcp from any to any port 5672,15672
You can access the RabbitMQ from your browser by using this URL http://publicIP:15672. If it is installed correctly, You will see a screen just like the following image.
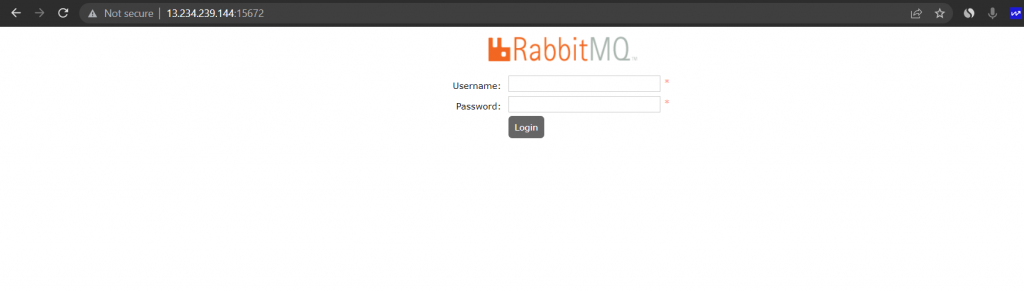
Now add the credentials, i.e. username and password, which we just created and login into the console.
How To Create Your First Exchange and Queue In Rabbitmq Through GUI
Now let’s create a queue and exchange and learn to establish a binding between them.
How To Create Exchange In RabbitMQ
Here are the steps to create exchange in RabbitMQ.
- Go to the exchange tab and click on add a new exchange.
- Type the desired exchange name
- Name : sampleexchange
- Type: Direct
- Durability: Durable
- Auto delete: No
- Internal: No
Now click on add exchange to create an exchange or to publish or create messages.
We can also delete and configure the existing exchanges from the many options available.
How To Create a Queue In RabbitMQ
The steps for creating a queue in RabbitMQ is given below.
- Click on the Queues tab in RabbitMQ user interface.
- Enter the name of the queue with other information required.
- Click on add queue.
Now our queue is ready to receive messages from the exchange.
How To Create Binding Between Exchange Between Exchange And Queue
To create a binding between exchange and queue, follow the below steps.
- Click on the Exchange tab.
- Click on the exchange and select the exchange we just created.
- Click on add binding from this exchange.
- Select a queue you want to bind. For this example, The name of the queue is SampleQueue.
- Add the queue name which you created.
- Click on bind.
Now our binding is created and we can start using the queue. Now let’s create an example message to test the binding.
How To Create A Message In RabbitMQ
Now, let us create a message in RabbitMQ to test the final set up.
Click on create a message; mention the required information. Now publish a message.
We can now see the created message in the queue tab. Click on the get messages option to view and receive that message.
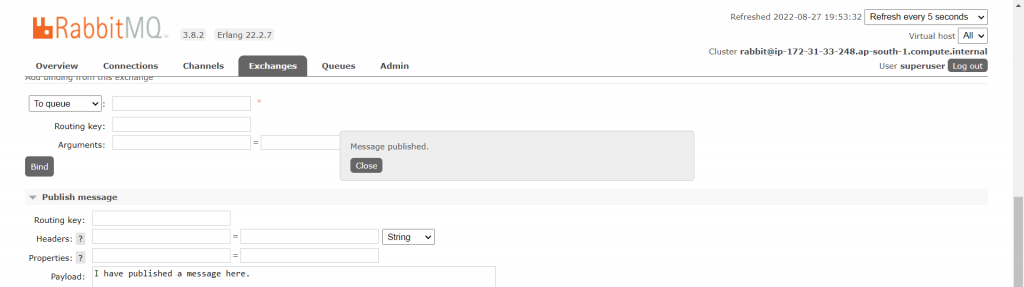
Now go to the queue and click on the sample queue. Then click on Get messages to see the list of published messages.
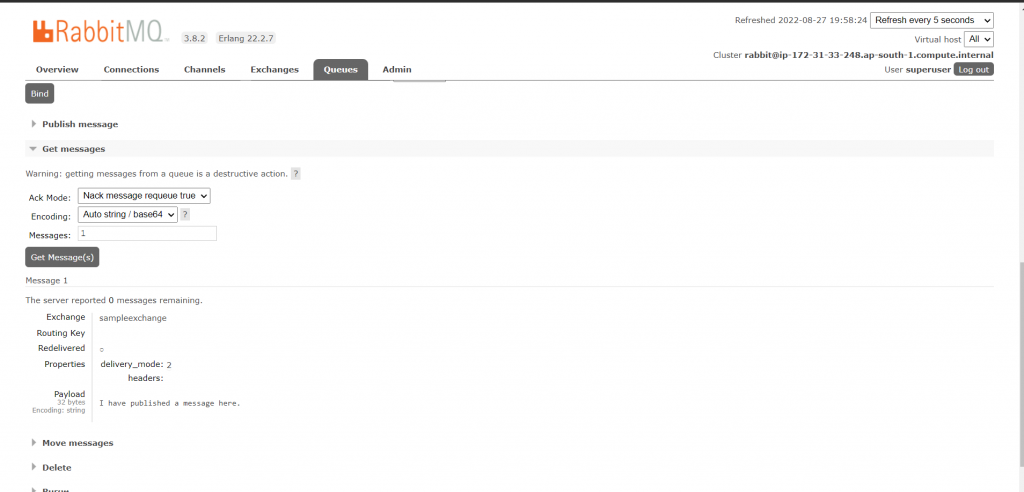
We can see our published message.
Conclusion
We have learned numerous concepts of RabbitMQ in this tutorial. Above, I have mentioned how you can install RabbitMQ on the Ubuntu operating System.
We have not only installed RabbitMQ but also created an Administrator user and assigned it the pseudo permissions.
We learned to create a web-based GUI RabbitMQ management console, developed our first exchange and our first queue, established a binding between them, and published our first message.
If you have any doubts or are facing any errors, please mention them in the comment section.