
GICT knowledge base
How to Install Redmine on Ubuntu 22.04
Published

This nifty tool is built as a web application, so you can access it conveniently through your internet browser. It’s crafted using a popular programming framework called Ruby on Rails, which ensures it runs smoothly and efficiently.
One of the great things about Redmine is its flexibility with databases. Whether you’re using MySQL/MariaDB, PostgreSQL, SQLite, or MSSQL, Redmine can work seamlessly with your chosen database engine. So, you don’t have to worry about compatibility issues – Redmine has got you covered.
Now, let’s talk installation. We’re going to walk you through the step-by-step process of installing Redmine on your Ubuntu 22.04 system. By the end of this article, you’ll be all set up and ready to take advantage of Redmine’s powerful project management capabilities. So, let’s roll up our sleeves and get started!
Required conditions:
It is necessary to have root SSH access on an Ubuntu VPS or to be a user with sudo rights.
Conventions
# – given commands should be executed with root privileges either directly as a root user or by use of the sudo command
$ – given commands should be executed as a regular user
Step 1: Use SSH to access your server.
Initially, you must use SSH to access your Ubuntu 22.04 VPS as the root user:
ssh root@IP_Address -p Port_number
The IP address and SSH port number of your server must be substituted for “IP_Address” and “Port_number,” respectively. Moreover, change “root” to the username of the system user who has sudo access.
With the following command, you may verify if the correct version of Ubuntu 22.04 is installed on your server:
lsb_release -a
Next, execute the subsequent command to ensure that every installed package on the server is updated to the most recent versions accessible:
The “root” user executes some of the commands in this article, while other users execute other ones.
apt update
Step 2: Install dependencies.
Before we can install Redmine from the source code, we must install the necessary build tools.
apt install build-essential ruby-dev libxslt1-dev libmariadb-dev gnupg2 bison libbison-dev libgdbm-dev libncurses-dev libncurses5-dev libxml2-dev zlib1g-dev imagemagick libmagickwand-dev libreadline-dev libssl-dev libyaml-dev libsqlite3-dev sqlite3
Step 3: Include a System User
To conduct tasks linked to Redmine, we will create a new system user in this stage named “redmine.”
useradd -r -m -d /opt/redmine -s /bin/bash redmine
With /opt/redmine as its home directory, the command mentioned above will create the user “redmine,” who should be able to execute shell commands. Additionally, we must include www-data, the user of our web server, in our Redmine group.
usermod -aG redmine www-data
Step 4: Set up Passenger and Nginx
We will install nginx from the Ubuntu repository in this step.
apt install nginx
Let’s install the Passenger packages next.
apt install -y dirmngr gnupg apt-transport-https ca-certificates curl
curl https://oss-binaries.phusionpassenger.com/auto-software-signing-gpg-key.txt | gpg --dearmor | tee /etc/apt/trusted.gpg.d/phusion.gpg >/dev/null
sh -c 'echo deb https://oss-binaries.phusionpassenger.com/apt/passenger jammy main > /etc/apt/sources.list.d/passenger.list'
apt update
apt install libnginx-mod-http-passenger -y
nginx should now be restarted with the passenger nginx module added.
systemctl restart nginx
We can now build our Redmine website’s nginx server block.
nano /etc/nginx/conf.d/redmine.yourdomain.com.conf
File above: Please insert the following. It is important to ensure that the server name is modified to match the name of your domain or subdomain.
server {

listen 80;

server_name redmine.yourdomain.com;
root /opt/redmine/public;
access_log /var/log/nginx/your_domain.com.access.log;

error_log /var/log/nginx/your_domain.com.error.log;
passenger_enabled on;

passenger_min_instances 1;

client_max_body_size 10m;

}
To implement the updated settings, save the file, quit, and then restart nginx.
systemctl restart nginx
Step 5:Install MariaDB and make a database.
We are going to use the standard Ubuntu repository in this step to install the MariaDB server. Use the following command to launch the MariaDB server installation:
apt install mariadb-server
On an Ubuntu machine, the MariaDB server will launch automatically after MariaDB has been installed. Thus, we can now move forward with the Redmine website’s database user and database creation.
mysql
The following instructions can be executed after logging into the MySQL shell.
mysql> CREATE DATABASE redminedb;

mysql> GRANT ALL on redminedb.* to redmineuser@localhost identified by 'm0d1fyth15';

mysql> FLUSH PRIVILEGES;

mysql> \q
Make sure you generate a better database password; in the command above, substitute a stronger password for m0d1fyth15.
Step 6: Set up Redmine
Redmine’s most recent stable version will be installed. Visit their download page to see if the most recent version is available.
Now, let’s download and extract version 5.0.5 into the /opt/redmine directory.
wget https://www.redmine.org/releases/redmine-5.0.5.tar.gz
tar -xzvf redmine-5.0.5.tar.gz -C /opt/redmine/ --strip-components=1
chown -R redmine. /opt/redmine/
Let’s now move to the user “redmine.”
su - redmine
Let’s duplicate the sample files for configuration.
cp -a /opt/redmine/config/configuration.yml{.example,}
cp -a /opt/redmine/config/database.yml{.example,}
cp -a /opt/redmine/public/dispatch.fcgi{.example,}
Next, we must modify the database configuration file; let’s do so by utilizing the credentials we generated earlier.
nano /opt/redmine/config/database.yml
Use the appropriate credentials, please.
exit
Let’s use user “root” to execute this command.
cd /opt/redmine && gem install bundler
Now let’s return to user “redmine.
su - redmine
Carry out the installation.
bundle config set --local path 'vendor/bundle'
bundle install
bundle update
To create the keys and move the database, use these two commands:
bundle exec rake generate_secret_token
RAILS_ENV=production bundle exec rake db:migrate
We can add default configuration data to the database when the database conversion is complete:
RAILS_ENV=production REDMINE_LANG=en bundle exec rake redmine:load_default_data
exit
Now, let’s update the gem.
gem update
It will take some time for the above command to finish.
After finishing, go to redmine.yourdomain.com and use the following login credentials to access Redmine by default:
Login as admin

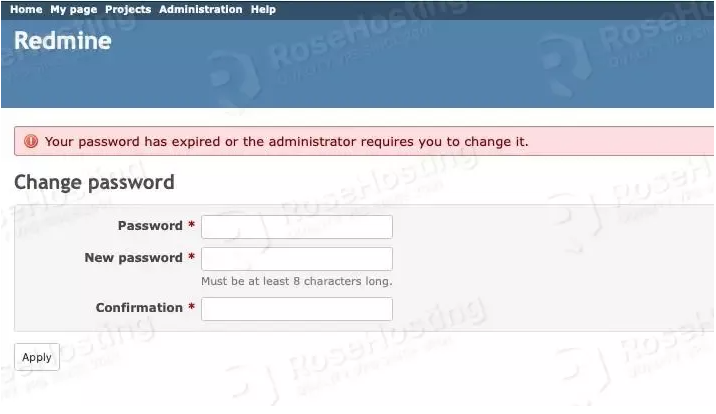
You will be required to establish a stronger password after logging in.
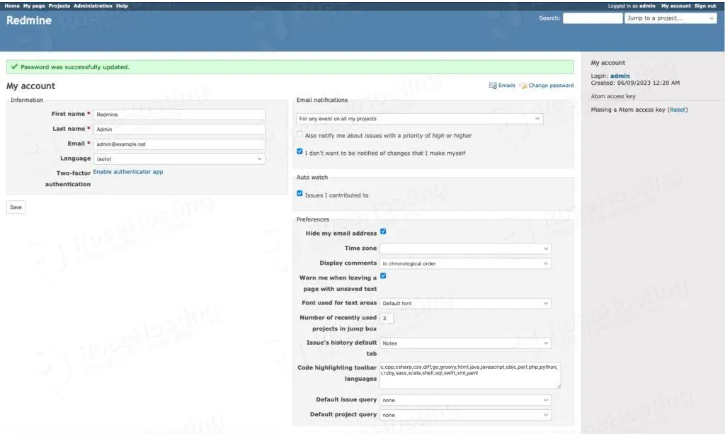
You can then get to work on your Redmine website.
We hope that our detailed instructions on installing Redmine on Ubuntu have greatly simplified and clarified the process for you.