
GICT knowledge base
How to Create Email Accounts in Webmin?
Published
How to Create Email Accounts in Webmin?
Webmin is the most popular open source hosting control panels that provides a simple and effective user interface for website and server owners to manage their services. It has a modular design so it’s very easy to add new functionality. In this documentation, we are discussing about how to create a new email account for a domain under your server via Webmin control panel.
1) Login to your Webmin control panel using the port 10000.
2) Go to System >> Users and Groups.
3) From the page, click on “Create a new user” link.

4) Now, you need to fill the form with appropriate information such as username, user id, Real name, Home directory, password, and shell.
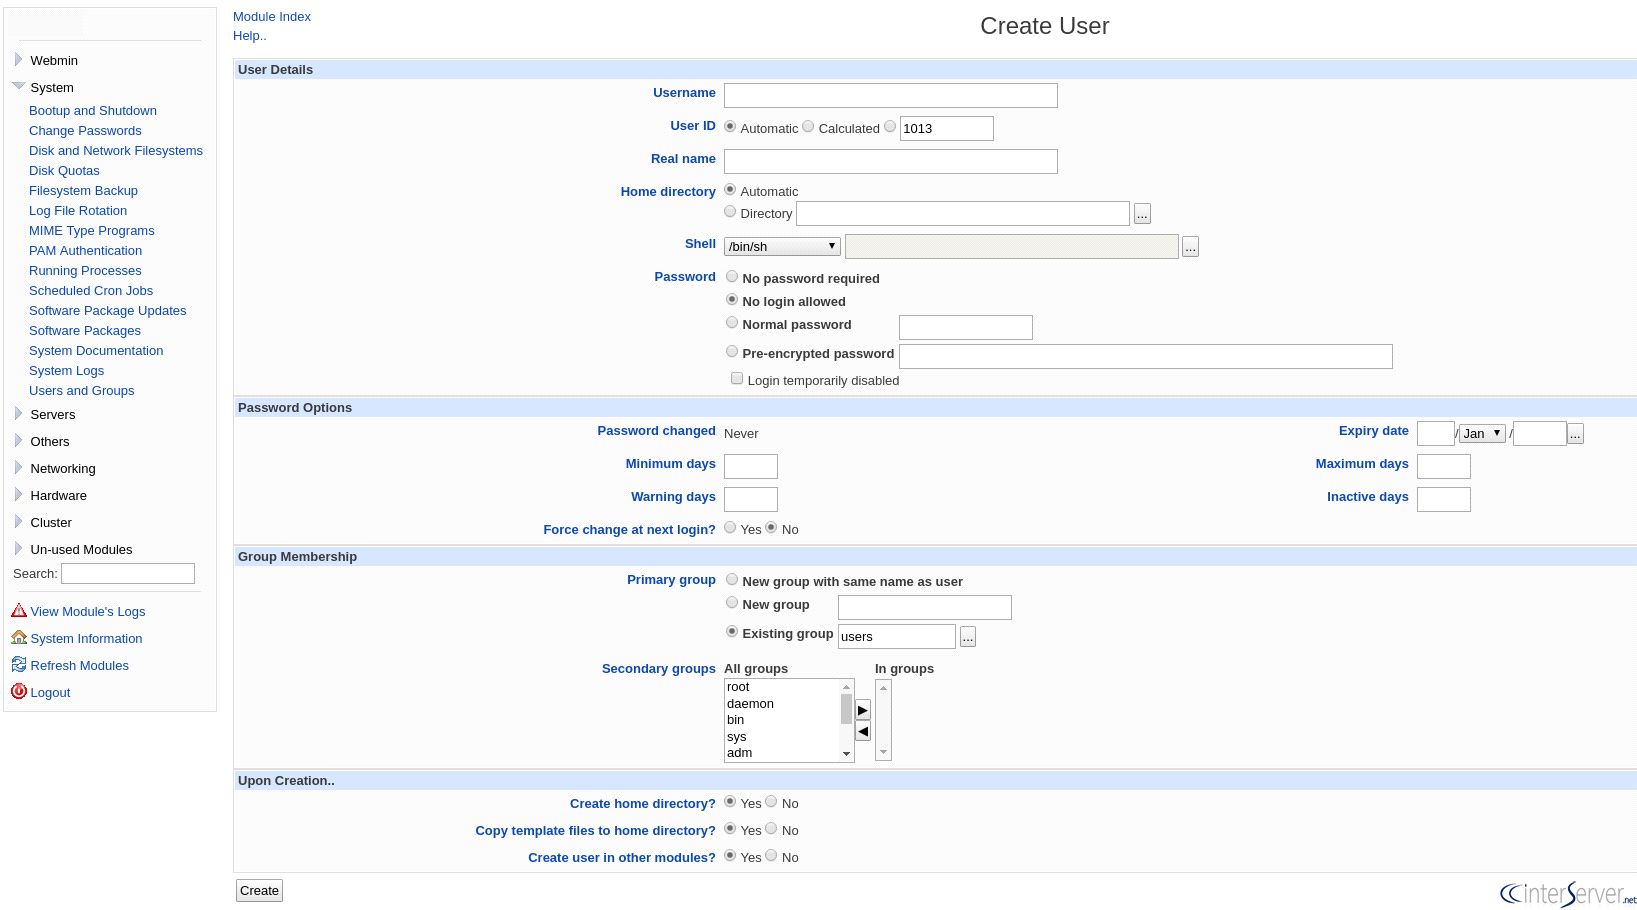
Username: If you want to create the email address as [email protected], then set the username’s value to example.
User ID: You can leave it as automatic.
Real Name: This field is required for you to identify each account from the list.
Home Directory: Click “Directory” and set it to /home/ where you created the user.
Shell: You can leave this field as it is.
Password: click the “Normal password” and type your desired password.
The above-mentioned fields are important for creating a valid e-mail account. You can also see more fields on the same page. You may fill them in if you like.
5) Now click on to the “Create” button to create an email account.
If you need any further assistance please contact our support department.
Related guides
How to Install Virtualmin with Webmin on Ubuntu
How to Install Virtualmin with Webmin, LAMP, BIND, and Postfix on Ubuntu Webmin is a web-based control panel that helps you to setup user account, Apache, D
WebminImport a cPanel Account into Virtualmin Safely
Plan a self-managed cPanel-to-Virtualmin import with private backups, deliberate account settings and separate website, database and mail verification.
WebminUse Webmin File Manager with Explicit Privilege and Path Scope
Review Webmin identity and filesystem paths before edits, moves, ownership changes or deletion, with private before-states and deliberate recovery.
WebminChange or Recover a Webmin Password with the Correct Account Scope
Distinguish Webmin-only and Unix passwords, use current authorized recovery tools and avoid exposing replacement credentials in shell arguments.