
GICT knowledge base
How to create a Private Messaging system in WordPress
Published
Adding a private messaging system in WordPress makes you more familiar with your users. You can easily manage your WordPress site with some amazing plugins. The main advantage is you don’t need any coding knowledge and there are many plugins available for WordPress.
We will use a free plugin named Front End PM. It’s a completely free plugin for WordPress that allows the users to chat on your WordPress with proper permissions and security. Front End PM for WordPress allows us to quickly configure a working private messaging system in minutes. So, Let’s start with the tutorial.
Why do you need a Private Messaging System?
There are many cases where you might need a messaging system. For instance, If multiple authors or and site admins are managing various aspects of the site, then they need to communicate with each other as the collaboration is an important aspect of working together. A private messaging system helps you to grow your site smoothly.
Allowing your website users to private message each other can also improve the user experience of your website. WordPress is capable of powering a huge projects that are managed by a team. So, It’s easier for them to communicate with each other on the project.
If you are working on a social networking website on WordPress, This plugin can be helpful for you.
How to install Front End PM
Installation of any plugin in WordPress is a very easy task. Follow the following steps to easily install Front End PM in your WordPress site.
- Log in to WordPress as Administrator.
- Go to Plugins -> Add New.
- Type “Front End PM” in the search box and see results.
- Click Install on a plugin named “Front End PM” by “Shamim Hasan”.
- Once it is installed, click on the Activate button to activate the plugin.
So, that’s all for the installation part. Now, Let’s see how to use the plugin.
How to configure Front End PM
Once the installation is done, you will see a new menu in the left sidebar of the admin panel called “Front End PM”. To configure the plugin, click on the Settings option under the Front End PM option in the left sidebar.
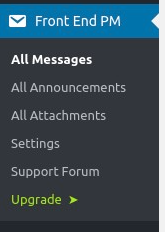
In the settings section, you will see a screen with 7 tabs. You can manage and mofidy the following settings in your chat system as per your requirements.

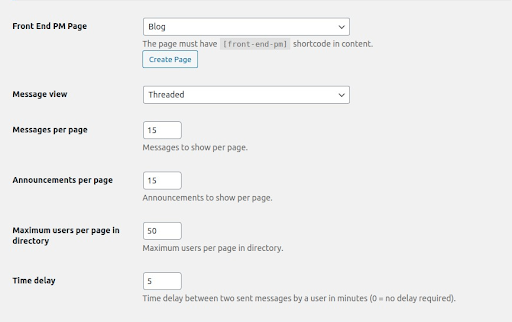
Under the general settings, you can configure your page either by using the shortcode in any wordpress page that you would like to use for private messing or by creating a new page.
You can set up the message view as thread or individual. Threaded mode will show you all messages that are sent and received, on the other hand, individual show you the most recent messages.
In general settings, you can also configure messenger per page, announcements per page, maximum user per page in the directory, time delay as per your requirement.
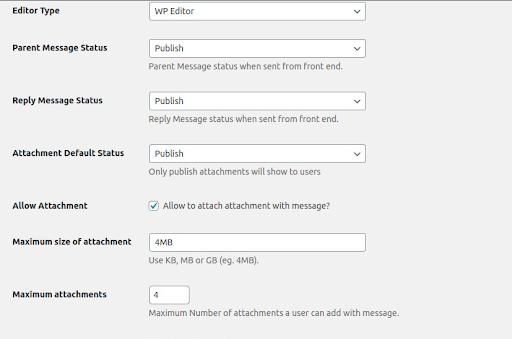
You can scroll down further to configure editor type either WP editor or text area, parent message status, reply message status, the attachment default status to publish or pending. You can also define the maximum size of the attachment, maximum attachment as per your requirement.
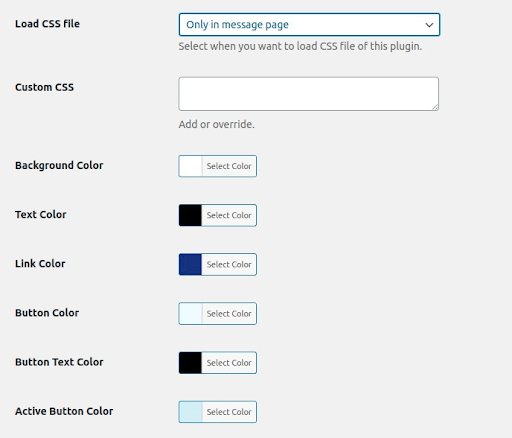
In the appearance tab, you can change the background color, text color, link color, button color button text color and much more. It allows you to design a system in such a way that it looks and feels great with the overall design of your website.
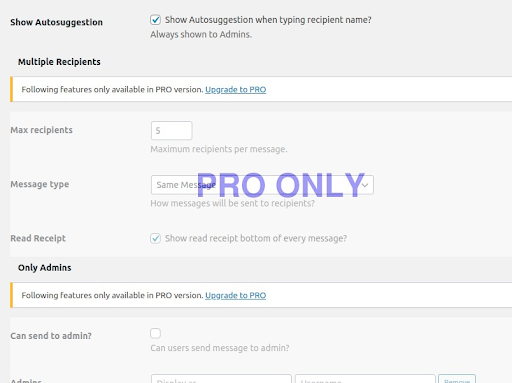
In the recipient tab, you can allow or disallow suggestions for the usernames. You can also set up the other features for the recipients but many features available with the pro version of the plugin only.
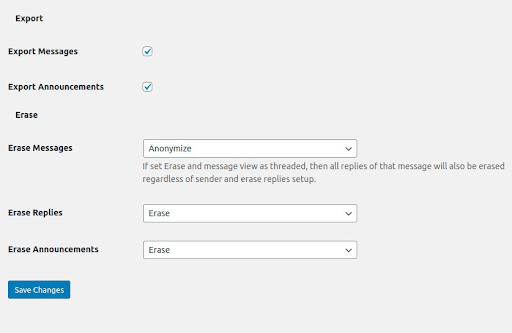
Privacy matters. You can export messages and announcements with just one click from the privacy tab. You can also erase messages, replies, and announcements in privacy settings. Privacy section allows you to manage almost everything related to privacy on your website.
In the E-mails section, you can set the sender’s name and E-mail so that the members of your site can identify whenever you send out an announcement. It is a great feature that allows you to send out announcements and individual E-mails directly from the WordPress dashboard. The other E-mail related features are available in the Pro version only.
Managing permission and user roles can be a daunting task at the security level, especially for the website has tons of users who require a variety of permissions.
To make the user management easier, WordPress has grouped different capabilities together into five user roles. They are:
- Administrator
- Editor
- Author
- Contributor
- Subscriber
You can manage permissions for the above five roles to access the message system, send new messages, send replies as per the admin’s choice. You can also block a particular user, add an announcement with only one click. Some additional features are only available in the pro version.
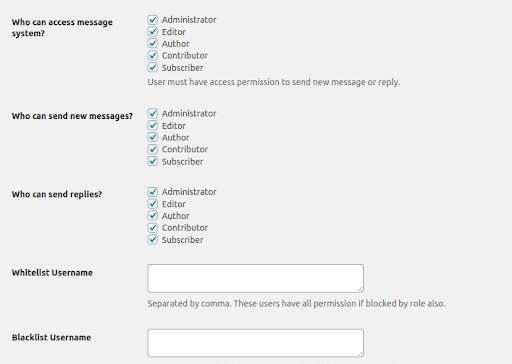
One greate feature in the Free version allows you to whitelist and blacklist the usernames. It is a very handy feature to disallow a specific username from logging in or registering on the chat system of your website.
So, that’s all you need to learn to set up a private messaging system on your WordPress website using Front End PM. We hope this tutorial was helpful for you. If you have any questions, please let us know in the comment section given below. We will help you as soon as possible. You can also contact our awesome support staff if you are an active InterServer customer.