
GICT knowledge base
Enable and disable ICMP PING in Windows 10 Firewall
Published
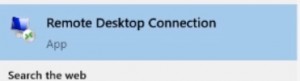
Click on Windows Button  from your local system.
Now type Remote Desktop and click on it.
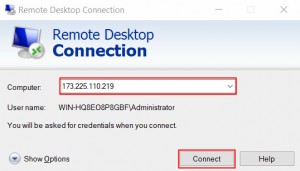
Enter the IP address of your Virtual Machine and click on Connect.
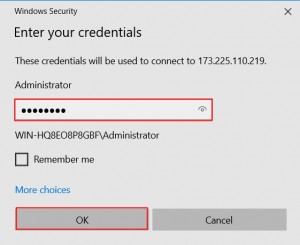
Enter Username as Administrator and Password and click on OK.
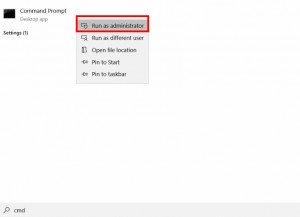
Once you are connect with your VM/Remote Desktop, and type cmd.
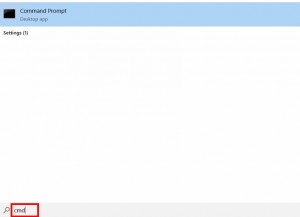
Now right click on the command prompt and Run as administrator.
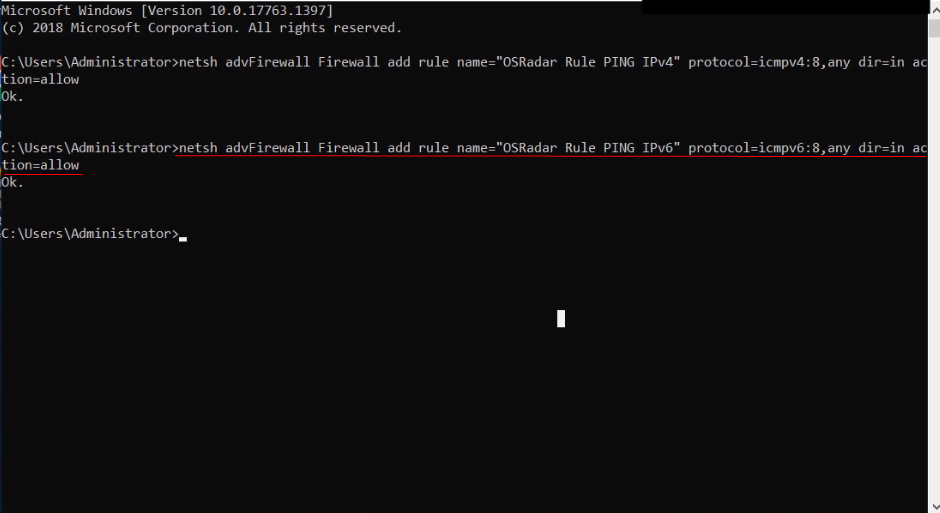
Creating the rule for IPv6 addressing
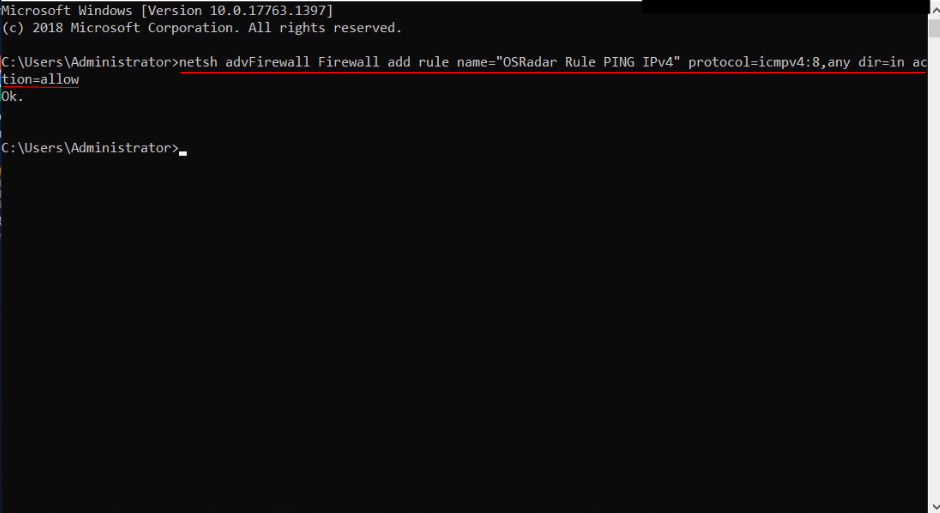
Now copy paste the following command and press on Enter Key:
netsh advFirewall Firewall add rule name="OSRadar Rule PING IPv4" protocol=icmpv4:8,any dir=in action=allow
netsh advFirewall Firewall add rule name=”OSRadar Rule PING IPv6″ protocol=icmpv6:8,any dir=in action=allow
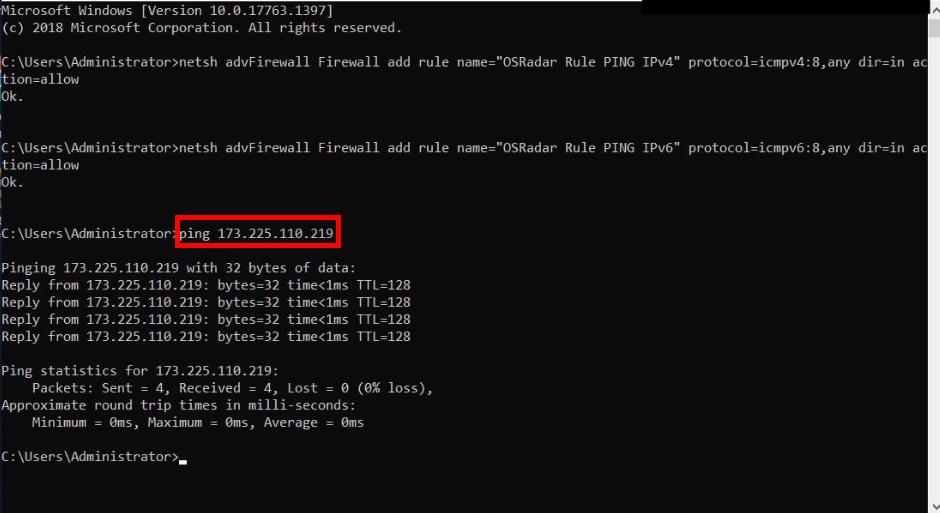
Now we can check that it works, pinging from a remote computer:
To disable the exception for IPv4 addresses, type command in the CMD:
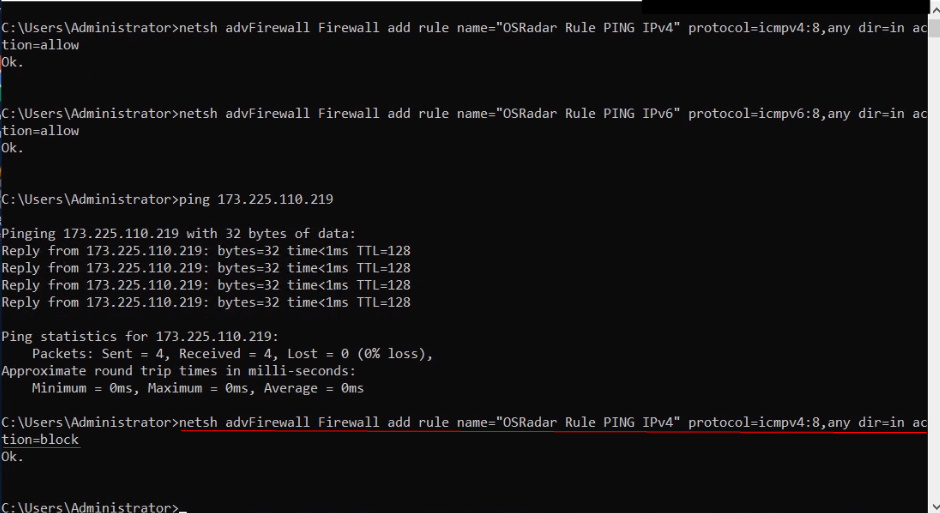
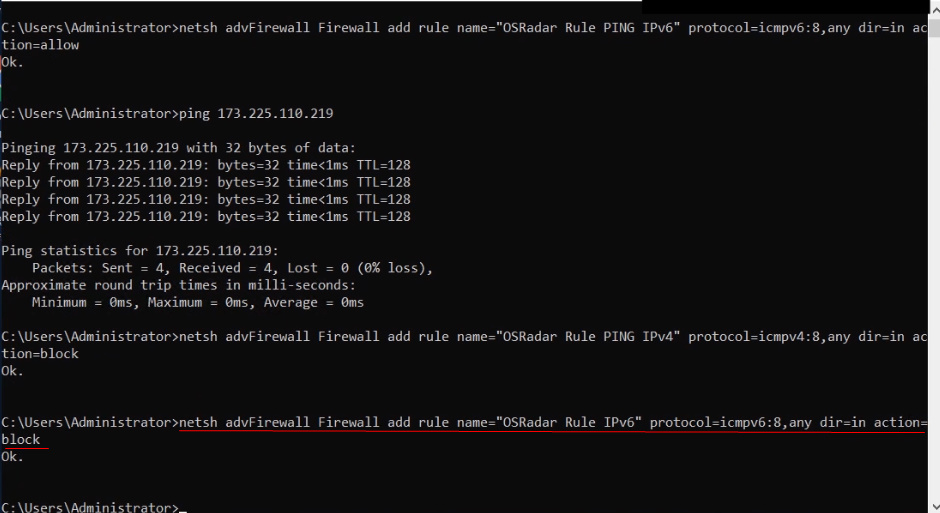
If IPv6 is addressing, please write the following command:
netsh advFirewall Firewall add rule name=”OSRadar Rule IPv6″ protocol=icmpv6:8,any dir=in action=block
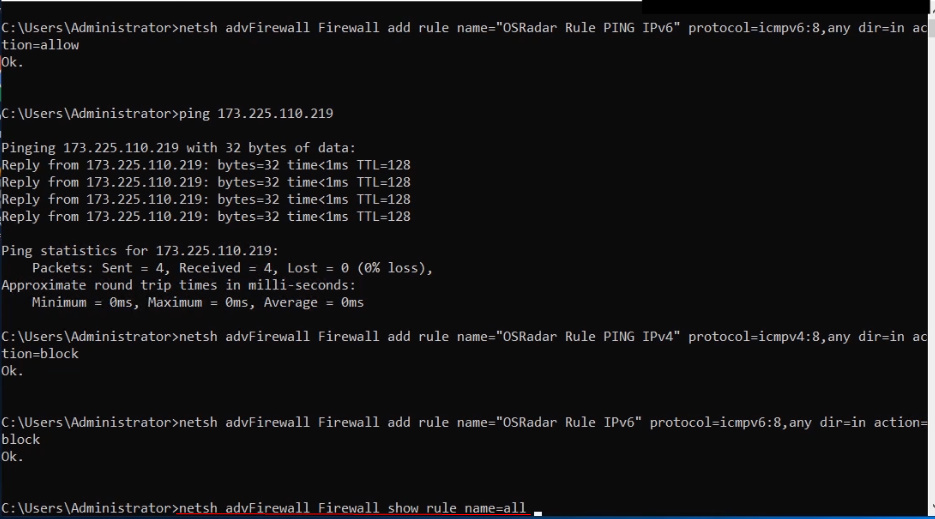
Run the bellow given command to see every rule in the system in detail:
netsh advFirewall Firewall show rule name=all
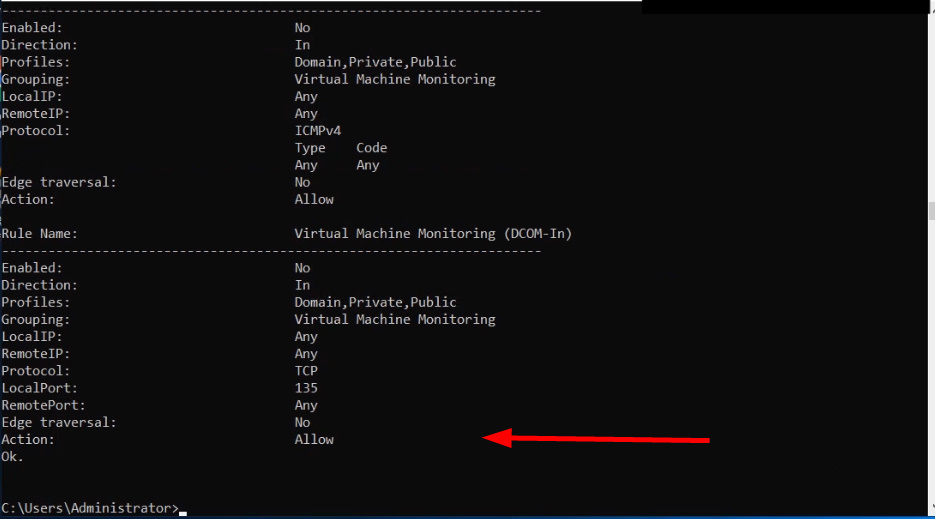
Detailed report
How to enable Ping in Windows through Graphic mode.
Click on and type windows and click on it.
W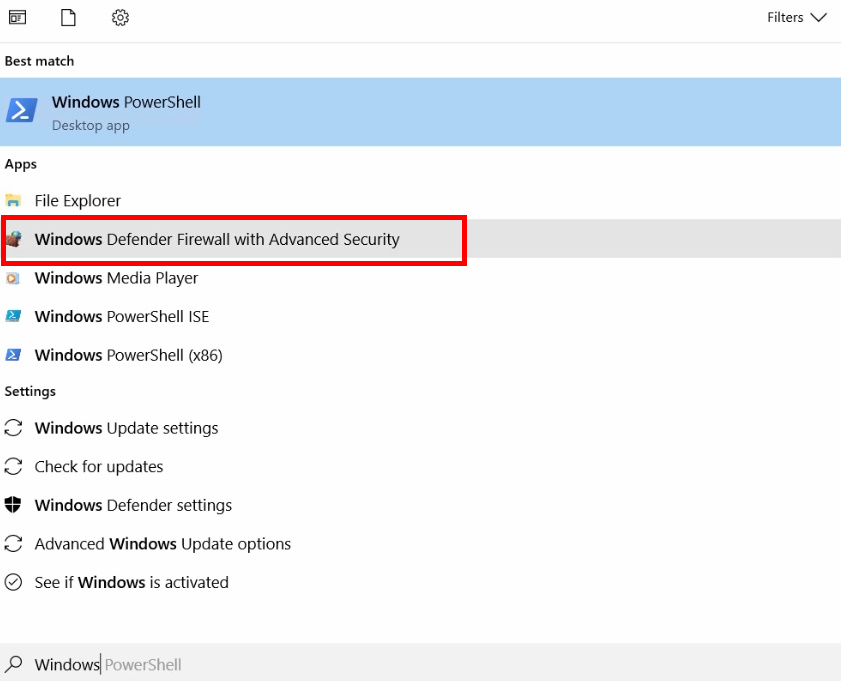
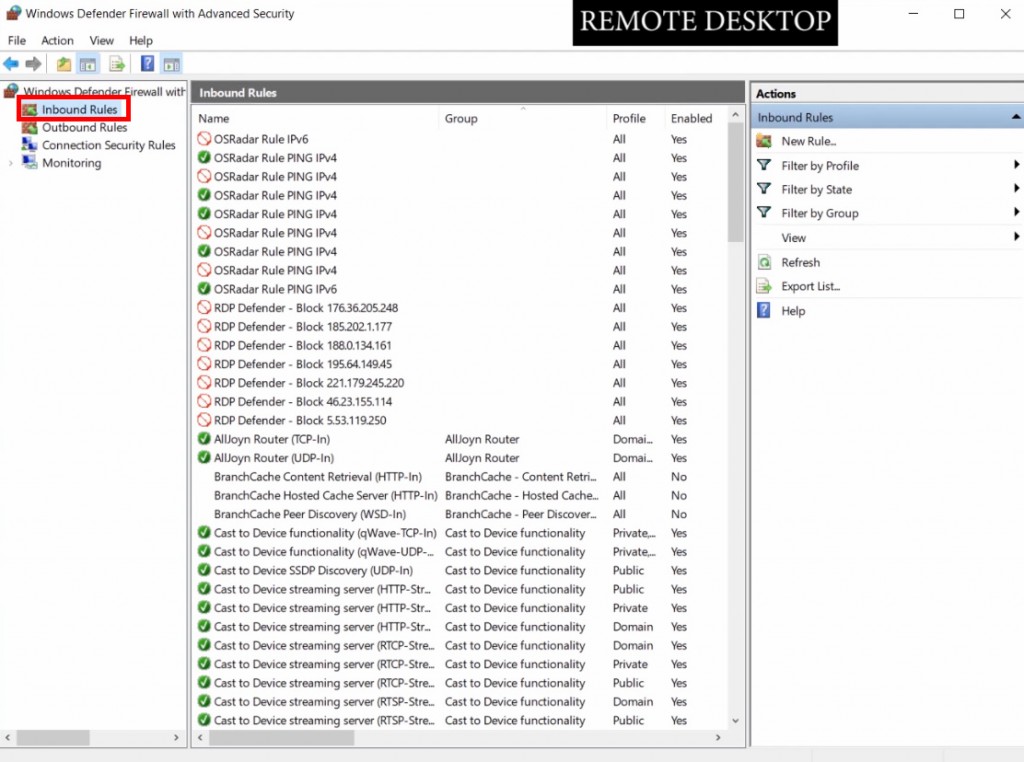
Firewall options will be displayed, select the Inbound Rules option in the left column.
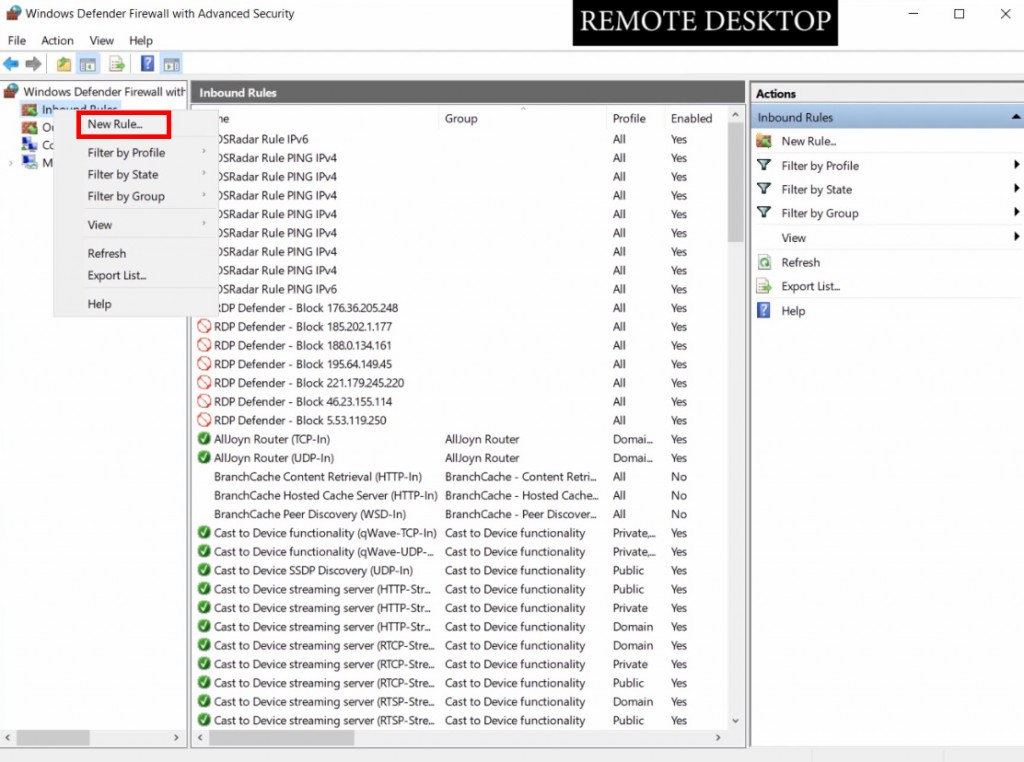
And right-click the mouse to create a New Rule.
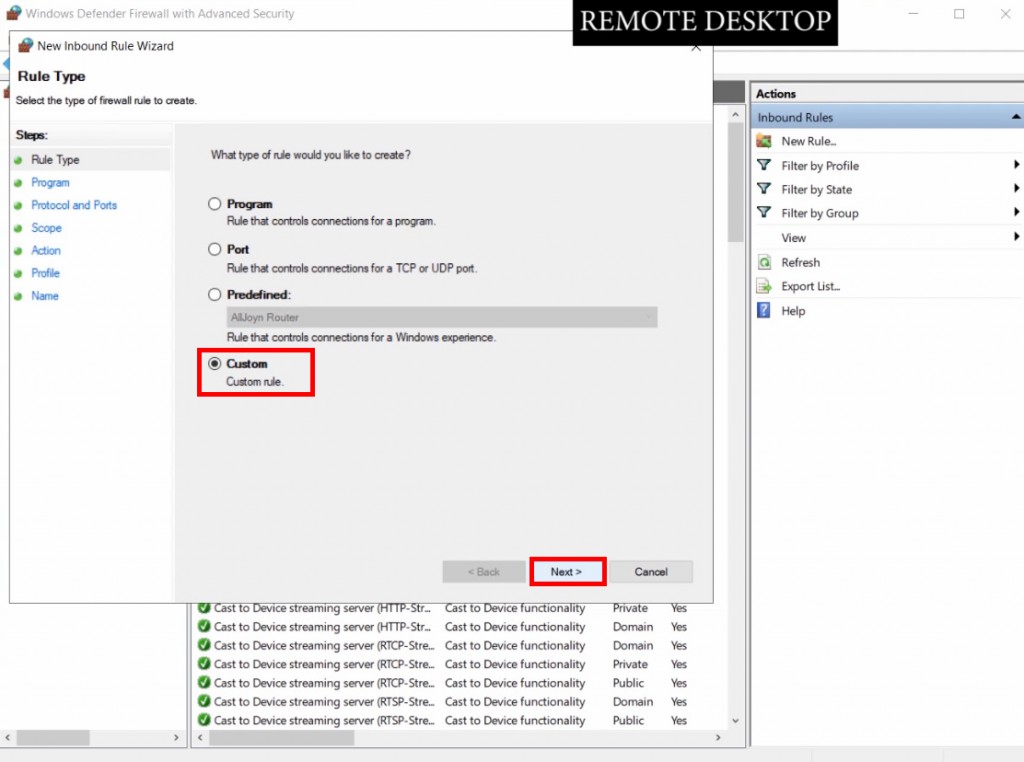
Select Custom in the rule type and press on Next Button.
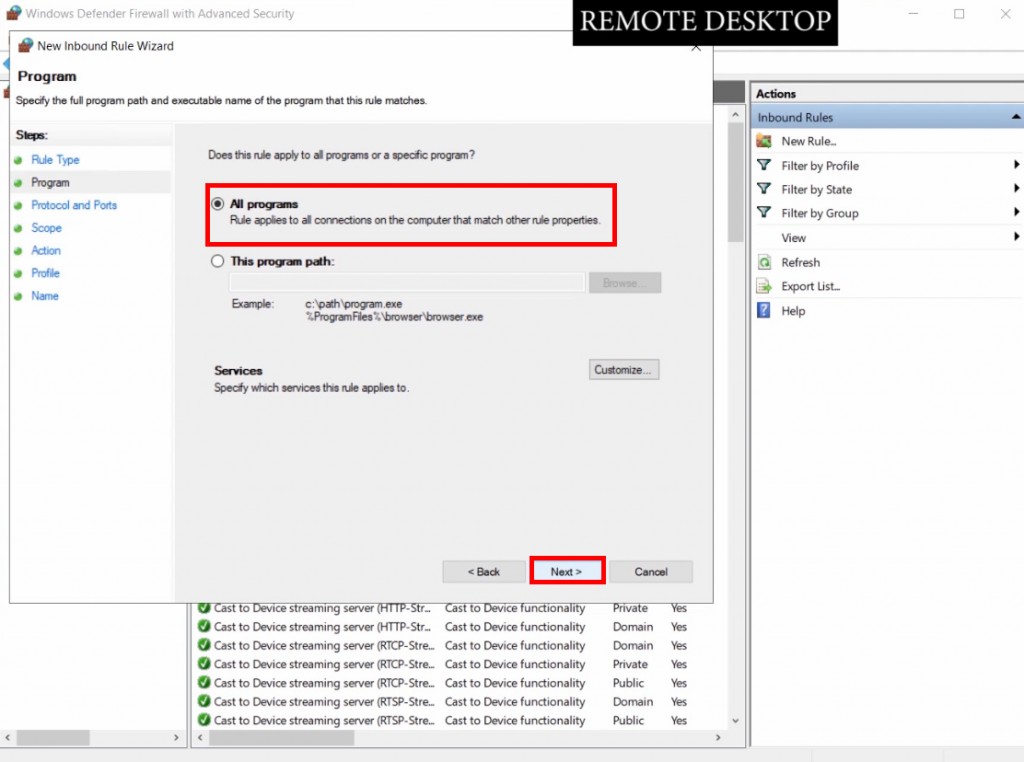
Select All programs and press on Next Button.
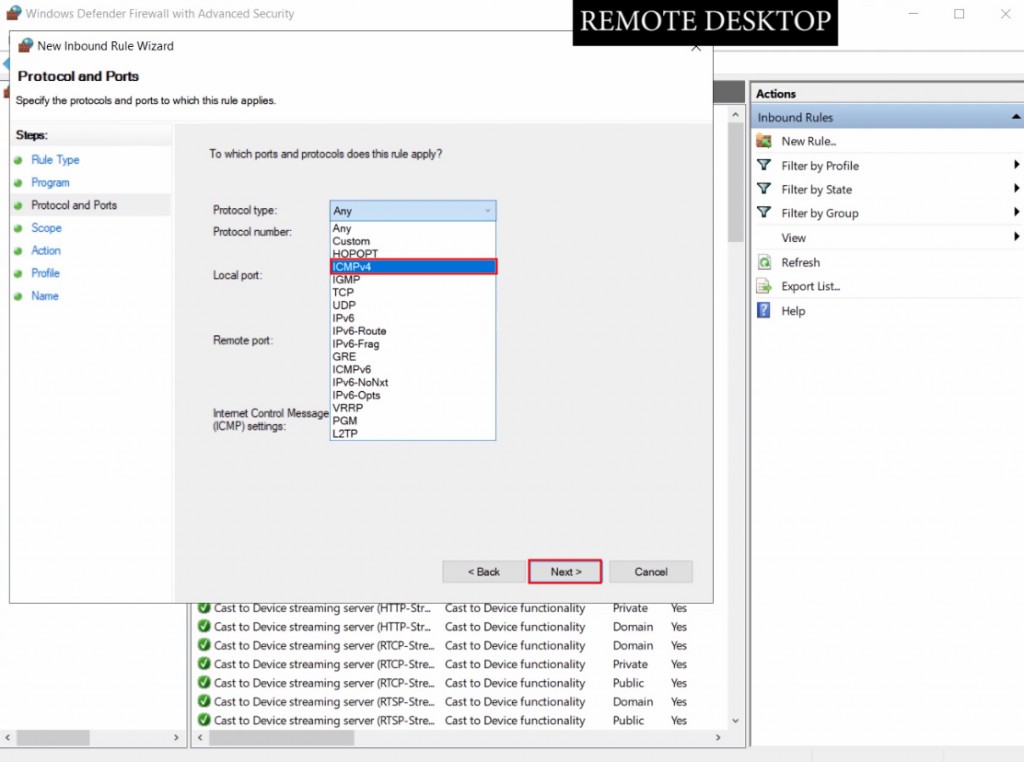
Select the Protocol type as ICMPv4 and then click on Next.
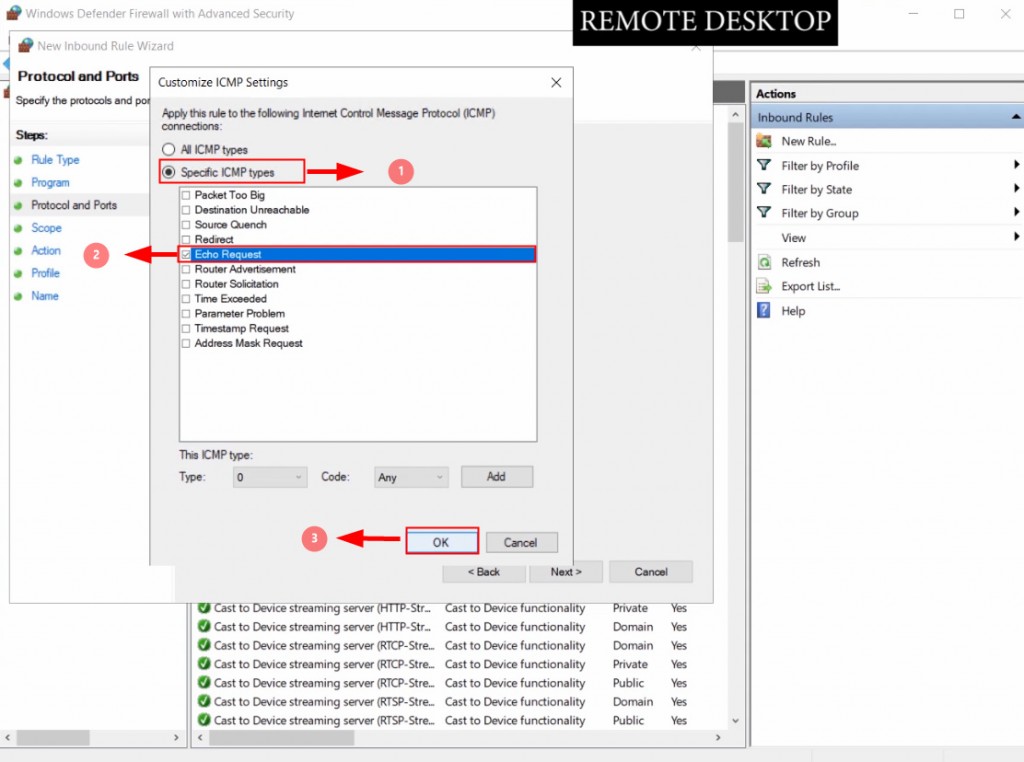
1.Click on Specific ICMP types radio button.
2.Click on Echo Request check box.
3.Click on OK to continue.
Click on Customize.
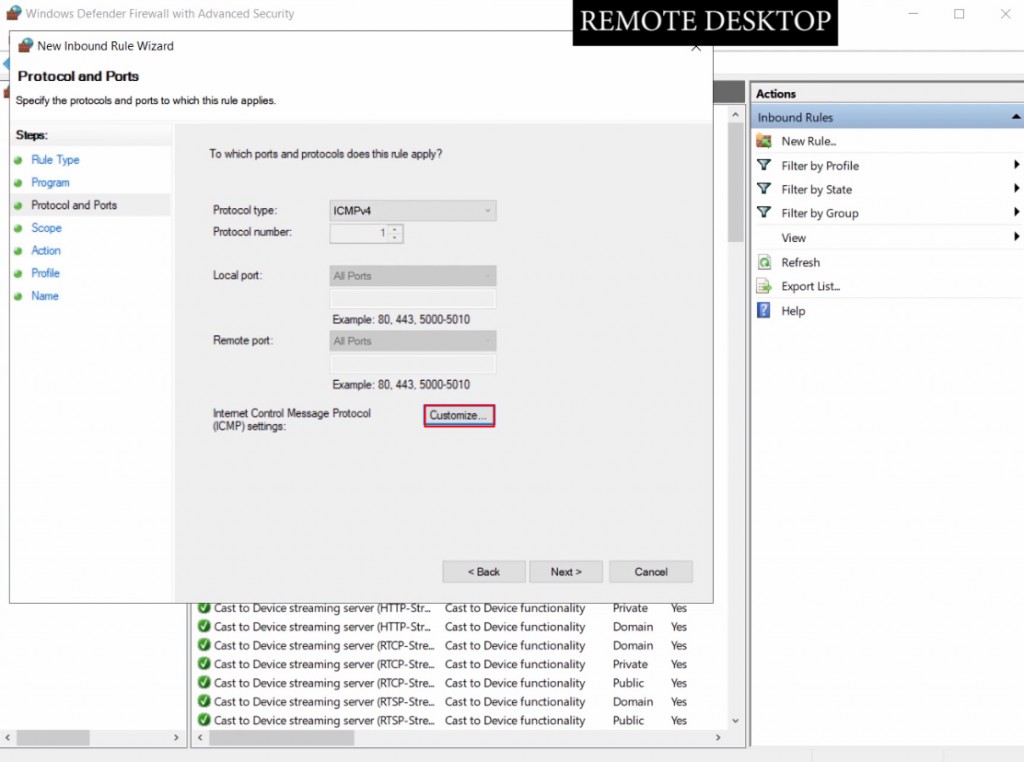
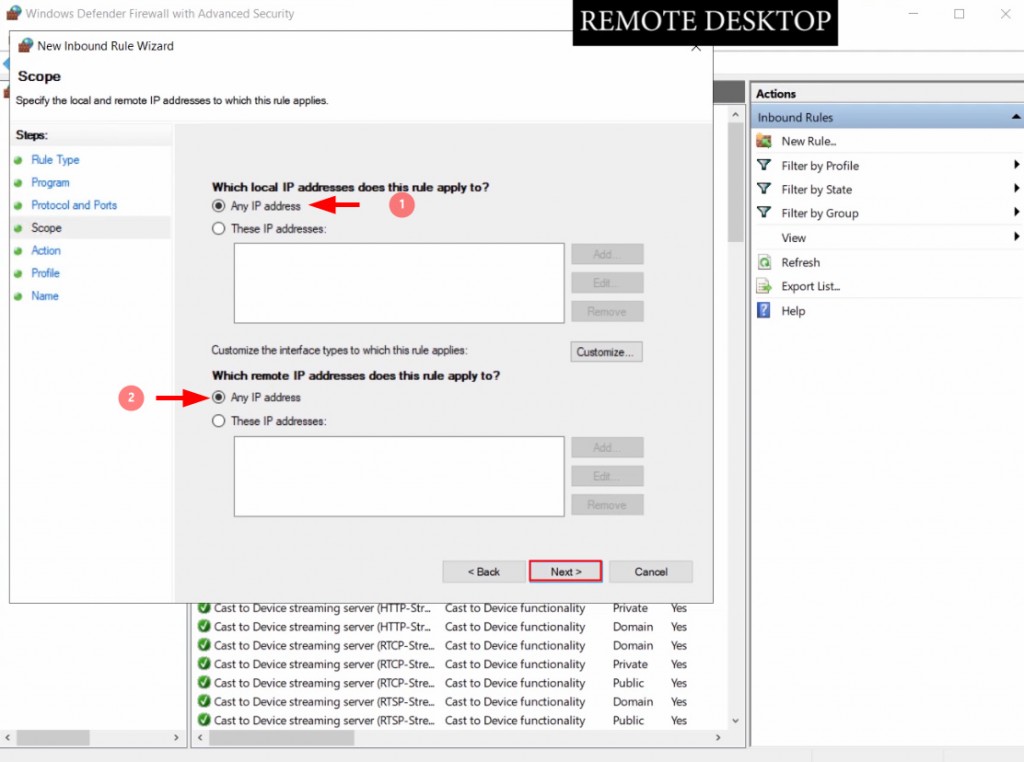
Here we can define a specific IP address in the rule where we will the requests to all the addresses. And click on NEXT.
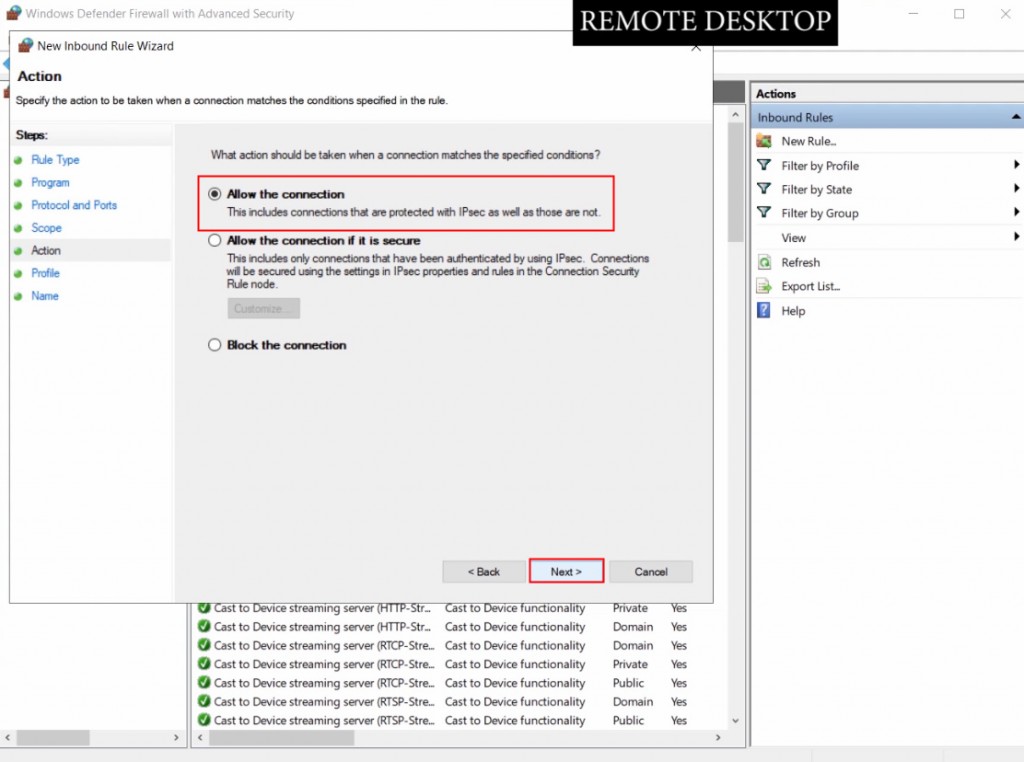
Click on Radio Button Allow the connection and click on Next.
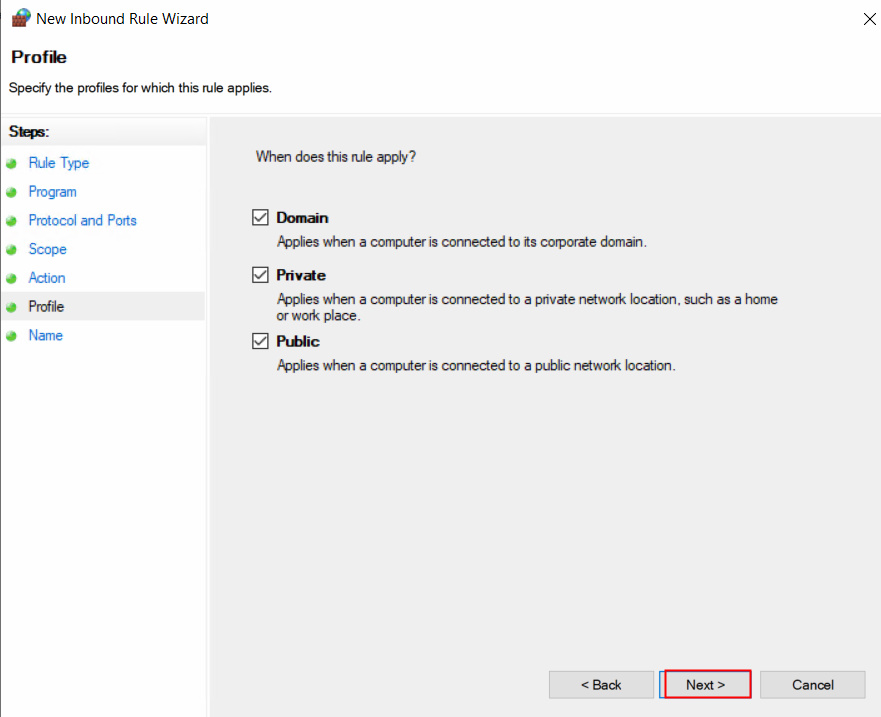
Click on the check box for Domain, Private and Public and click on Next.
Now assign the name to the rule and click on Finish.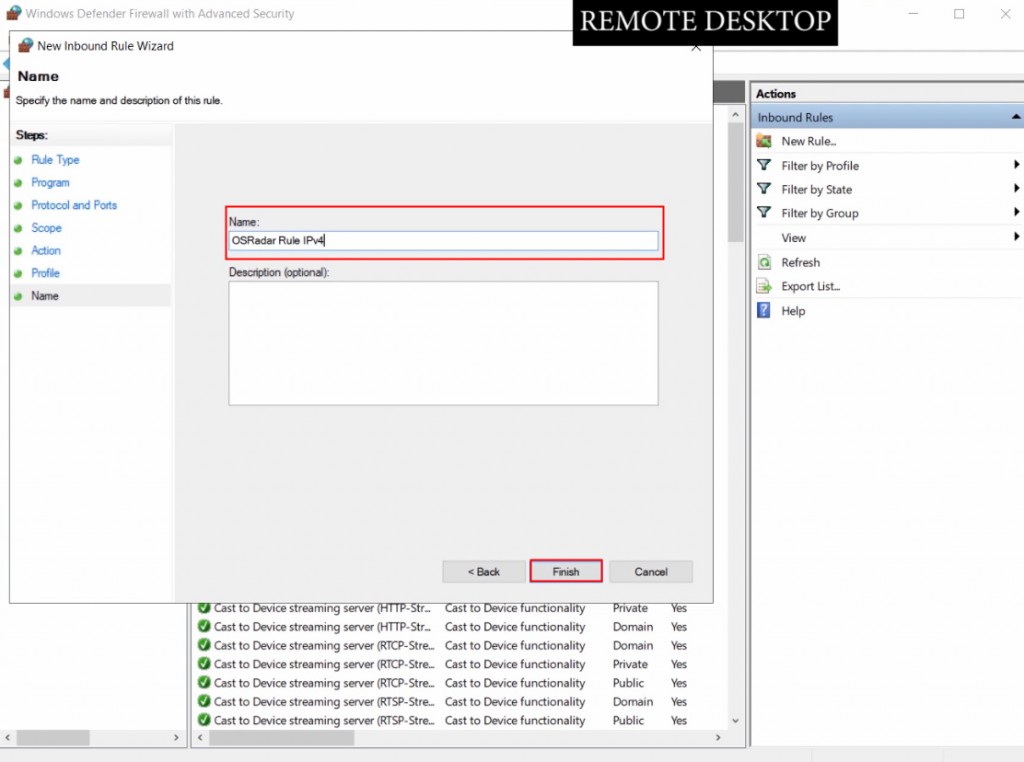
Now we can see rule has been created.
To create the exception for IPv6 addressing, we have to repeat the same process but in the protocol and ports window, we have to select ICMPv6.
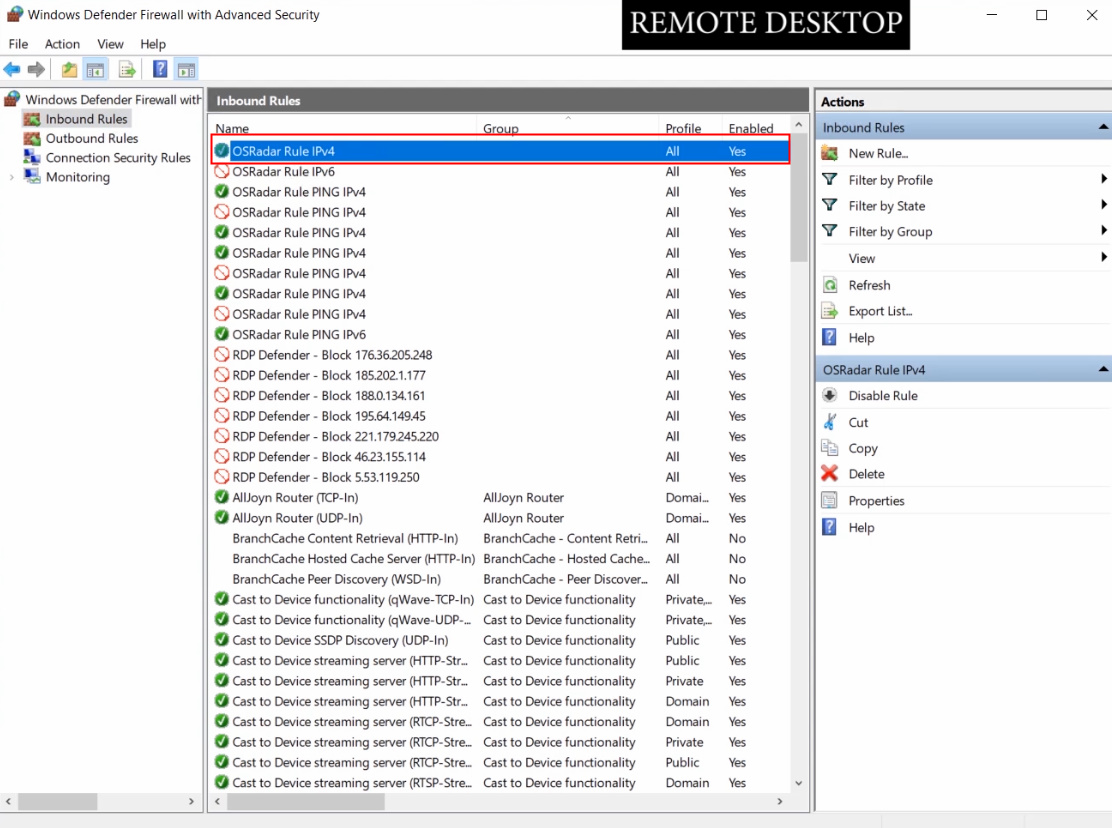
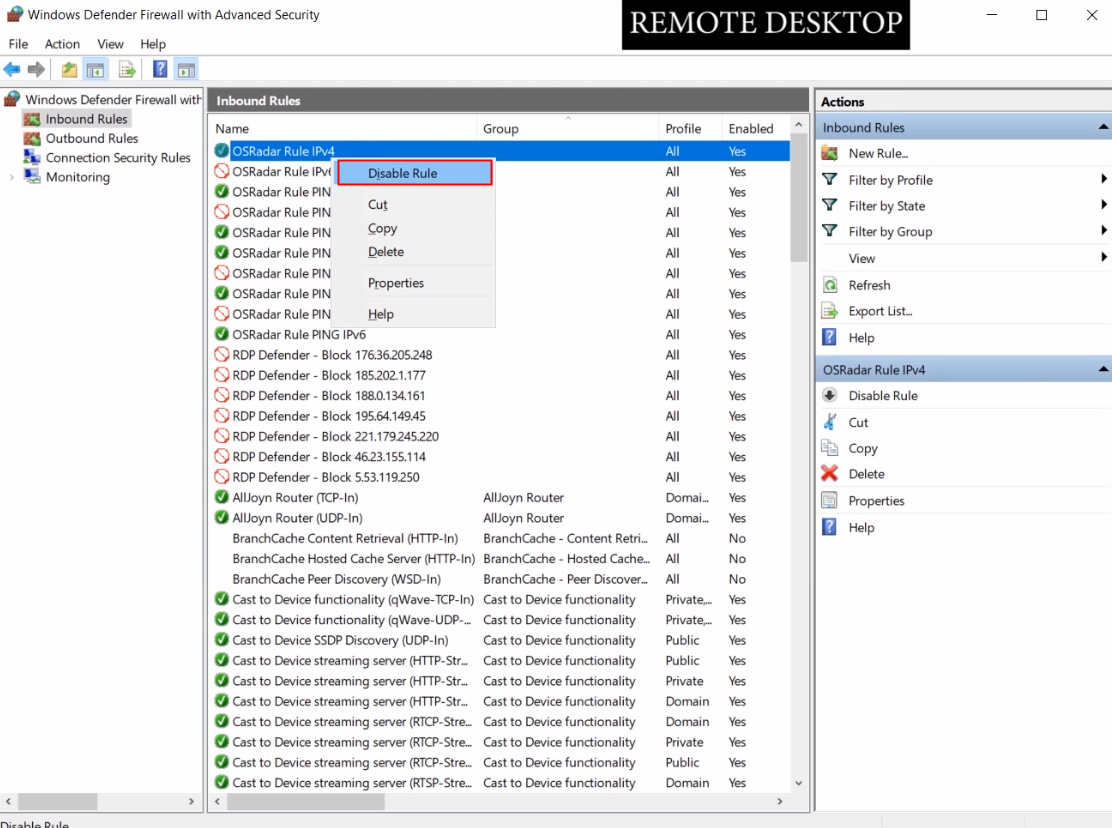
To disable any of the created rules, just right-click on it and choose Disable Rule.
We have seen how to enable and disable ping in Windows 10.
If you need any further help please contact our support department.