
GICT knowledge base
How to Create Category in Zen Cart?
Published
Zencart is an open-source E-commerce store management system. It allows you to create an E-commerce store without any technical knowledge. It is an open-source project, It means that you will get updates and patches for free forever. You can also modify the codebase of the project as per your requirements. With InterServer web hosting, you can easily install ZenCart within minutes on your domain name.
With Zen-Cart, you can manage your store from its admin panel. You can organise your product in categories as well as sub-category. Zen-Cart provides an interface to manage your categories and sub-categories. While you create a website it’s normal to display your products in manner. So, with the zen cart, you can do it in few steps. Let’s see how we can create a category and its sub-category.
Create Category in Zencart
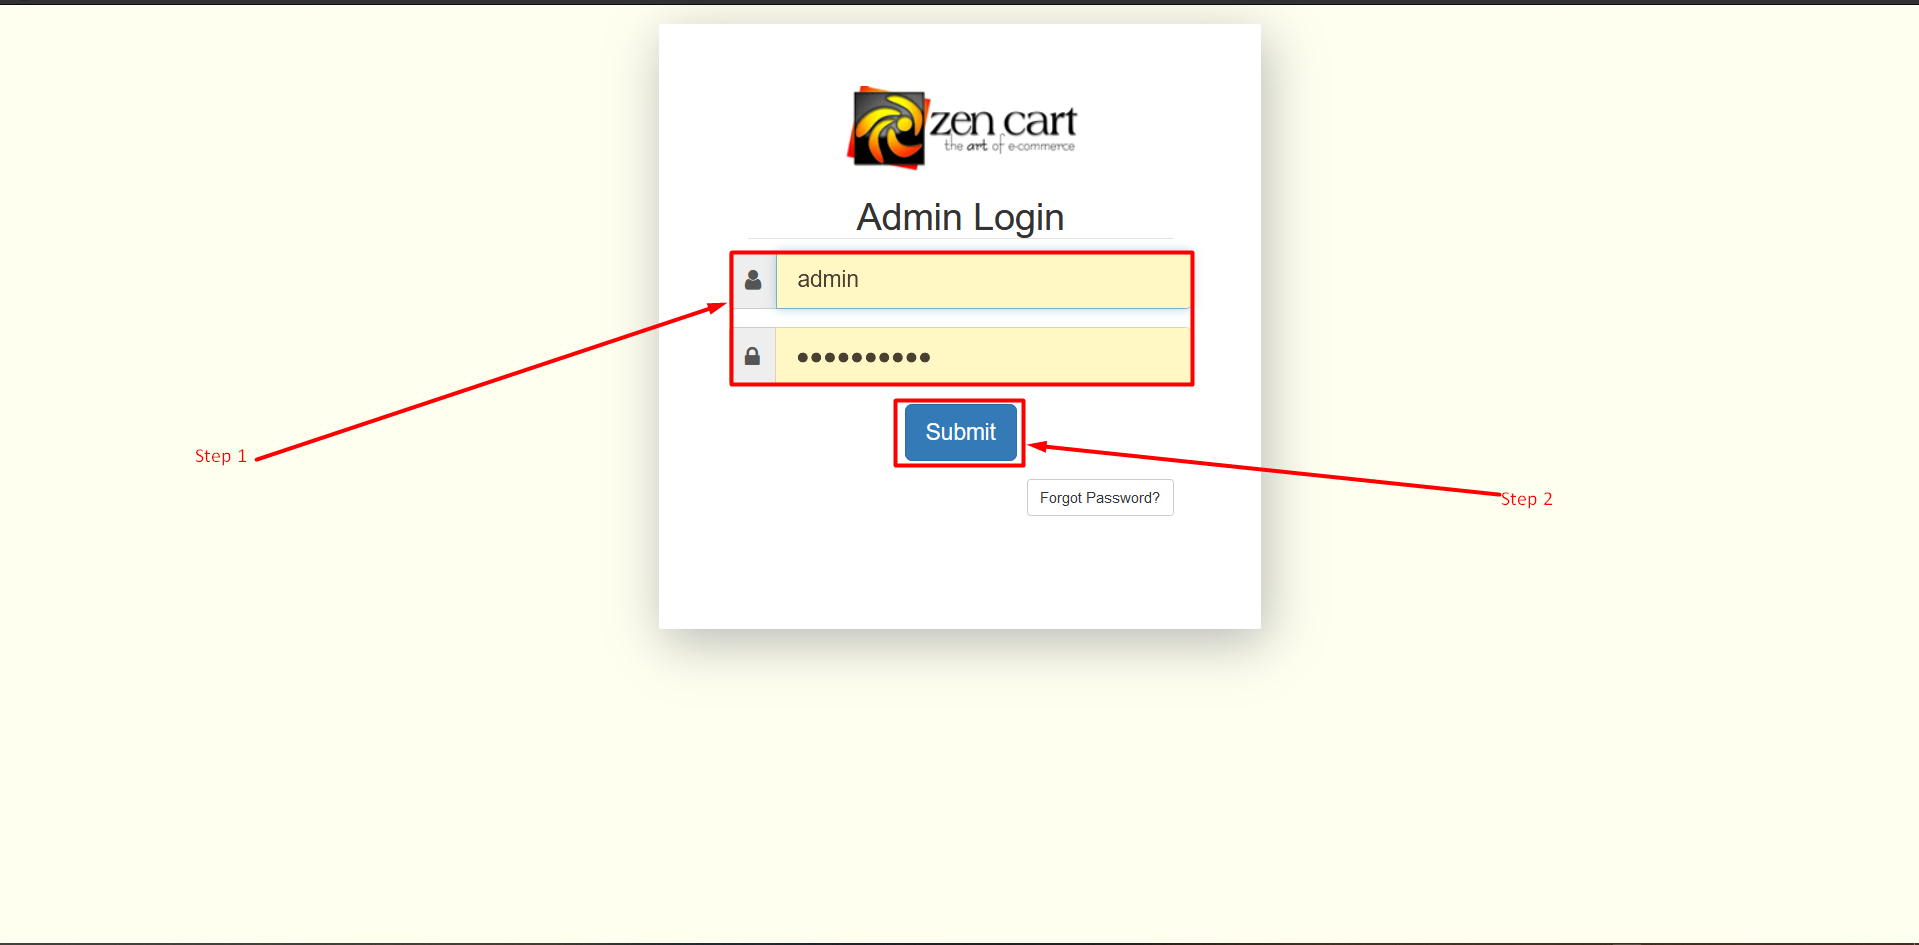
Step 1: Go to the login page of the administration panel. Type your Username and Password in the form.
Step 2: Now click on the Submit button.
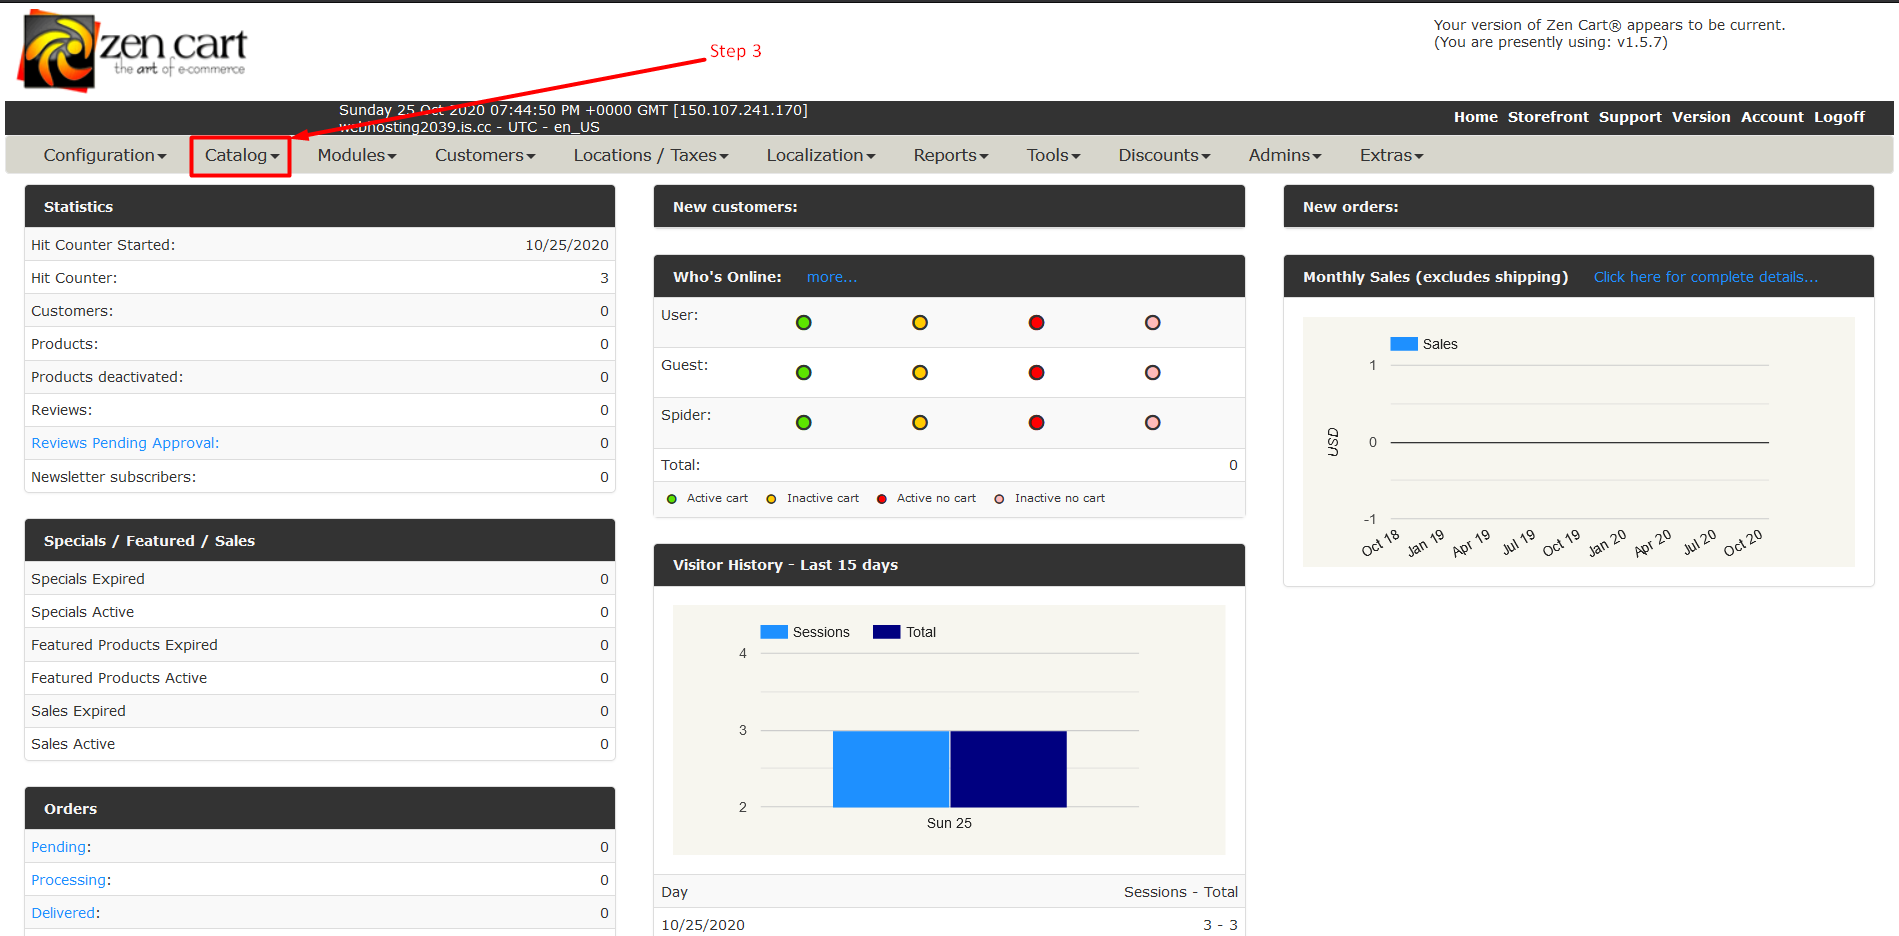
Step 3: Now Find a tab section and find the Catalog tab and click on the Triangle to expand that tab.
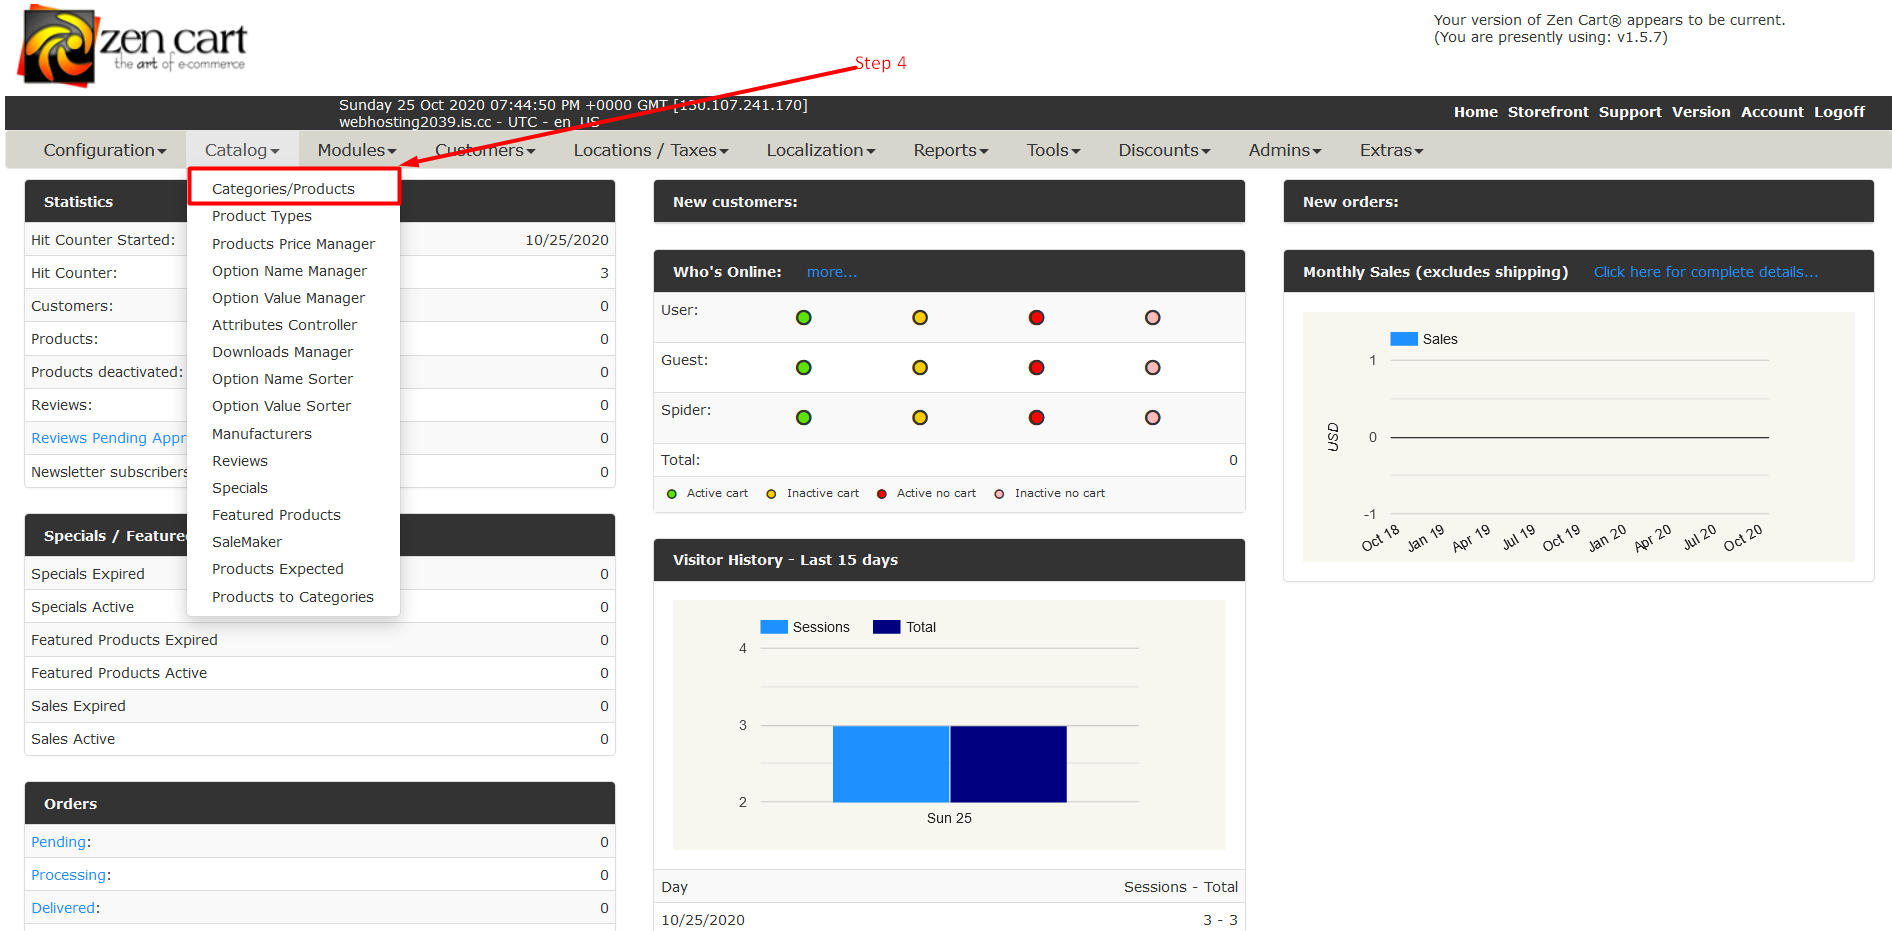
Step 4: Now Click on Categories/Products.
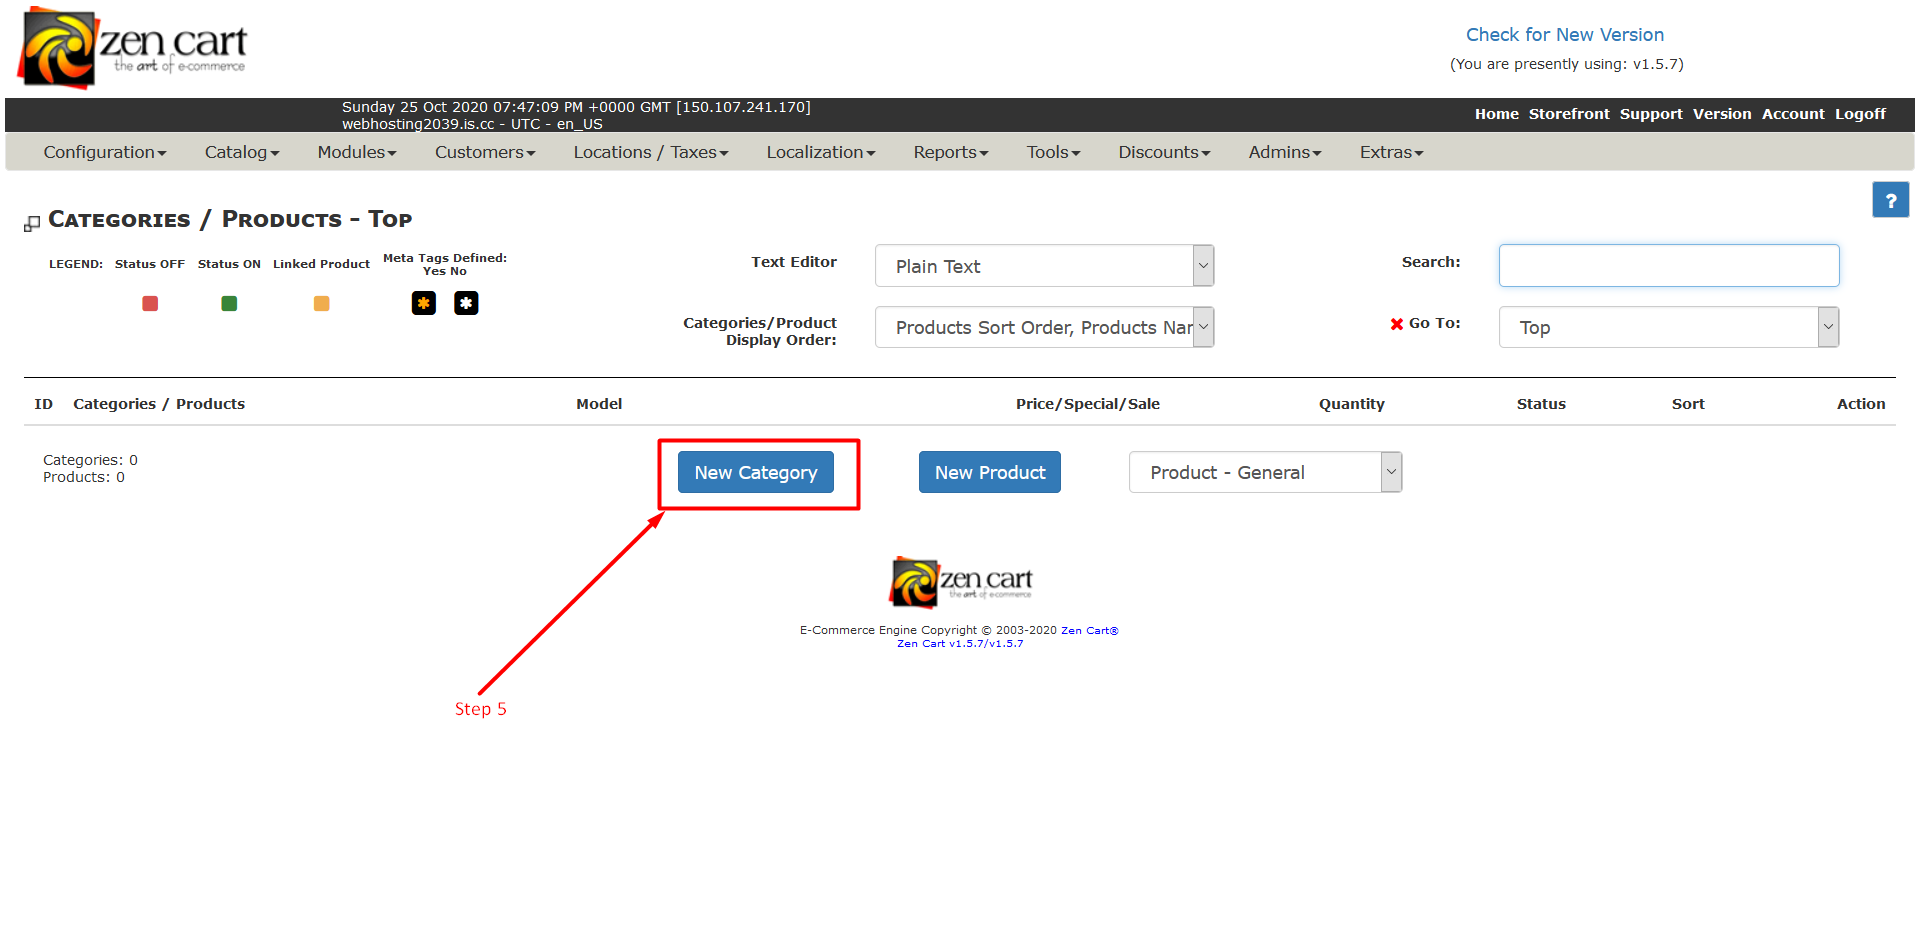
Step 5: Now that tab menu will take you to the section where your product’s main category and their child category will display. So, now click on the button called New Category.
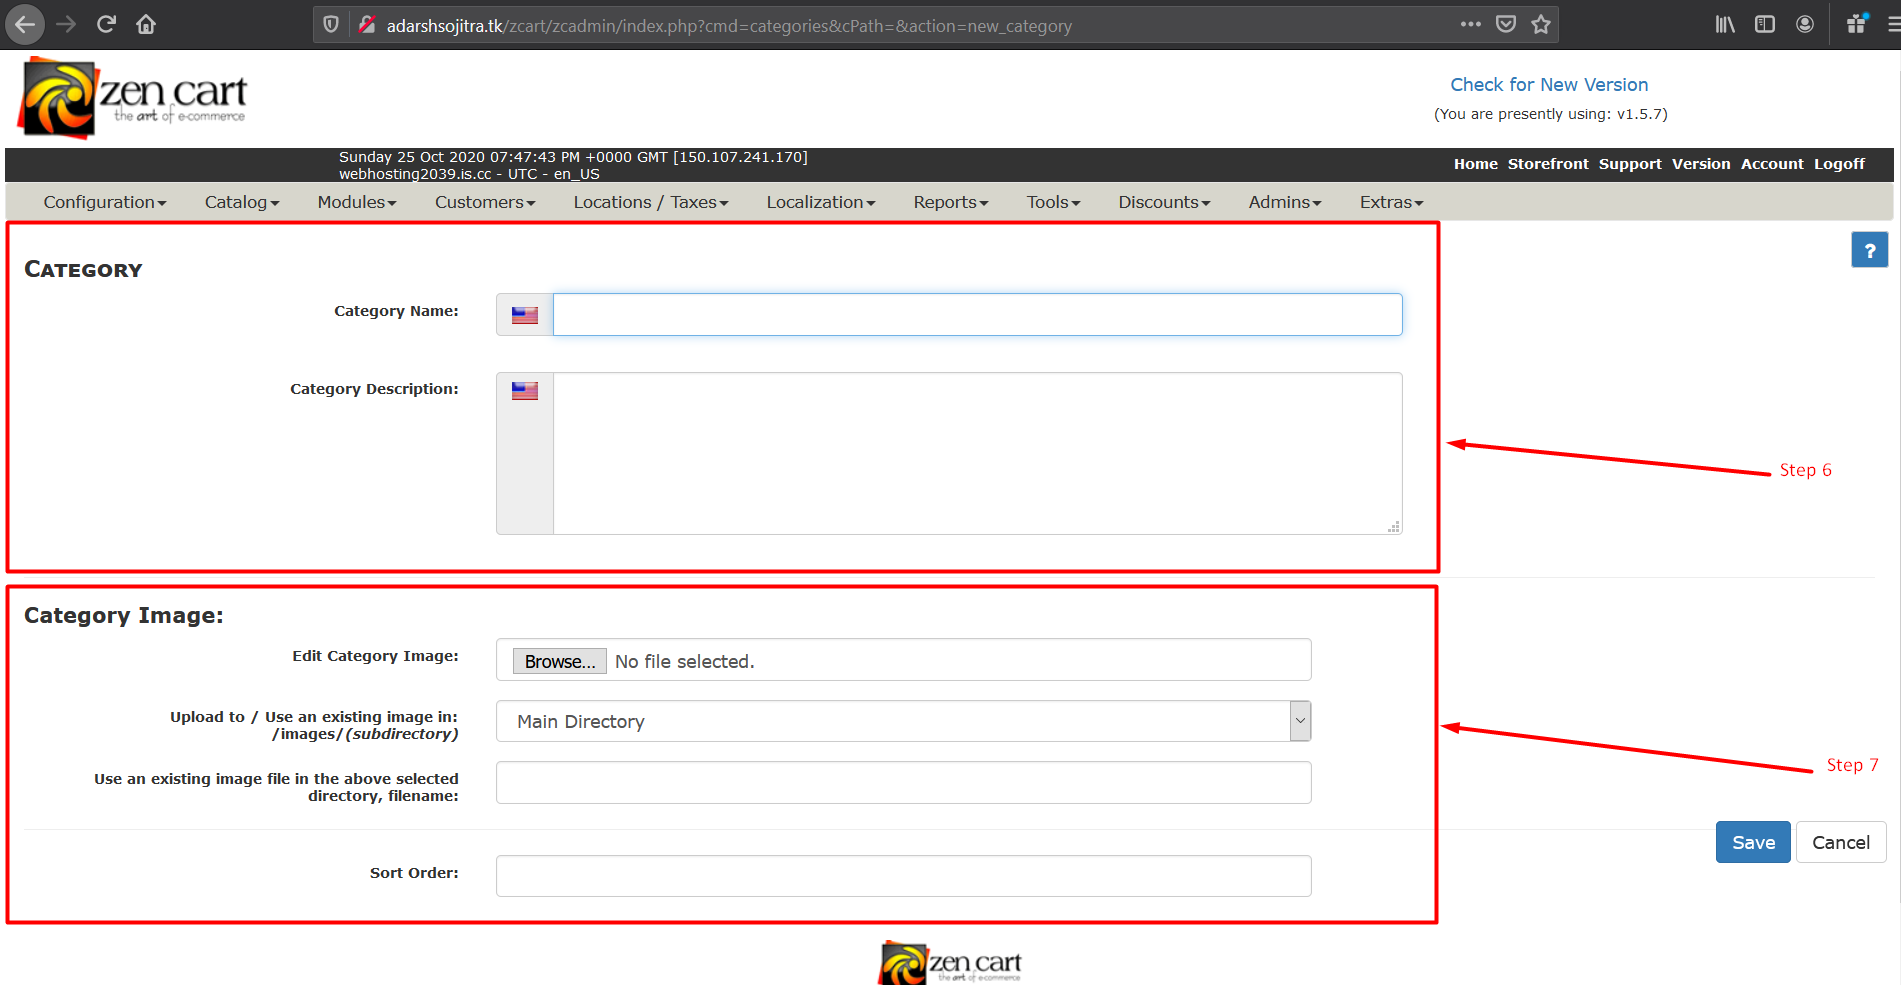
Step 6: To add a new category there are two sections. The first section is a category where you need to give information about your category. For example, Category name.
Step 7: the second section is for photo upload. You can upload your category image from here.
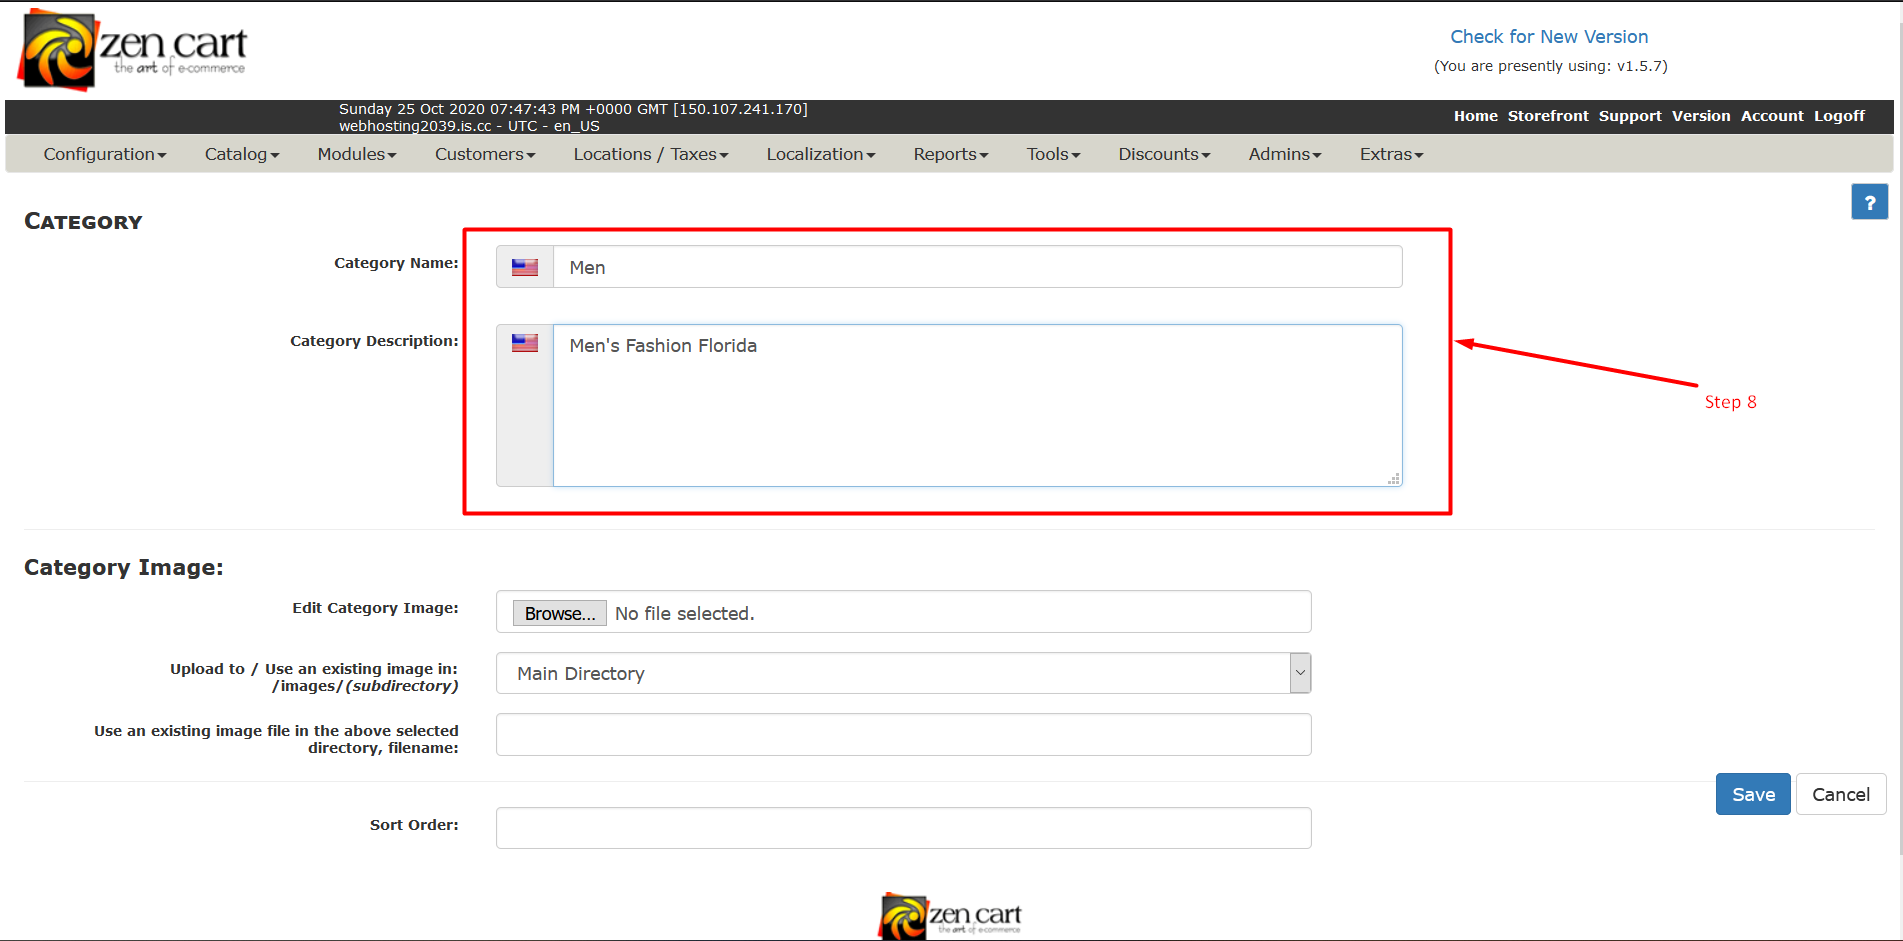
Step 8: Type the Details of your category. See an example in the following image.
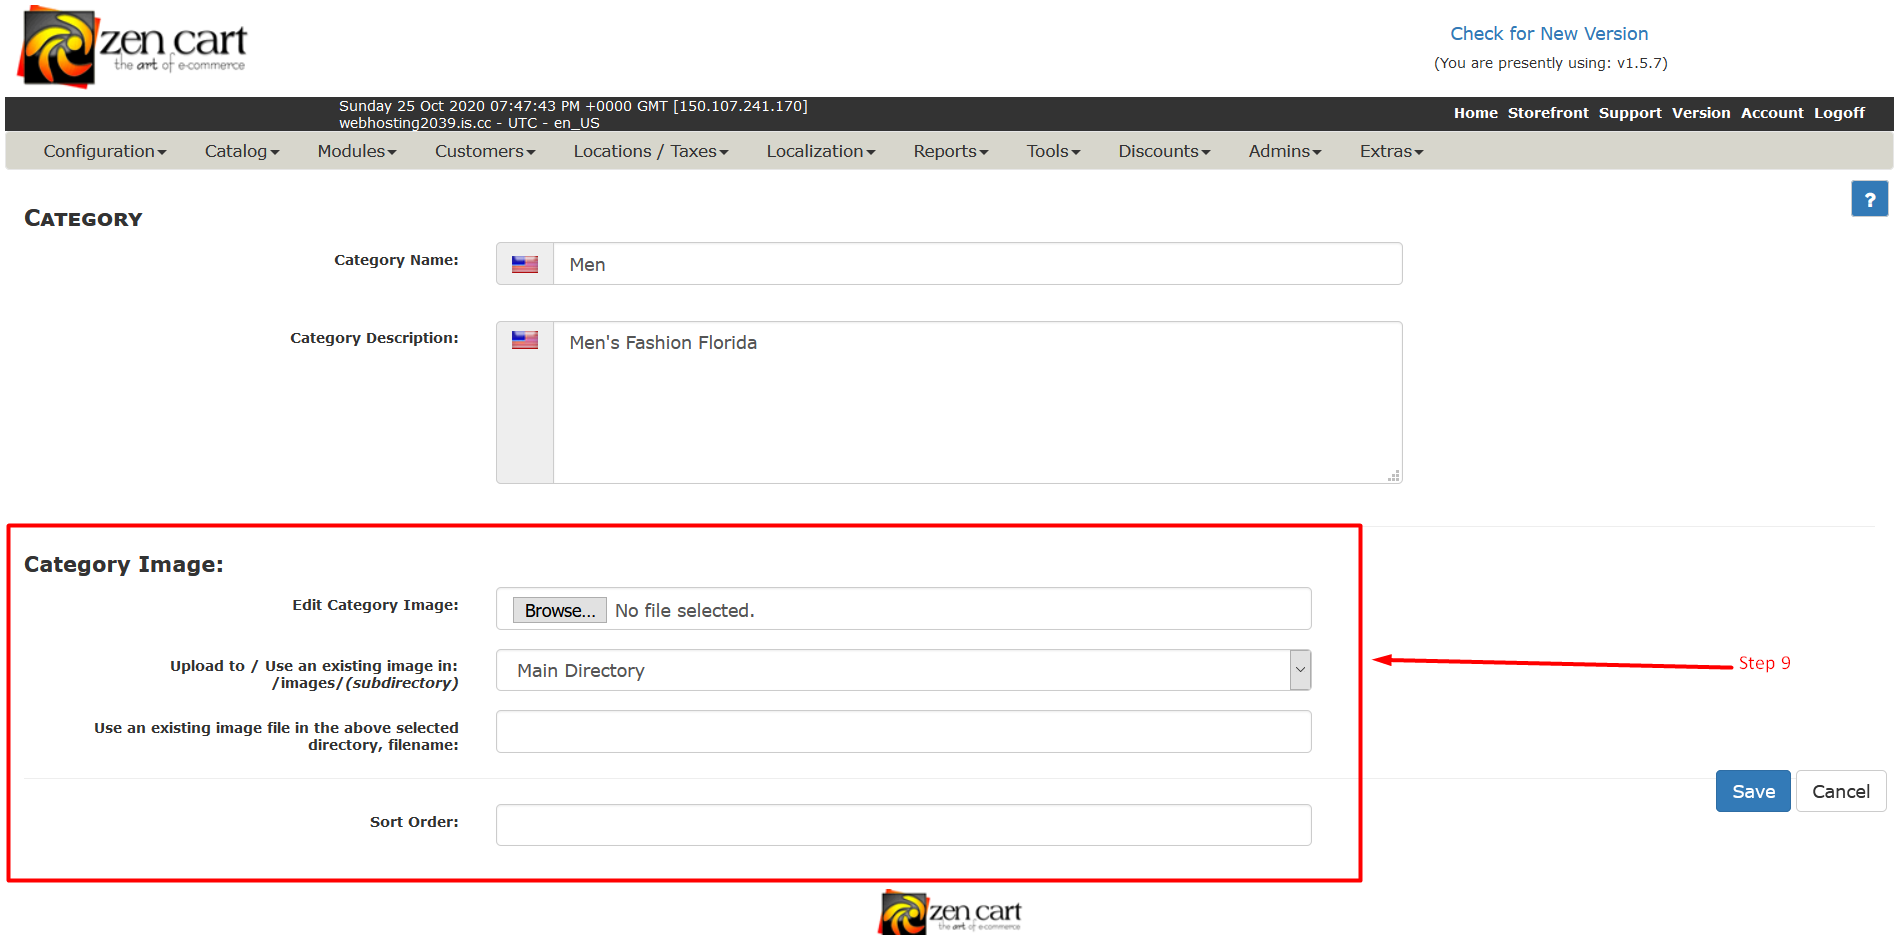
Step 9: Upload your category image from Browse Button and fill in the below details.
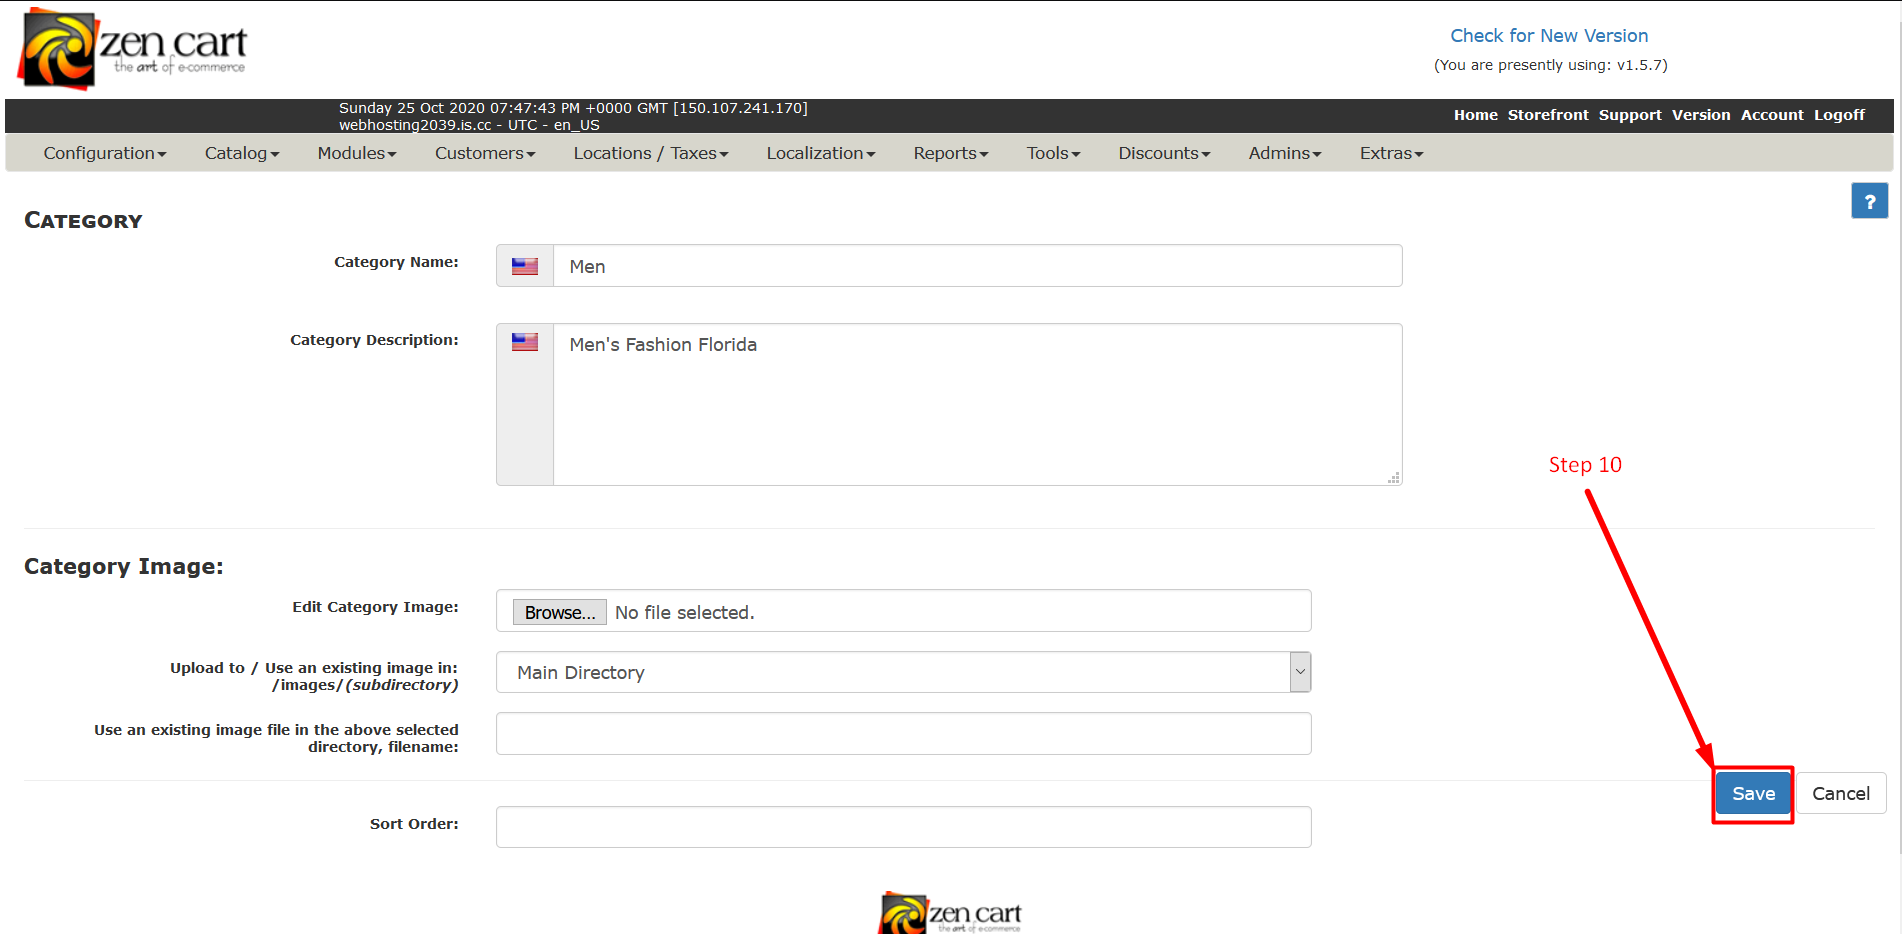
Step 10: Now to create a category just click on the SAVE button.
Step 11: That SAVE button will take you to the main category /Product page where you can see and manage your product category. Now create a sub-category click on your Existing Category. For example, main category MEN.
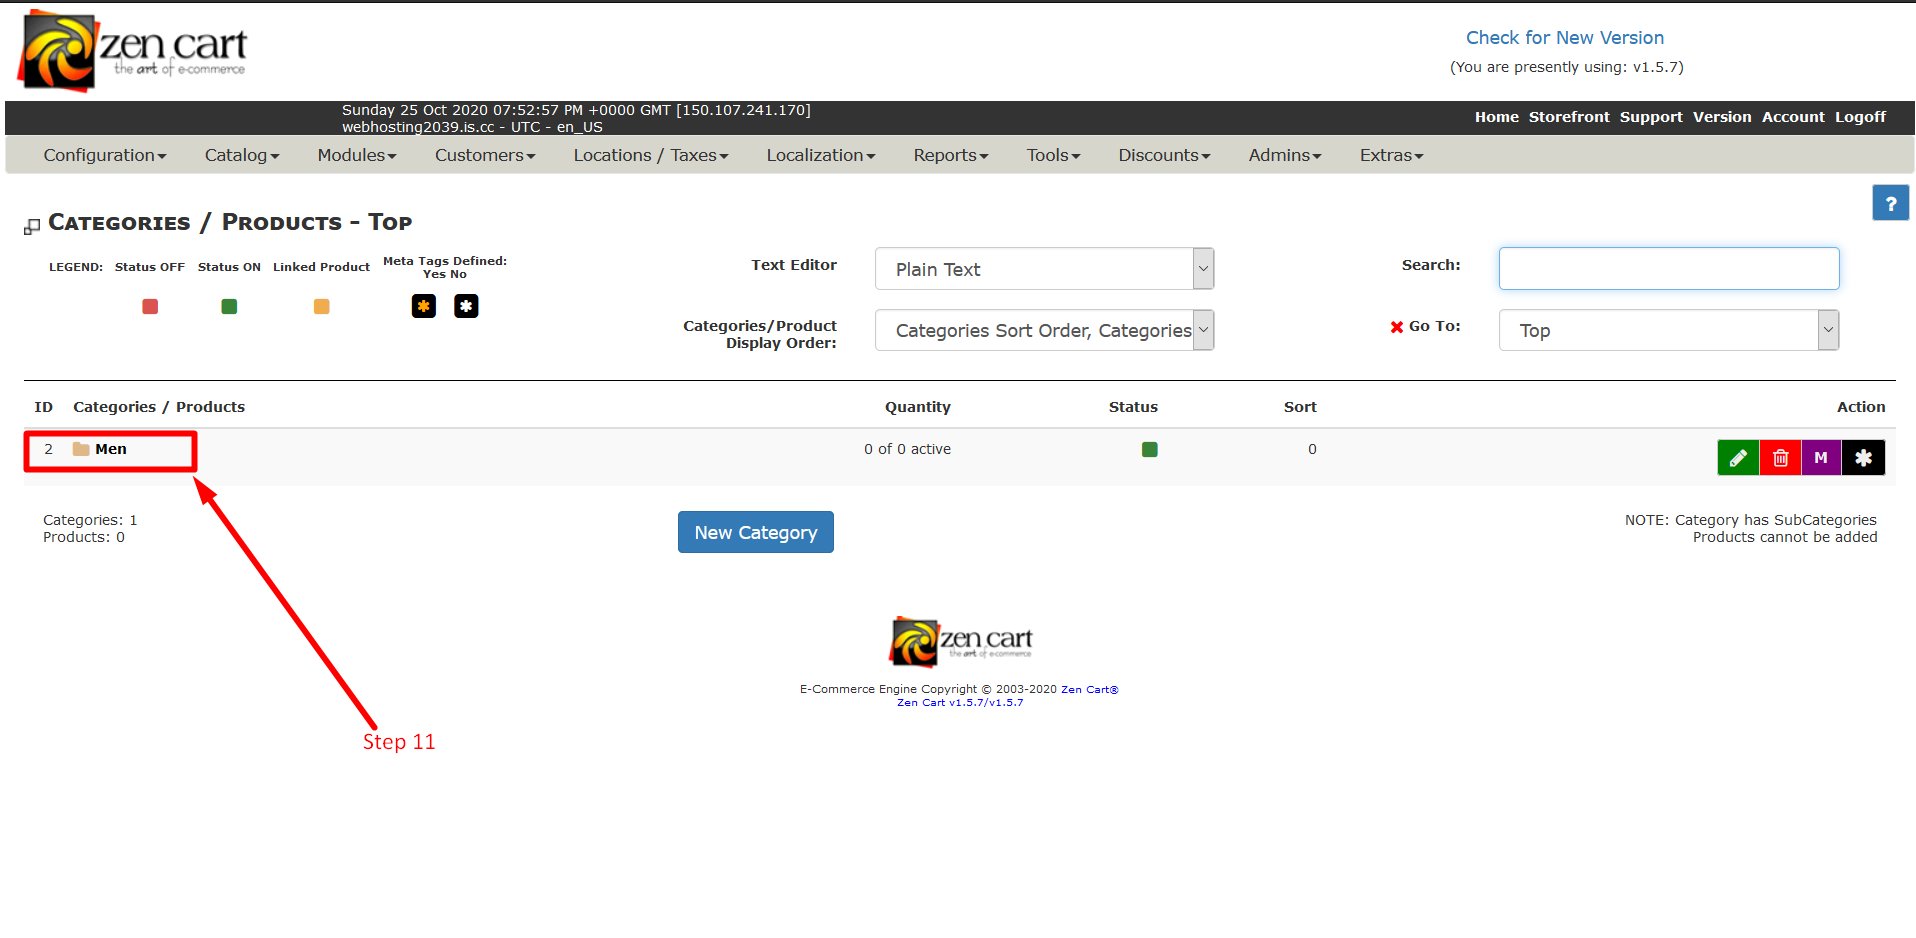
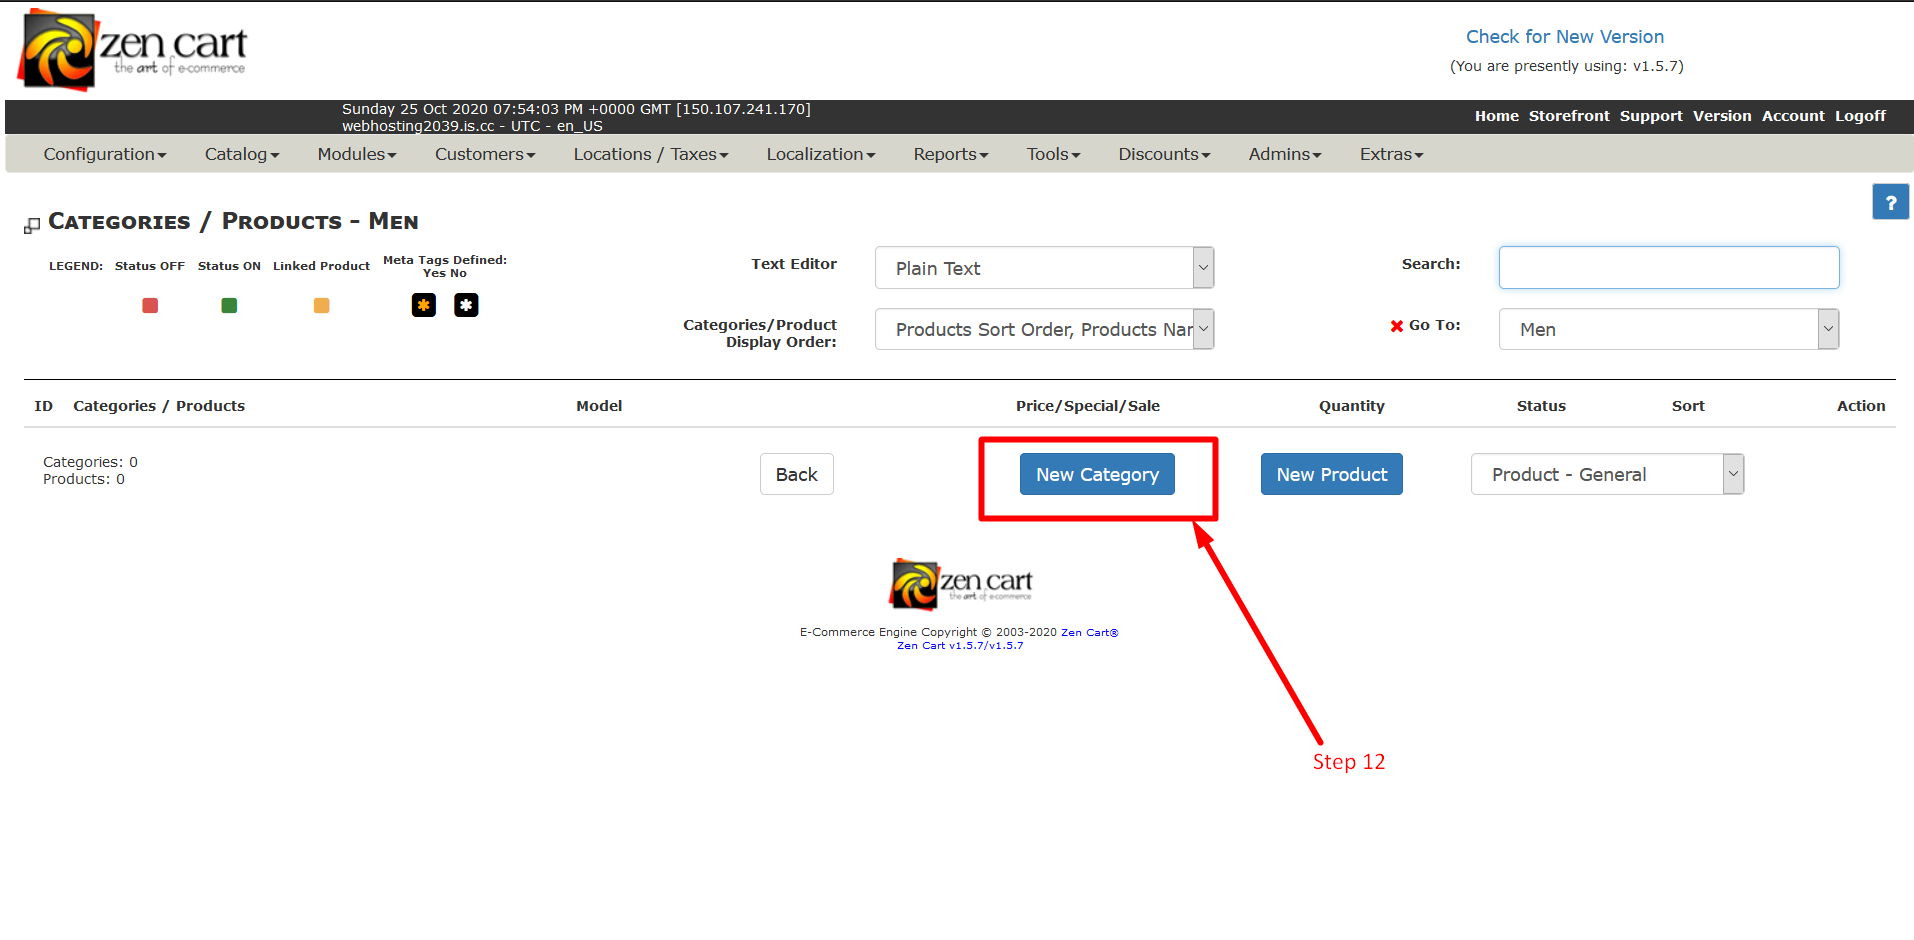
Step 12: Now click on the New Category button to add a sub-category.
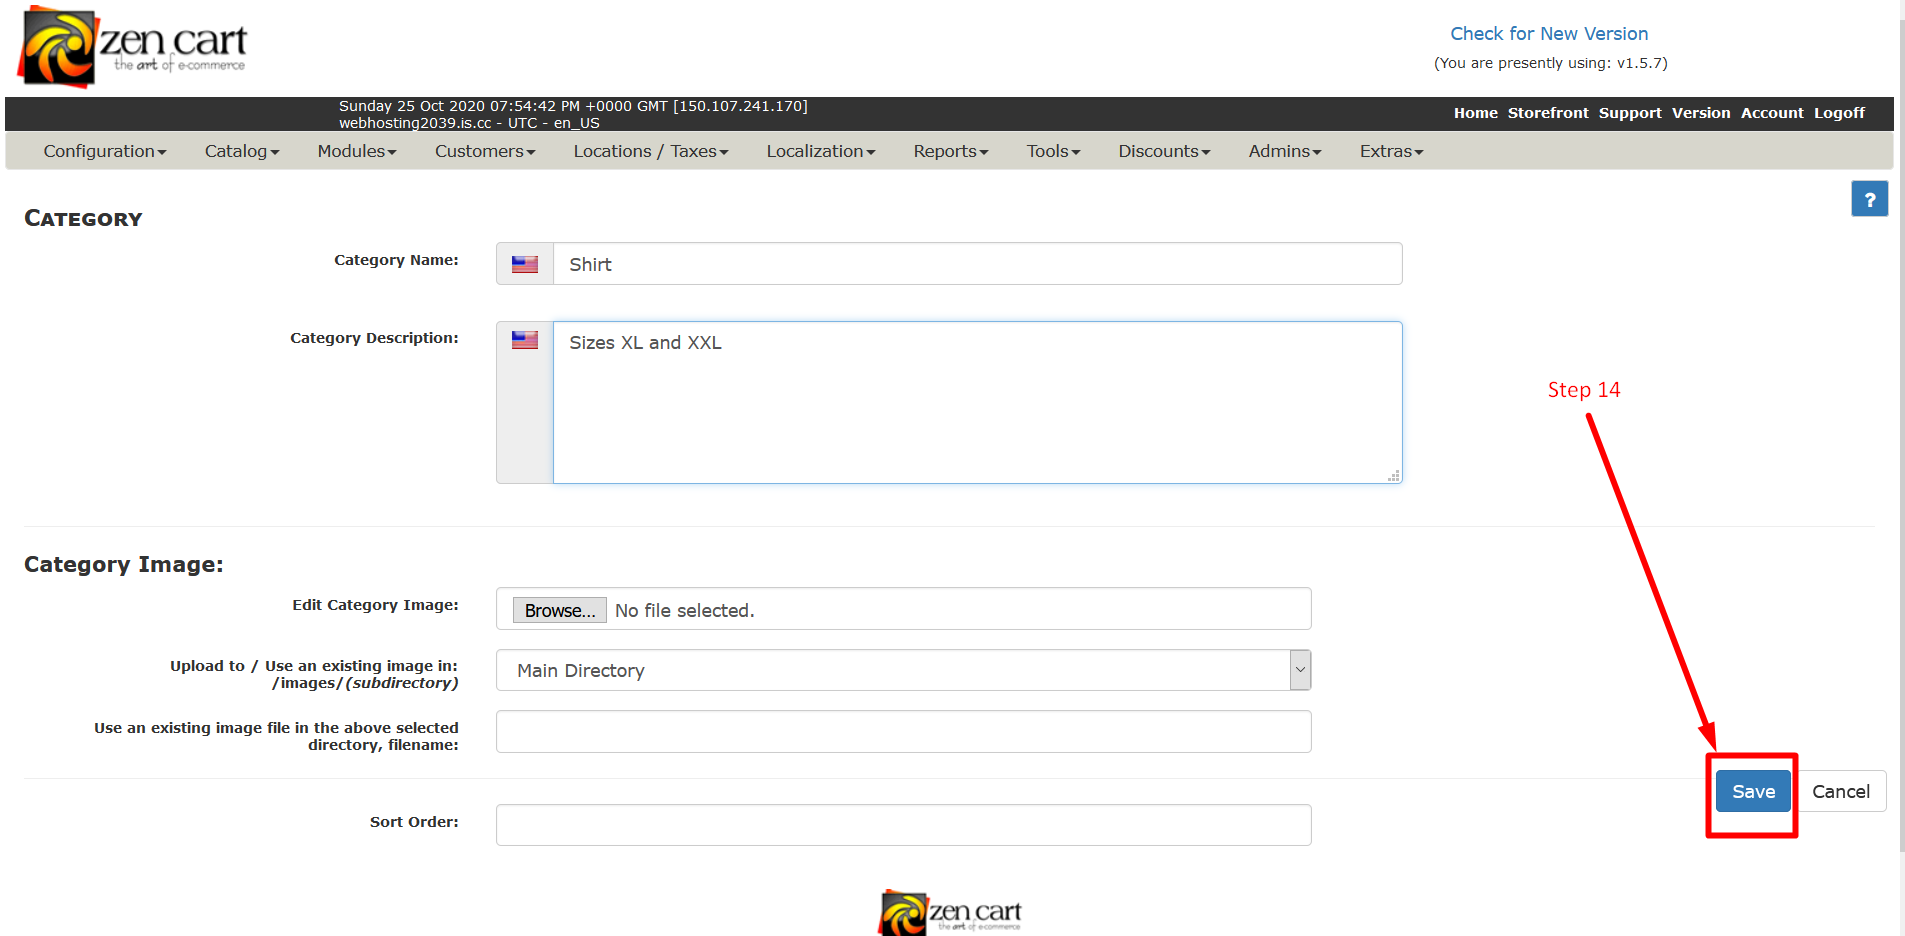
Step 13: Fill the details again for Sub Category. For example sub-category shirt in MEN.
Step 14: Click on SAVE Button. It will save the process.
So, this is how you can create and manage categories in Zencart. It is always good to properly organise your products. It allows your customers to find the right product without too much efforts. We hope this tutorial was helpful for you. If you have questions, feel free to use the following comment section. We are happy to help!
Related guides
Top 10 Best Content Management Systems in 2021!
Follow this list to learn in detail about the 10 most popular content management systems available in the market.
E-CommerceWooCommerce vs Shopify : The best E-commerce platforms
WooCommerce and Shopify are the two most popular E-commerce platforms. Follow this tutorial to learn more about both of them.
E-CommerceBest Applications to Run E-commerce Websites
E-commerce Hosting:E-commerce is the process of selling and buying of goods or services over the world wide web. It is also known as electronic commerce or
E-CommerceEasy Digital Downloads Plugin for WordPress
Easy Digital Downloads (EDD) plugin is the second most well-known WordPress eCommerce plugin, after WooCommerce. EDD plugin is used to create an eCommerce