
GICT knowledge base
cPanel Started NodeJS Support
Published
The cPanel introduced the NodeJS support in the recent v80 release. Previously the cPanel had no support for the NodeJS, that either we’d to install manually on the server which even won’t have a user-friendly interface or by purchasing Cloud Linux that they provided NodeJS support on hand. The Cloud Linux license has a cost of $10 per month, that their system built over CentOS with additional security and hardening process. It is worth looking at this if you are running a hosting business within your VPS/Dedicated server. You can refer our knowledge base article on how to install NodeJS within Cloud Linux OS here – https://www.interserver.net/tips/kb/cloudlinux-nodejs-support-cpanel/
Node.js is an open-source, cross-stage JavaScript runtime environment for building up a different assortment of instruments and applications. In spite of the fact that Node.js is not a JavaScript system, a number of its essential modules are composed in JavaScript, and engineers can compose new modules in JavaScript. Node.js is mainly used for hosting different kinds of applications like the Ghost blogging platform etc. The cPanel recently released the NodeJS support, that you could install via EasyApache4 interface now.
Here are the requirements of cPanel’s NodeJS package:
1) CentOS 6 or 7, Red Hat® Enterprise Linux® (RHEL) 6 or 7, or Cloud Linux™ 6 or 7 OS
2) EasyApache 4
3) Require root level access.
Method 1
1) Login to the server as a root user via SSH, and run the following commands to install cPanel’s EasyApache4 Nodejs package.
yum install ea-ruby24-mod_passenger ea-apache24-mod_env
yum install ea-nodejs10
2) The above will install the below applications and these will be stored in the /opt/cpanel/ea-nodejs10/bin/ directory on the server.
Node.js
NPM
NPX
Method 2 (UI)
1) Login to the WHM interface with the root logins and click on “EasyApache4” icon under the Software tab.
2) Click on “Customize” blue button on the current profile (at the top) to install the new packages
3) Click on “Additional Packages” option from the left tab menu.
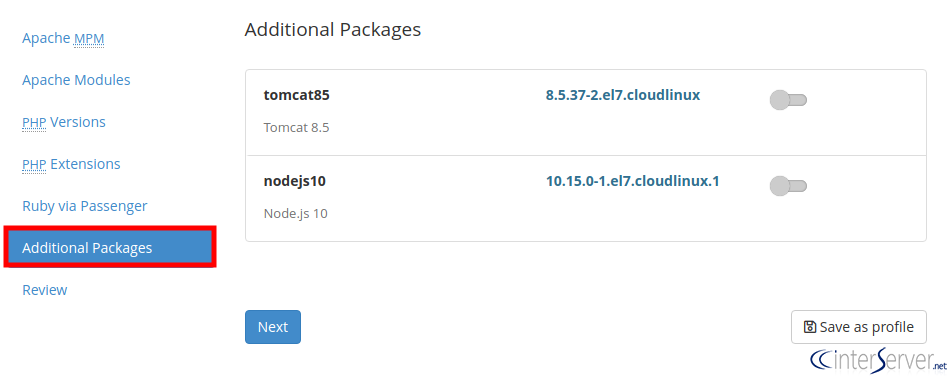
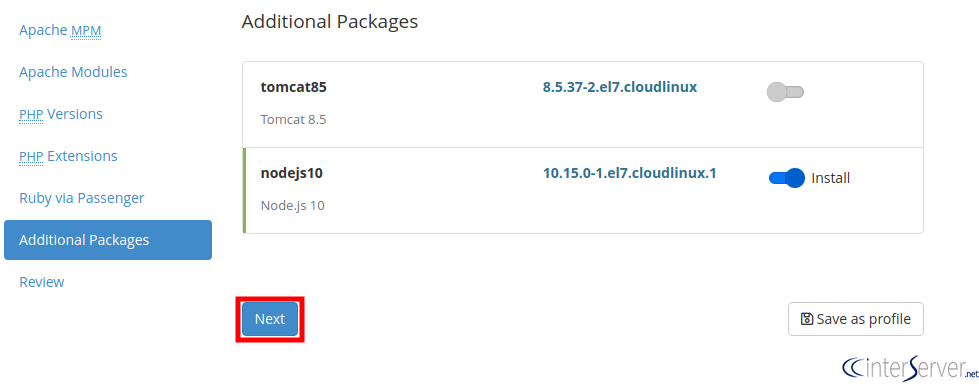
4) Toggle the button beside the nodejs10 package and click on the “Next” button.
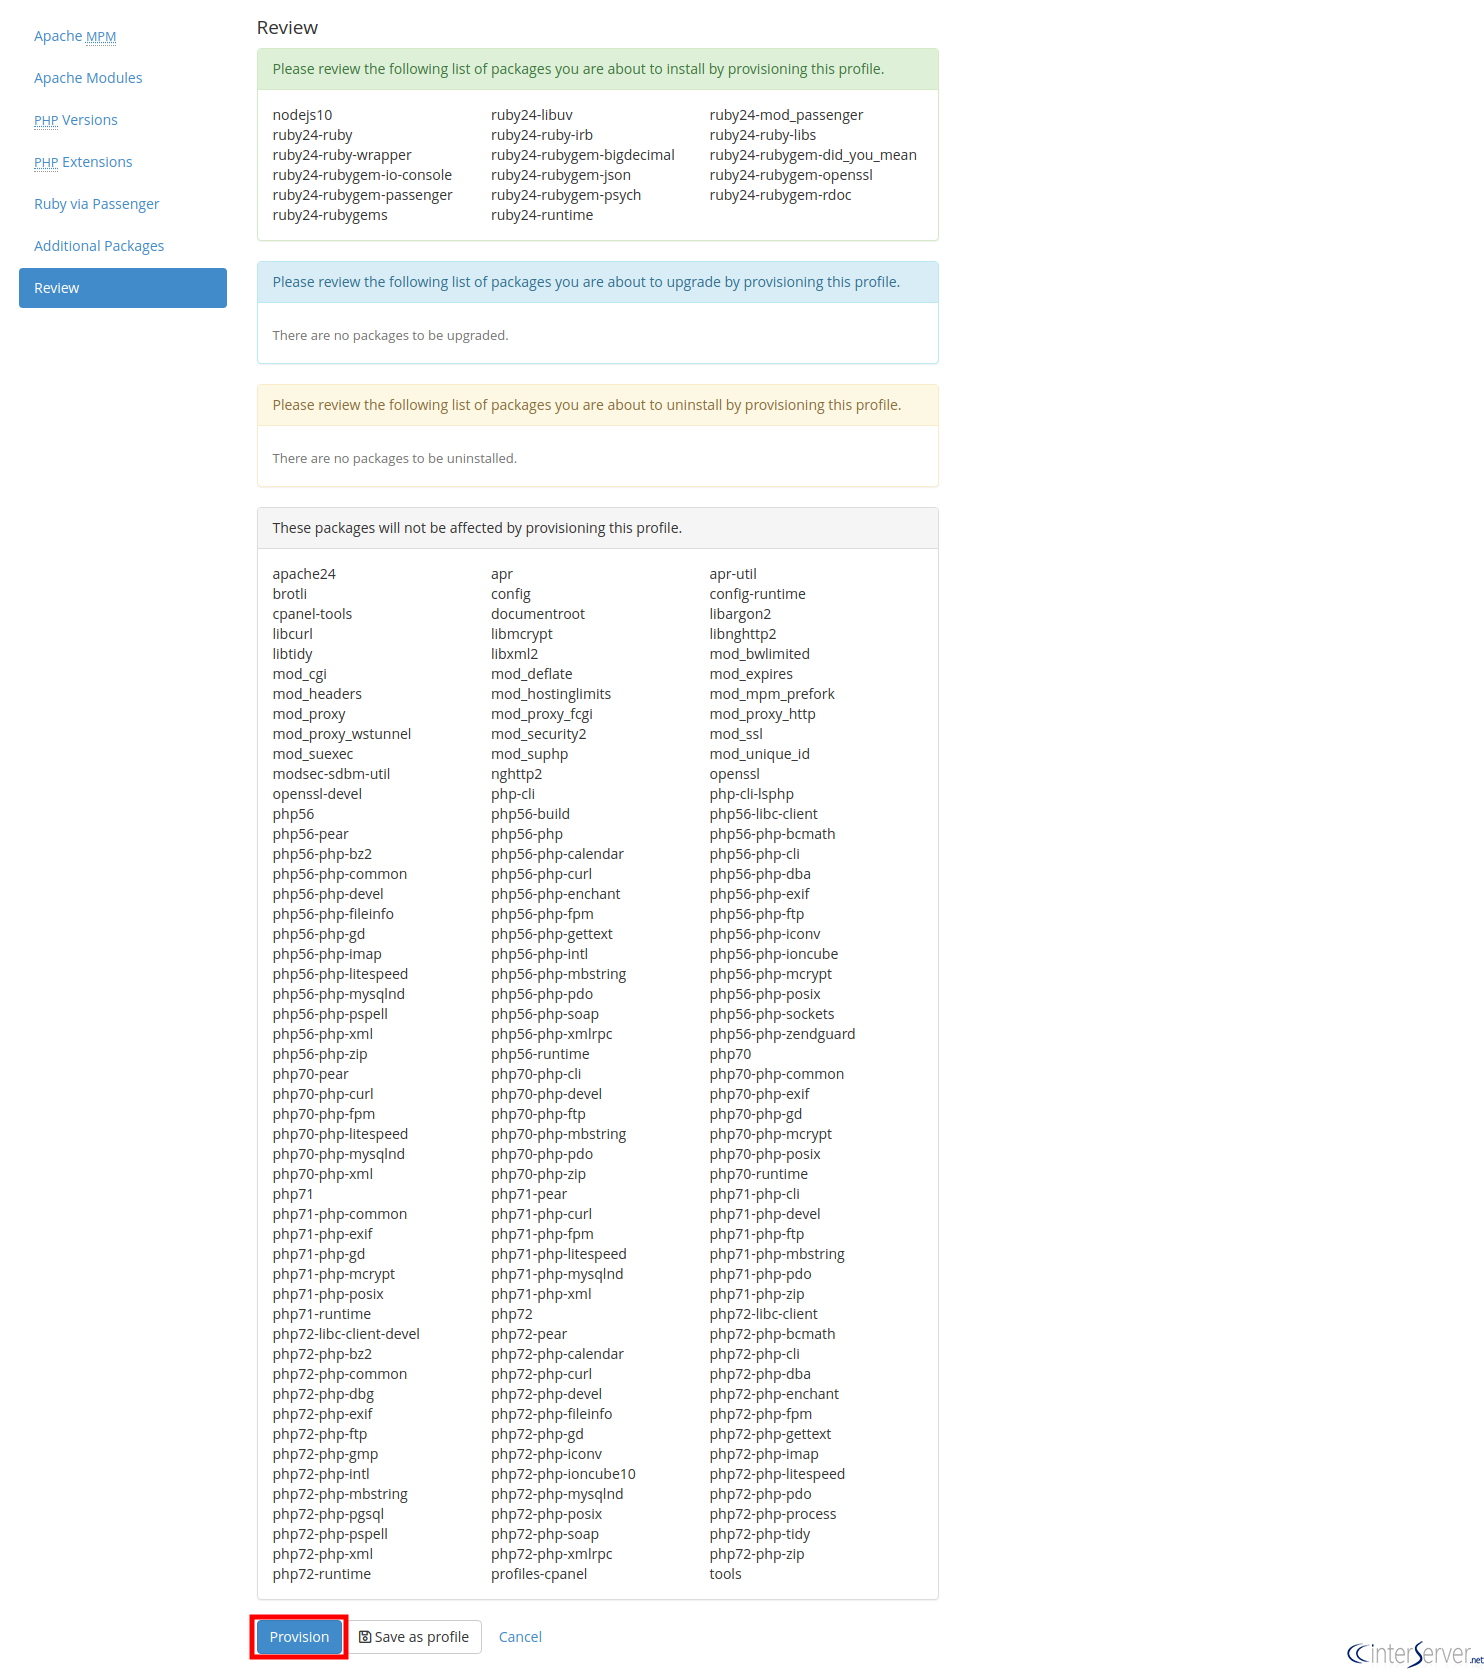
5) Here it will show an overview of the packages that will be installed, make sure there is none listed in the third column, and if all good then click on the “Provision” button at the bottom to start the installation.
The cPanel users can then install the Node.js web applications by either cloning through cPanel’s Git Version Control interface or by creating a new application via the cPanel’s ‘’Application Manager” interface.
If you need any assistance with setting up the above, feel free to get in contact with our support team either via email or LiveChat.
Related guides
How to Add Redis Cache to Node.js Apps
Complete guide to adding Redis cache in Node.js apps. Learn setup, database query caching, session storage, and production tips with code examples.
Node.jsHow to Deploy Node.js Applications with Nginx
Learn how to deploy Node.js apps with Nginx reverse proxy. Complete step-by-step tutorial covering server setup, SSL certificates, PM2 process management, and production...
Node.jsHow to create CRUD API with Node.js and Express – Beginner’s Guide
Learn how to build a simple CRUD API with NodeJS and Express in this beginner-friendly guide.
Node.jsHow to Delete Data in MongoDB Using Node.js
Master data deletion in MongoDB using Node.js with safe filters, bulk operations, soft deletes, and best practices for performance, security, and compliance.