
GICT knowledge base
Add Event Schema to WordPress with All In One SEO Plugin
Published
In today’s fast-paced world, events such as concerts and techno parties are increasingly popular. However, for event organizers, finding ways to effectively promote these events to their targeted audience is essential. One powerful tool to achieve this is the implementation of event schema markup. By utilizing event schema, organizers can enhance their event’s visibility in search engine results, ensuring that the right audience discovers and attends their events.
Why Should We Add Event Schema in WordPress?
Event schema markup is nothing but a particular type of code that is added to your WordPress website. You have to add the date, time, place, and other required event details. It will be easy for the search engines to identify and display the date and time of the event. So customers can quickly get to your event and buy tickets online.
This will improve your SEO and help people find your event on the search engine. A more targeted audience will be interested in your event.
After adding the schema markup, your event will be easily visible in rich snippets, event listings, and Google knowledge panels, which appear above regular search engine results. These elements will help you get more visitors and increase click-through rates for your event.
How to Add Event Schema in WordPress
The easiest way to add event schema in WordPress is All in One SEO (AIOSEO). It is the best WordPress plugin and supports almost many schema types to help search engines better understand your content.
Step 1: First, you have to install and activate the AIOSEO plugin on your site.
Step 2: Upon activation, the plugin will automatically launch its setup wizard.
Step 3: Move forward and click on the “let’s get started” button.
Once the All in One SEO plugin is ready to use, we can move forward to create event schema on WordPress pages and posts.
Adding Event Schema in WordPress Page or Post
After finishing the setup process of the All in One SEO plugin on your site, now you have to open a post or page where you want to add an event schema.
Step 4: To follow Google’s rules for event pages, each event needs its web page with a unique URL.
Step 5: In WordPress, scroll down to find the ‘AIOSEO Settings’ at the bottom of the editor.
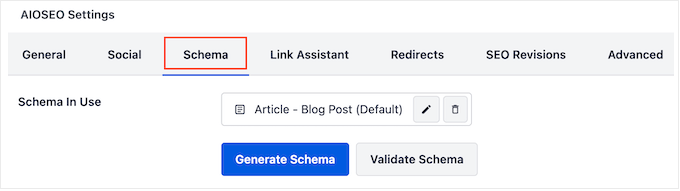
Step 6: Click on the ‘Schema’ tab to see the schemas you’ve enabled, like the Article schema.
How to Add Event Schema Using AIOSEO
Step 7: Now, you can add the event schema. Click the ‘Generate Schema’ button.
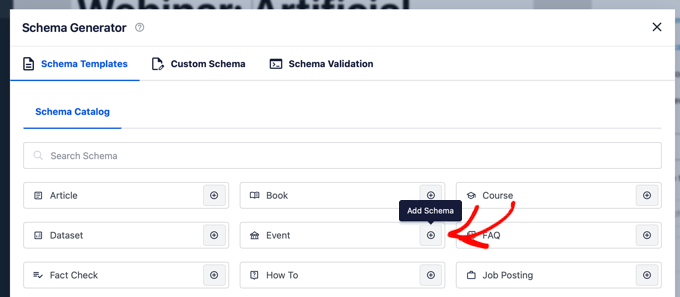
Step 8: In AIOSEO’s Schema Catalogue, find the ‘Event’ option and click the ‘+ Add Schema’ button.
Filling Out the Event Schema Form
Step 9: First, enter a name for your event. By default, AIOSEO uses the post title. You can change this by deleting the intelligent tag and typing your title.
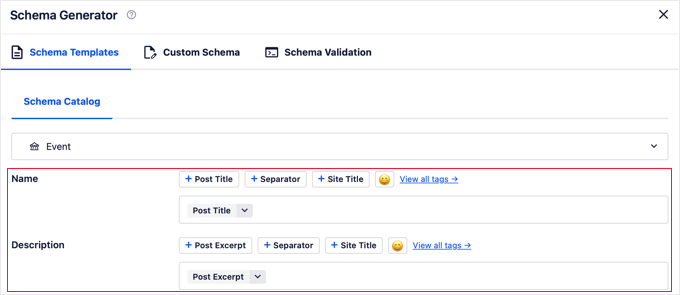
Step 10: Next, add a description of your event. The default is the post excerpt, but writing a more precise description is better.
Step 11: Then, choose the type of event from the drop-down menu.
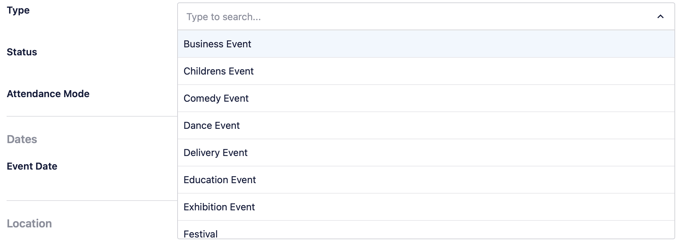
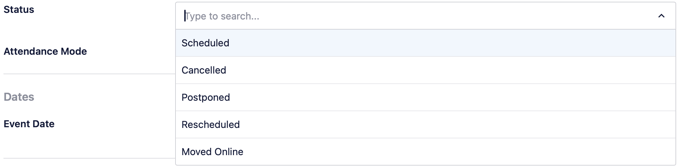
Step 12: After that, select the event status. Start with ‘Scheduled,’ and change it later if needed.
Step 13: Next, choose how people can attend: online, offline, or both.
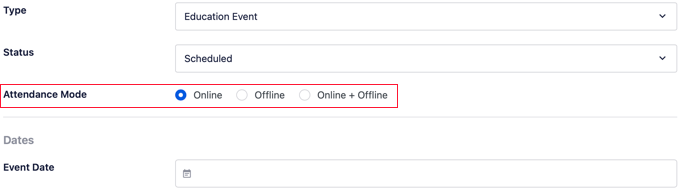
Step 14: Now, click the ‘Event Date’ field to select the event date. A calendar will then appear, allowing you to select the start and end dates.
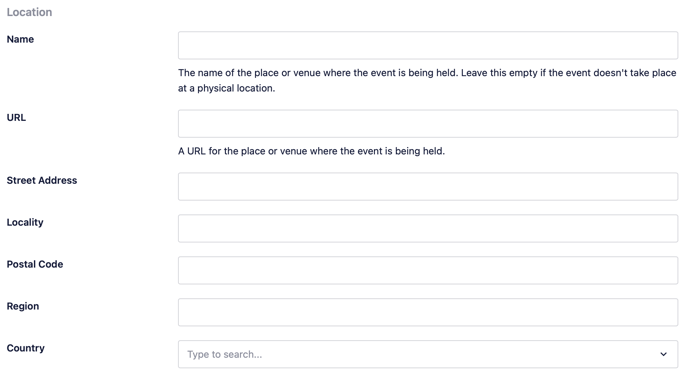
Step 15: If your event is online, leave the location section blank. Type the venue name and website link if it’s in person.
Step 16: Fill in the address to help guests find the event.
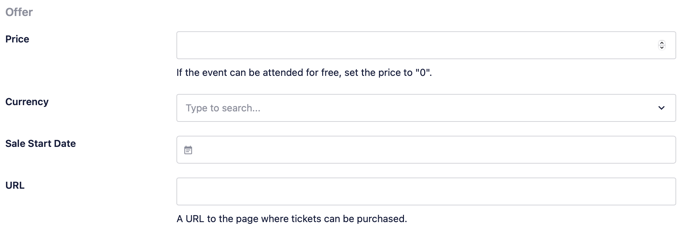
Step 17: In the Offer section, enter the ticket price. For free events, put 0. If tickets are for sale, include the sale start date and a link to buy them.
Step 18: The following sections let you add details about the event organizer and performer. Specify if the organizer is a person or a group, and include their name and website link.
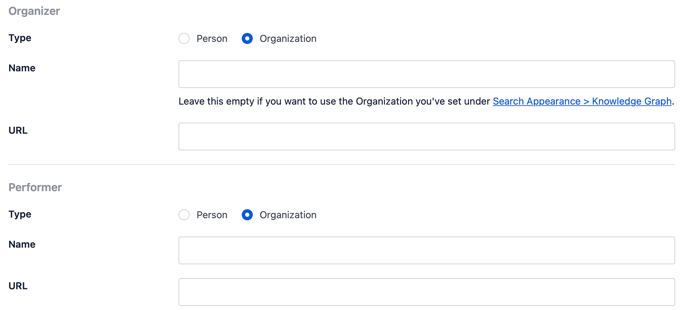
Step 19: You can add similar info for the performer if it’s a performance.
Step 20: You can also upload an image for the event, ensuring it’s 112×112 pixels or smaller.
Step 21: Once you’ve filled out the event schema form, click the ‘Add Schema’ button at the bottom to save it to your post or page.
Now, the schema information will be automatically converted from form to the code that is required for search engines to identify your event. Let’s validate the schema and then we can publish the event.
How to Test Your Event Schema in WordPress
You can check your schema in the AIOSEO Settings under the Schema section at the bottom of the WordPress content editor.
Step 22: To start, click the ‘Validate Schema’ button.
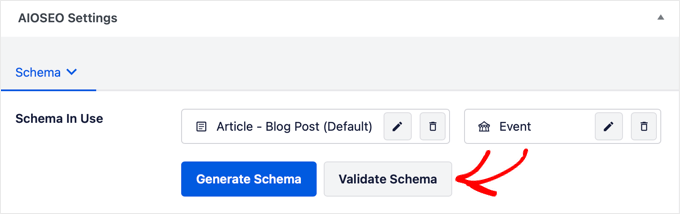
This will show your schema markup code in a pop-up.
Step 23: To test the schema, click the ‘Test with Google’ button.
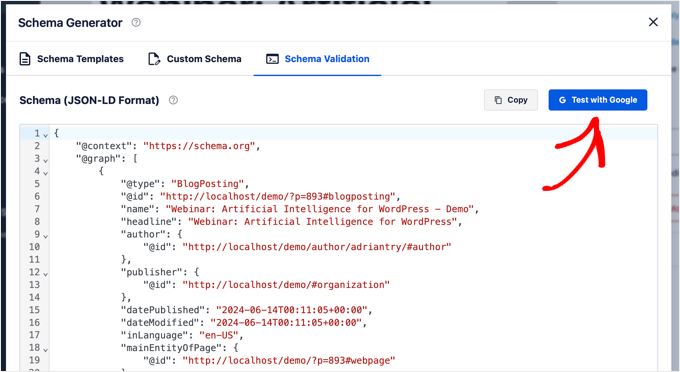
This will open Google’s Rich Results Test tool in a new tab.
Step 24: Just click the ‘Test Code’ button to proceed.
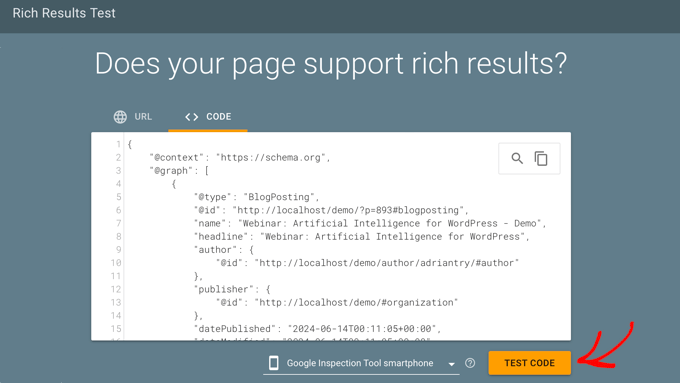
Google will check your page for various schema types, like Articles, Breadcrumbs, FAQs, and more.
You can click on the ‘Events’ section to see the details of your Event schema.
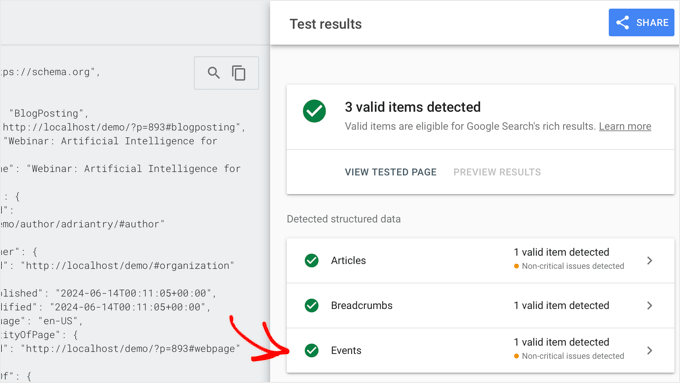
Here, you should find all the event information you added.
You might also see a list of issues, both critical and non-critical.
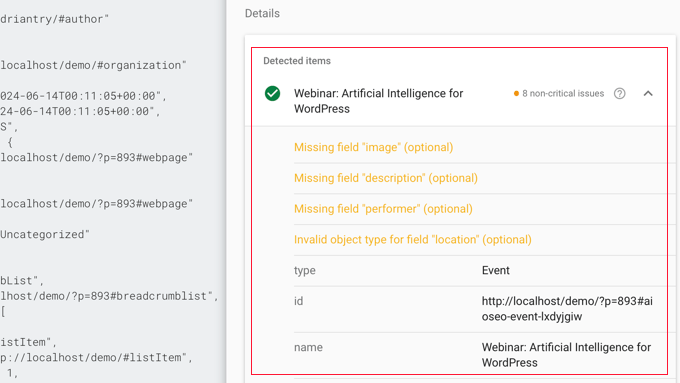
If something is wrong or missing, you’ll need to fix it.
Step 25: Go back to the tab where you were editing the post or page, and click the pencil icon next to the Event schema.
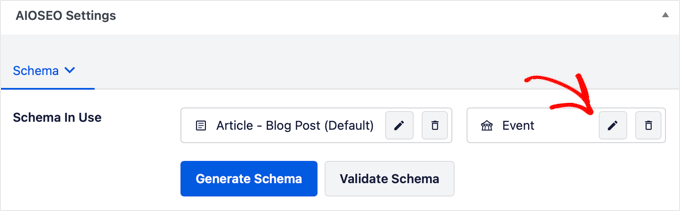
Now you can update the information in the Event schema form to correct any problems. After you update it, you can test the schema again.
Adding Schema Markup for Local SEO
If your event is happening at your business location, you can improve your rankings by optimizing for local SEO.
Step 26: To begin, go to the All in One SEO » Local SEO page and click the ‘Activate Local SEO’ button.
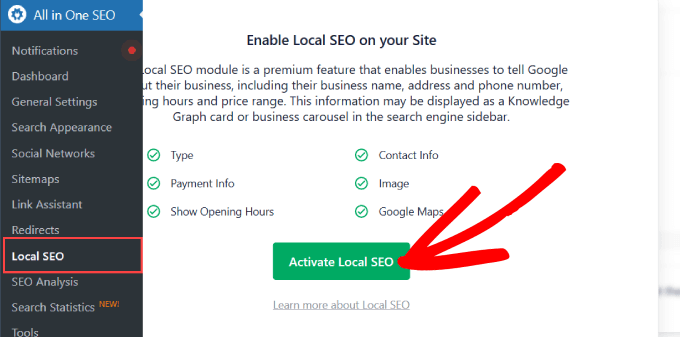
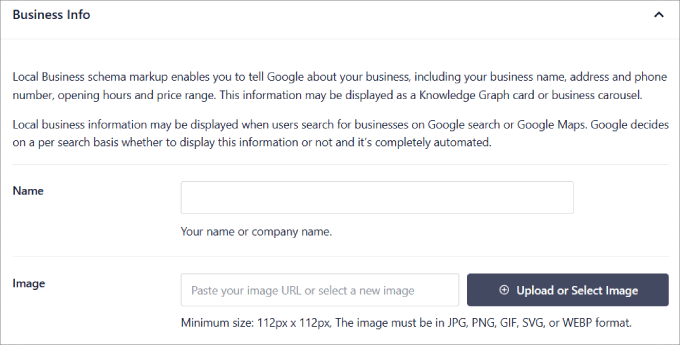
Step 27: Once you activate this feature, you can fill in important details about your business in the Locations tab.
This will help Google and other search engines show your business information more clearly in local search results.
Conclusion
In conclusion, adding event schema in WordPress is a straightforward process that can improve how your events appear in search results. By following the steps to activate the AIOSEO plugin and fill in the necessary details, you help search engines understand your events better. Testing your schema with Google’s tools ensures everything is set up correctly. This not only enhances visibility but also attracts more attendees to your events. With just a few simple actions, you can make your events stand out online and reach a larger audience. Start optimizing today for better results!
Related guides
301 Moved Permanently Error: Understanding and Implementing Redirects
Learn about the 301 Moved Permanently error, its causes, SEO implications, and effective strategies for implementing and managing redirects to optimize user experience...
SEOWhy Every Web Developer Needs a Portfolio
Discover why every web developer needs a standout portfolio and learn the essential elements that make it impressive.
SEOThe Ultimate Guide to Multilingual SEO: Expand Your Global Reach
Discover best practices for multilingual SEO to enhance your global visibility.
SEOSEO Has Changed – How to Do Keyword Research That Actually Works in 2025
Discover effective keyword research strategies for 2025. Learn how to understand search intent, utilize the best tools, and optimize your content for better visibility...